By the Light of the Moon
*German version below | Deutsche Version unten*
Hello everyone! Welcome back to another mixed media project. I am so excited for Halloween! I think one can make some interesting projects around this season! Today’s project is no exception! Let’s start with the materials I used:
Materials (If something is not in stock, please simply click on “Product reminder”/ “Produkterinnerung”)
- Tim Holtz – Mini Thickboard Tag 11,5 x 20 cm
- Tim Holtz Etcetera – Pinked Trims
- Prima Marketing – Art Basic – Gesso Clear
- Stamperia Stencil – Bricks
- Tim Holtz Distress Grit Paste – Crypt
- Distress Oxide Spray – Vintage Photo
- Distress Spray Stain – Lumberjack Plaid
- Tim Holtz Worn Wallpaper
- Ranger Multi Medium – Matte
- Ranger – Tim Holtz Distress Oxide Pads
- Tim Holtz Stampset – Mr. Bones
- VersaFine Onyx Black
- Ranger Embossing Super Fine Powder – Black
- Tim Holtz Layering Mask – Moon Mask
- Distress Mica Stain Set – Halloween #3 & #5
- Tim Holtz Etcetera – Cathedral Windows
- Distress Paint
- Sizzix Tim Holtz DIE Set – Frightful Things
- Tim Holtz idea-ology – Drippy Candles
- Moss
- Tim Holtz – Layers + Paper Dolls – Halloween 2023
- Tim Holtz idea-ology Baseboards + Transparencies – Halloween 2023

For this project, I worked on an Etcetera Tag by Tim Holtz. These Tags are made out of thickboard, which makes them really sturdy. First of all, I covered the Tag with clear Gesso, to create a surface for my mediums. Gesso is needed in this case because I used sprays. If I hadn’t use Gesso, the thickboard would have sucked the colours in and it would have looked somewhat strange. So, Gesso for the win! Once the Gesso was dry, I used the Stamperia Bricks stencil and Distress Crypt Paste on some small areas and then I left it to dry. It is always better to let this sort of Pastes to air dry. To add colour, I used Lumberjack Plaid Distress Spray Stain and Vintage Photo Distress Oxide Spray. I applied the red colour first and allowed the Crypt Paste to soak it in. Then I applied some drops of the Vintage Photo ink, between the bricks, sprayed it with water and then dried it. I chose a lovely piece from the Idea-Ology Worn Wallpaper set, I tore some opening on it, on the spots where the bricks were going to show through, and then I used Ground Espresso Distress Oxide ink to add some shadows and darken the whole thing. I glued the paper on my Tag, using Multi Medium Matte and then I darkened the edges with Black Soot Distress Oxide ink. I also used two Etcetera Trims, dressed them with my Worn Wallpaper, darkened them just as I did with my bigger piece and then I attached them on the Tag. My Tag reinforcer is simply treated with my brown and black Distress Oxide inks and attached on the Tag.

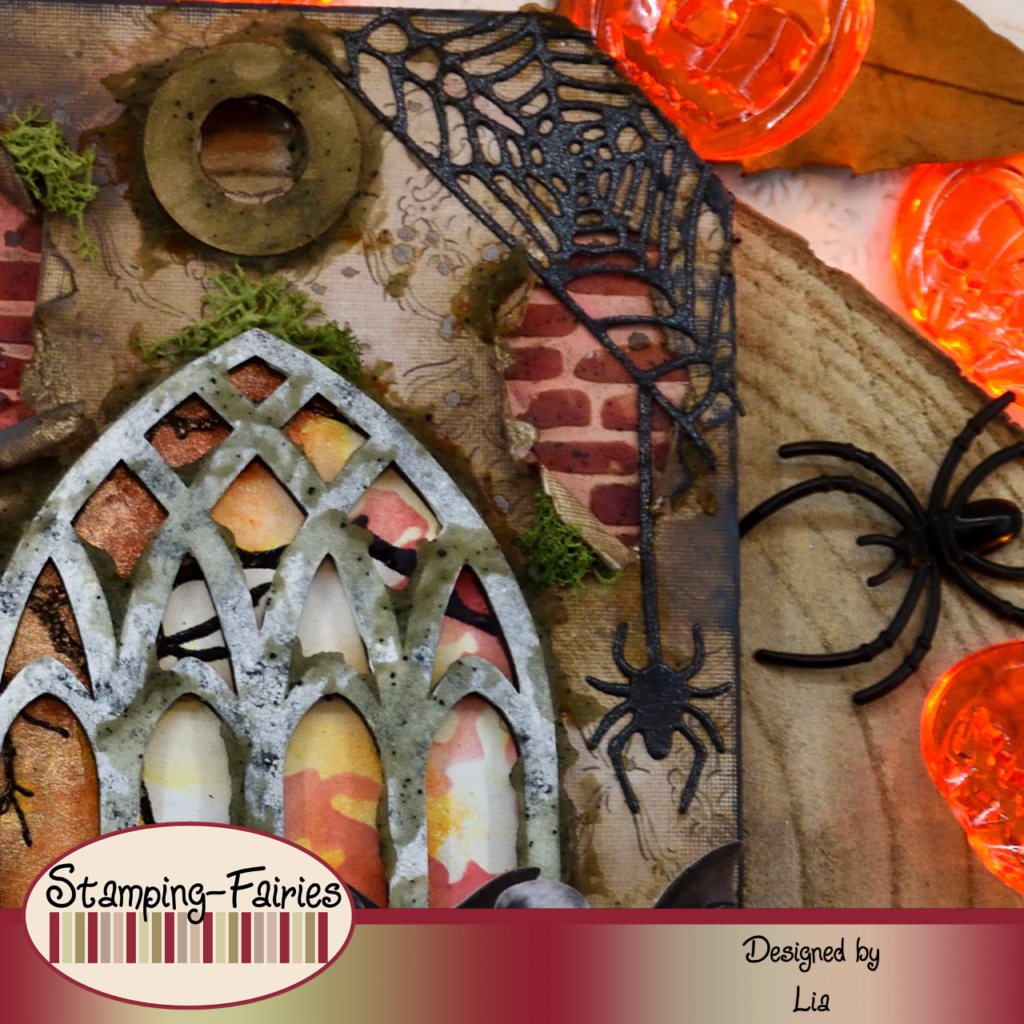
It was time to create the images for my scene. I wanted a window in the center of the Tag. So, I used one of the small Etcetera Cathedral Windows and I treated it with Picket Fence and Black Soot Distress Paints. I wanted to create the illusion that there is a night spooky sky behind the window. So, I chose a panel of mixed media paper and I started by stamping the big branch from the Mr. Bones stamp set, with Versa Fine Onyx Black ink, and then heat embossing it with Ranger Black embossing powder. I used the middle sized moon mask from the Layering Moon Mask stencil set and I made sure that it covered some of the branches. Then I colourd my panel using Distress Mica Stains in colours Harvest Moon, Burning Ember, Iron Gate and Unravelled. I dried the panel and then I added details to the moon by using the stencil part of the moon mask with Barn Door Distress Oxide ink. I used my Cathedral Window to trace the shape on my coloured panel and then I cut it out. I had a slight meltdown, because I really loved the way that spooky night sky looked and I didn’t want to cut it and hide most of it, but it passed pretty quickly… (no, it didn’t…). My window was ready but I still needed more! So, I used the Sizzix Frightful Things Thinlits set to cut some spider webs and a spider and I attached those on the corners of the Tag. I used a good portion of Multi Medium Matte on the Trims and then I attached some dried Moss on them. I went on and added Moss all around the little nooks and crannies of this project. I also used a candle from the Idea-Ology Drippy Candles set. As a center piece, I used the two little boys from the Idea-Ology Layers + Paper Dolls – Halloween 2023 set. I used my Faber Castell Pit Artist pens to add some collour to their shirts and I gave them some spooky wings.
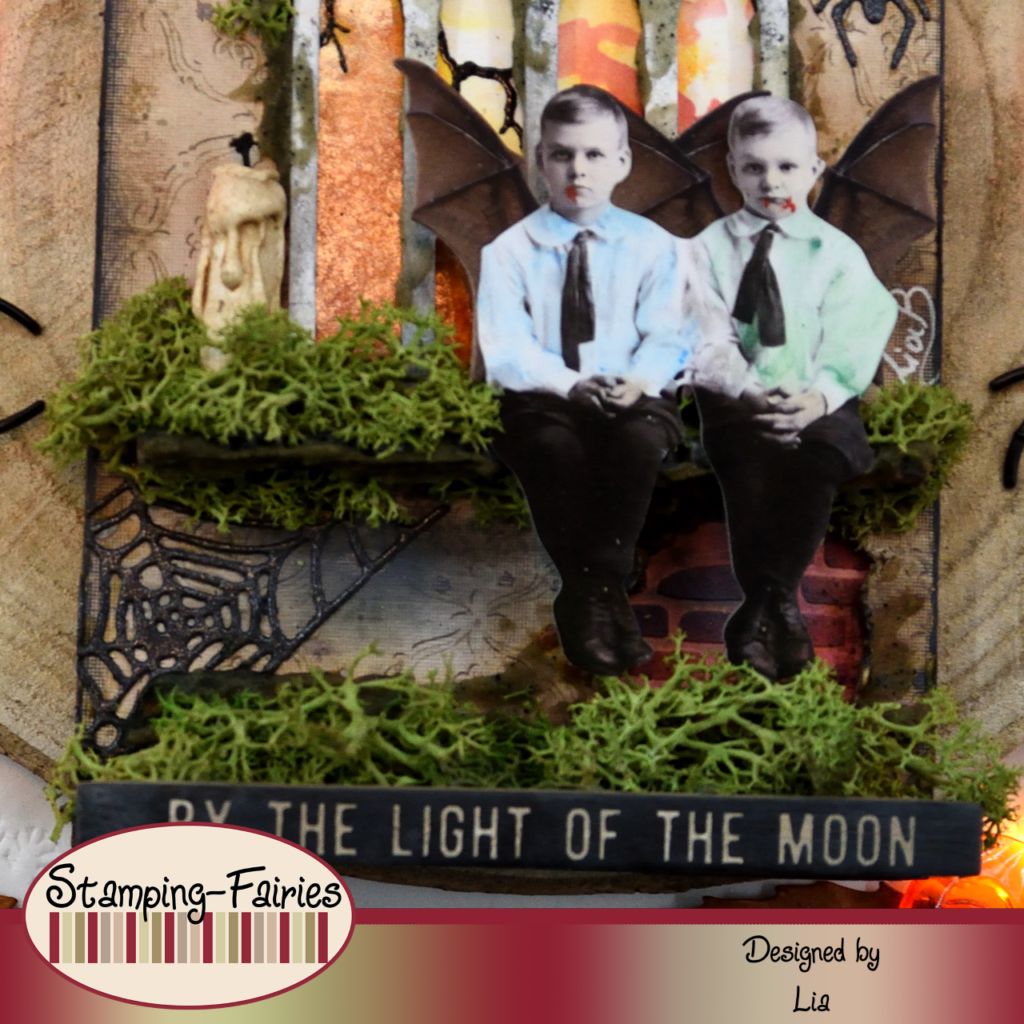
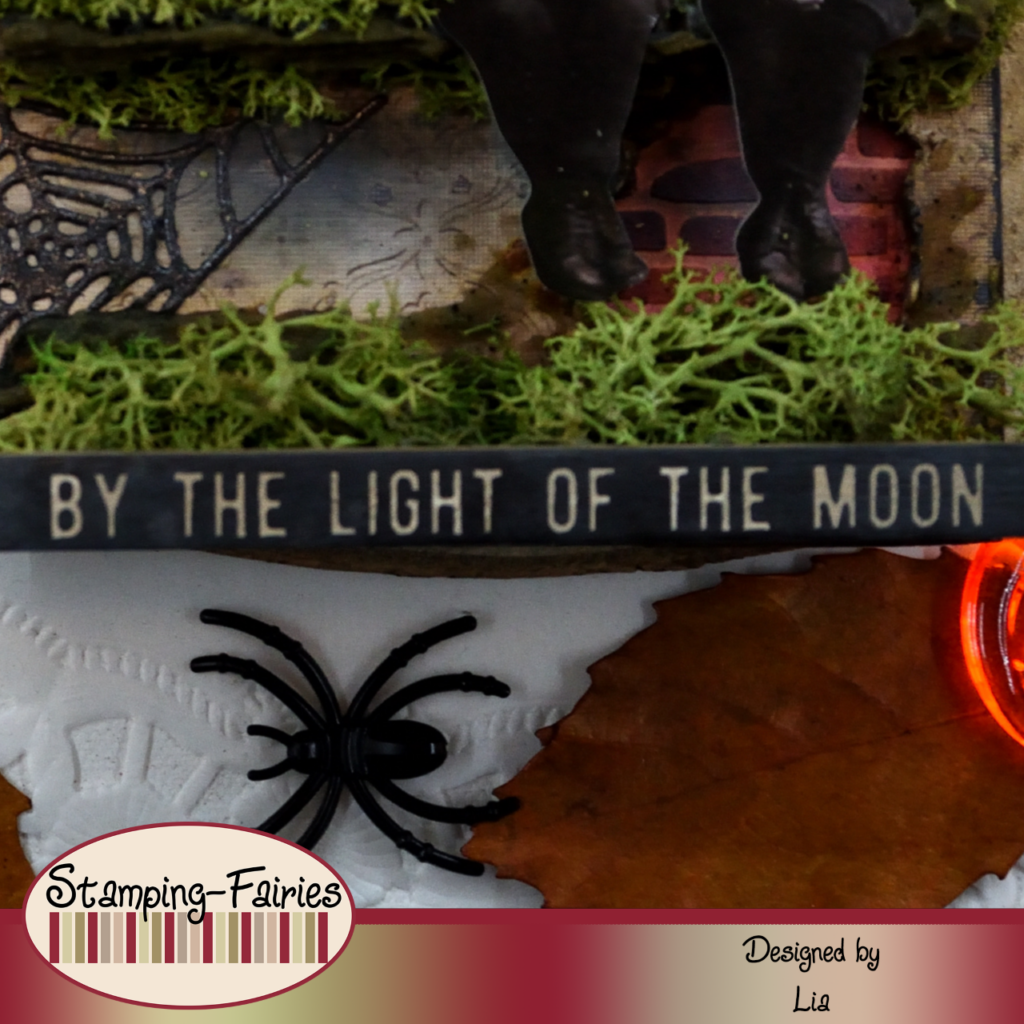
My sentiment comes from the Idea-Ology Baseboards + Transparencies – Halloween 2023 set. I used Ground Espresso Distress Oxide ink to make this baseboard stripe less clean and sharp and then I attached it on the bottom of my Tag. I was so happy to realize that it was the exact width of my Tag. It says „By the Light of the Moon“ and, of course, I chose it because I thought it fits with the window scene. In the end, I added a bit more Crypt Paste in all the little corners of my project. I also used the spatula to add Crypt Paste all over my window.
And that was the project for today! I think that, the more I use this Crypt Paste, the more I like it. It works so perfect. And I seriously think I am going to produce some more spooky night sky sceneries, because… well… I like it! I really hope you like today’s project! I hope you got inspired! We will see each other again next Monday! Until then, stay creative and have fun!
*Deutsche Version*
Hallo zusammen! Willkommen zurück zu einem weiteren Mixed-Media-Projekt. Ich freue mich so sehr auf Halloween! Ich denke, dass man in dieser Saison einige interessante Projekte realisieren kann! Das heutige Projekt ist keine Ausnahme! Beginnen wir mit den Materialien, die ich verwendet habe:
Materialien (wenn etwas nicht auf Lager ist, bitte einfach auf „Produkterinnerung“ klicken)
- Tim Holtz – Mini Thickboard Tag 11,5 x 20 cm
- Tim Holtz Etcetera – Pinked Trims
- Prima Marketing – Art Basic – Gesso Clear
- Stamperia Stencil – Bricks
- Tim Holtz Distress Grit Paste – Crypt
- Distress Oxide Spray – Vintage Photo
- Distress Spray Stain – Lumberjack Plaid
- Tim Holtz Worn Wallpaper
- Ranger Multi Medium – Matte
- Ranger – Tim Holtz Distress Oxide Pads
- Tim Holtz Stampset – Mr. Bones
- VersaFine Onyx Black
- Ranger Embossing Super Fine Powder – Black
- Tim Holtz Layering Mask – Moon Mask
- Distress Mica Stain Set – Halloween #3 & #5
- Tim Holtz Etcetera – Cathedral Windows
- Distress Paint
- Sizzix Tim Holtz DIE Set – Frightful Things
- Tim Holtz idea-ology – Drippy Candles
- Moos
- Tim Holtz – Layers + Paper Dolls – Halloween 2023
- Tim Holtz idea-ology Baseboards + Transparencies – Halloween 2023
Für dieses Projekt habe ich auf einem Etcetera Tag von Tim Holtz gearbeitet. Diese Tags bestehen aus Thickboard, was sie sehr robust macht. Zuerst habe ich das Tag mit klarem Gesso bedeckt, um eine Oberfläche für meine Medien zu schaffen. In diesem Fall wird Gesso benötigt, da ich Sprays verwendet habe. Wenn ich Gesso nicht verwendet hätte, hätte die Thickboard die Farben aufgesaugt und es hätte etwas seltsam ausgesehen. Also, Gesso for the win! Sobald das Gesso trocken war, habe ich auf einigen kleinen Flächen die Stamperia Bricks Schablone und die Distress Crypt Paste verwendet und es dann trocknen lassen. Es ist immer besser, diese Art von Pasten an der Luft trocknen zu lassen. Um Farbe hinzuzufügen, habe ich Lumberjack Plaid Distress Spray Stain und Vintage Photo Distress Oxide Spray verwendet. Ich habe zuerst die rote Farbe aufgetragen und die Crypt Paste einwirken lassen. Dann habe ich einige Tropfen der Vintage Photo Tinte zwischen die Steine aufgetragen, sie mit Wasser besprüht und dann getrocknet. Ich habe ein schönes Stück aus dem Idea-Ology Worn Wallpaper Set ausgewählt, an den Stellen, an denen die Ziegel sichtbar sein sollten, einige Öffnungen aufgerissen und dann habe ich Ground Espresso Distress Oxide Tinte verwendet, um ein paar Schatten hinzuzufügen und das Ganze Stuck abzudunkeln. Ich habe das Papier mit Multi Medium Matte auf meinen Tag geklebt und dann die Ränder mit Black Soot Distress Oxide Tinte abgedunkelt. Ich habe auch zwei Etcetera Trims verwendet, sie mit meiner Worn Wallpaper verkleidet, sie abgedunkelt, genau wie ich es mit meinem größeren Stück gemacht habe, und sie dann am Tag befestigt. Der Lochverstärker des Tags ist einfach mit meinen braunen und schwarzen Distress Oxide Tinten behandelt und auf dem Tag befestigt.
Zeit, die Bilder für meine Szene zu erstellen. Ich wollte ein Fenster in der Mitte des Tags. Also habe ich eines der kleinen Etcetera Kathedralenfenster verwendet und es mit Picket Fence und Black Soot Distress Paints behandelt. Ich wollte die Illusion erzeugen, dass sich hinter dem Fenster ein gruseliger Nachthimmel befindet. Also entschied ich mich für eine Platte aus Mixed-Media-Papier und begann damit, den großen Zweig aus dem Mr. Bones Stempelset mit Versa Fine Onyx Black Tinte zu stempeln und ihn dann mit Ranger Black embossing Pulver zu prägen. Ich habe die mittelgroße Mondmaske aus dem Layering Moon Mask Schablonenset verwendet und darauf geachtet, dass sie einige der Zweige bedeckt. Dann habe ich mein Panel mit Distress Mica Stains in den Farben Harvest Moon, Burning Ember, Iron Gate und Unravelled eingefärbt. Ich habe die Platte getrocknet und dann Details zum Mond hinzugefügt, indem ich Barn Door Distress Oxide Tinte durch den Schablonenteil der Mondmaseke aufgetragen habe. Ich habe mit meinem Kathedralenfenster die Form auf meiner farbigen Tafel nachgezeichnet und sie dann ausgeschnitten. Ich hatte einen leichten Nervenzusammenbruch, weil ich die Art und Weise, wie dieser gruselige Nachthimmel aussah, wirklich liebte und ich ihn nicht aufschneiden und so das meiste davon verstecken wollte, aber das ging ziemlich schnell vorüber … (Nein, das tat es nicht … ). Mein Fenster war fertig, aber ich brauchte noch mehr! Also habe ich mit dem Sizzix Frightful Things Thinlits Set einige Spinnennetze und eine Spinne ausgeschnitten und diese an den Ecken des Tags befestigt. Ich habe eine gute Portion Multi Medium Matte auf die Trims aufgetragen und dann etwas getrocknetes Moos darauf angebracht. Ich fuhr fort und fügte überall in den kleinen Ecken und Winkeln dieses Projekts Moos hinzu. Ich habe auch eine Kerze aus dem Drippy Candles Set von Idea-Ology verwendet. Als Mittelstück habe ich die beiden kleinen Jungs aus dem Idea-Ology Layers + Paper Dolls – Halloween 2023 Set verwendet. Ich habe meine Faber-Castell-Pit-Artist-Stifte verwendet, um ihren Hemden etwas Farbe zu verleihen, und auch ihnen ein paar gruselige Flügel verliehen.

Mein Spruch stammt aus dem Idea-Ology Baseboards + Transparencies – Halloween 2023 Set. Ich habe etwas Ground Espresso Distress Oxid Tinte verwendet, um diesen Baseboard Streifen weniger sauber und scharf zu machen, und habe ihn dann an der Unterseite meines Tags angebracht. Ich war so froh, als ich feststellte, dass es genau die Breite meines Tags hatte. Darauf steht „Im Licht des Mondes“ und natürlich habe ich es ausgewählt, weil ich dachte, dass es zur Fensterszene passt. Am Ende habe ich in allen kleinen Ecken meines Projekts etwas mehr Crypt Paste hinzugefügt. Ich habe den Spatel auch verwendet, um Crypt Paste auf mein gesamtes Fenster aufzutragen.

Und das war das Projekt für heute! Ich denke, je öfter ich diese Crypt Paste verwende, desto mehr gefällt sie mir. Es funktioniert so perfekt. Und ich denke ernsthaft, dass ich noch mehr gruselige Nachthimmelszenen produzieren werde, weil… nun ja… es mir gefällt! Ich hoffe sehr, dass euch das Projekt gefällt! Ich hoffe, ihr habt euch inspirieren lassen! Wir sehen uns nächsten Montag wieder! Bis dahin bleibt kreativ und habt Spaß!

Beileidskarte
Das könnte dich auch interessieren
Meine Osterkarten-Challenge
4. April 2022
Dream Big!
19. Januar 2021