
A Feeling of Christmas
*German version below | Deutsche Version unten*
Hello everyone! Welcome back to another mixed media project. I missed last Monday because I was sick, so I have a relatively big project to show you today! It follows the theme of our new challenge, which is Christmas/Winter. I created two Christmas Art Journal pages. Let’s start with the materials I used:
Materials (If something is not in stock, please simply click on “Product reminder”/ “Produkterinnerung”)
- Distress Paints
- Tim Holtz Worn Wallpaper
- Ranger Multi Medium – Matte
- Prima Marketing – Art Basic – Gesso Clear
- Tim Holtz Layering Stencil – Linked Circles
- Ranger Texture Paste Opaque Crackle
- Distress Spray Stain – Lumberjack Plaid
- Ranger – Tim Holtz Distress Oxide Pads
- Tim Holtz Ephemera Pack – Christmas
- Tim Holtz – Layers Christmas Botanicals
- We R memory keepers Standard Eyelets – metal
- Tim Holtz Distress Crayons – Set #3
- Tim Holtz – Large Fasteners
- Tim Holtz idea-ology – Adornments – Snowflakes
- Sizzix Tim Holtz Thinlits – Santa Greetings, Colorize
- Ranger Glossy Accents
- Tim Holtz – idea-ology – Droplets – Christmas

I worked in my big Art Journal this time and I started with my background. The first thing I did was to paint my pages with Distress Paint in colours Walnut Stain and Lost Shadow. I wanted a warm but not very dark tone. I really like mixing the Lost Shadow in other colours, to neutralize them a little bit. It works really well! Once my pages were dry, I tore a piece of Idea-Ology Christmas Worn Wallpaper and I attached the pieces on the top left corner of the left page and the bottom right corner of the right page, using Multi Medium Matte. I covered my pages with clear Gesso and then moved on to stenciling. I used the Linked Circles Layering stencil by Tim Holtz, with Ranger Texture Crackle Paste, to add some design detail on some parts of my pages. I left the Paste to dry and then I coloured it with the Lumberjack Plaid Distress Spray Stain. All I did was spray with the colour, spray with water, let it run, dub the excess and dry. I repeated this process when I felt like it was needed. Lumberjack Plaid is a very strong colour, so it is always good to be careful with it, but it is also a very beautiful colour and I really can not stay away from it! I splattered the page with gold acrylic paint and dried it. Then I used Ground Espresso Distress Oxide ink with a blending brush and I darkened the edges of my pages. The brown was not exactly dark enough for me, so I used the Black Soot Distress Oxide ink and I rubbed the ink pad directly on the edges of the pages. I splattered again, this time with Picket Fence Distress Paint, and the background was ready!
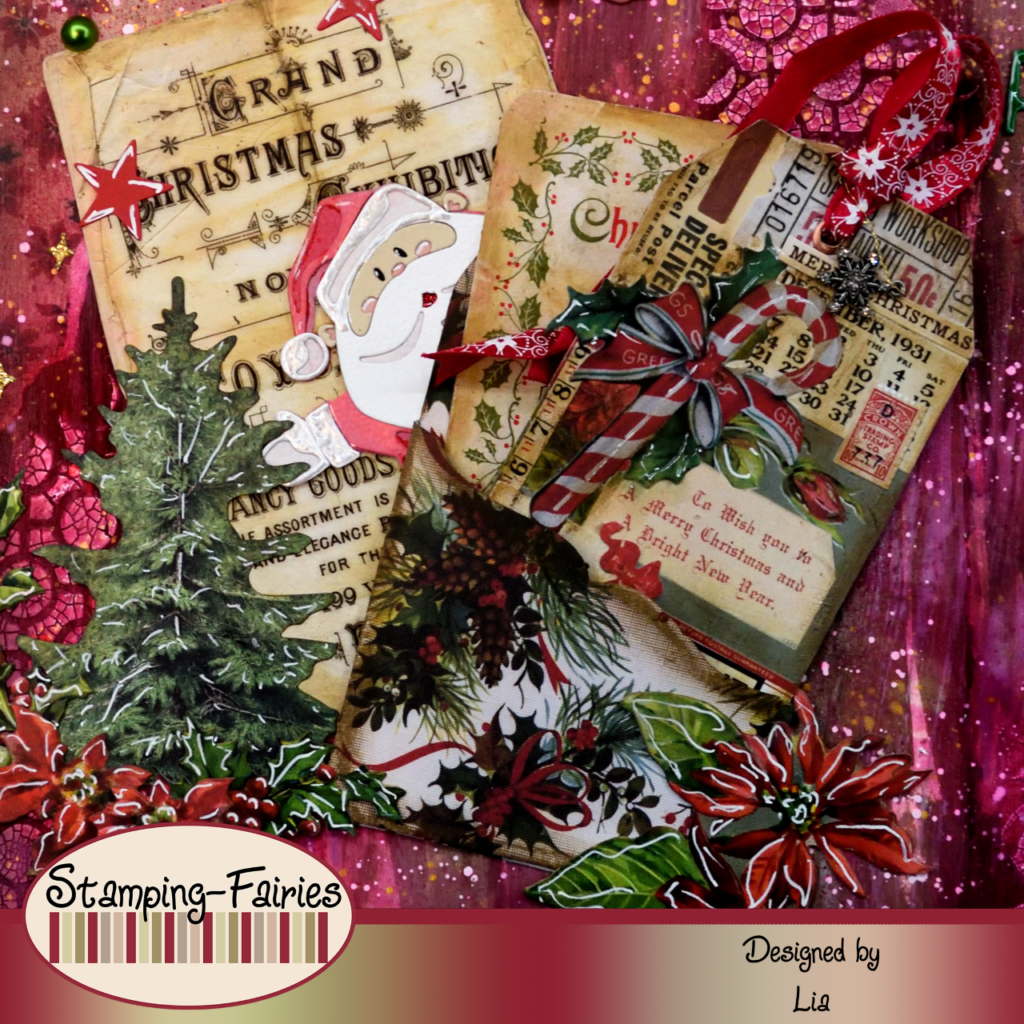
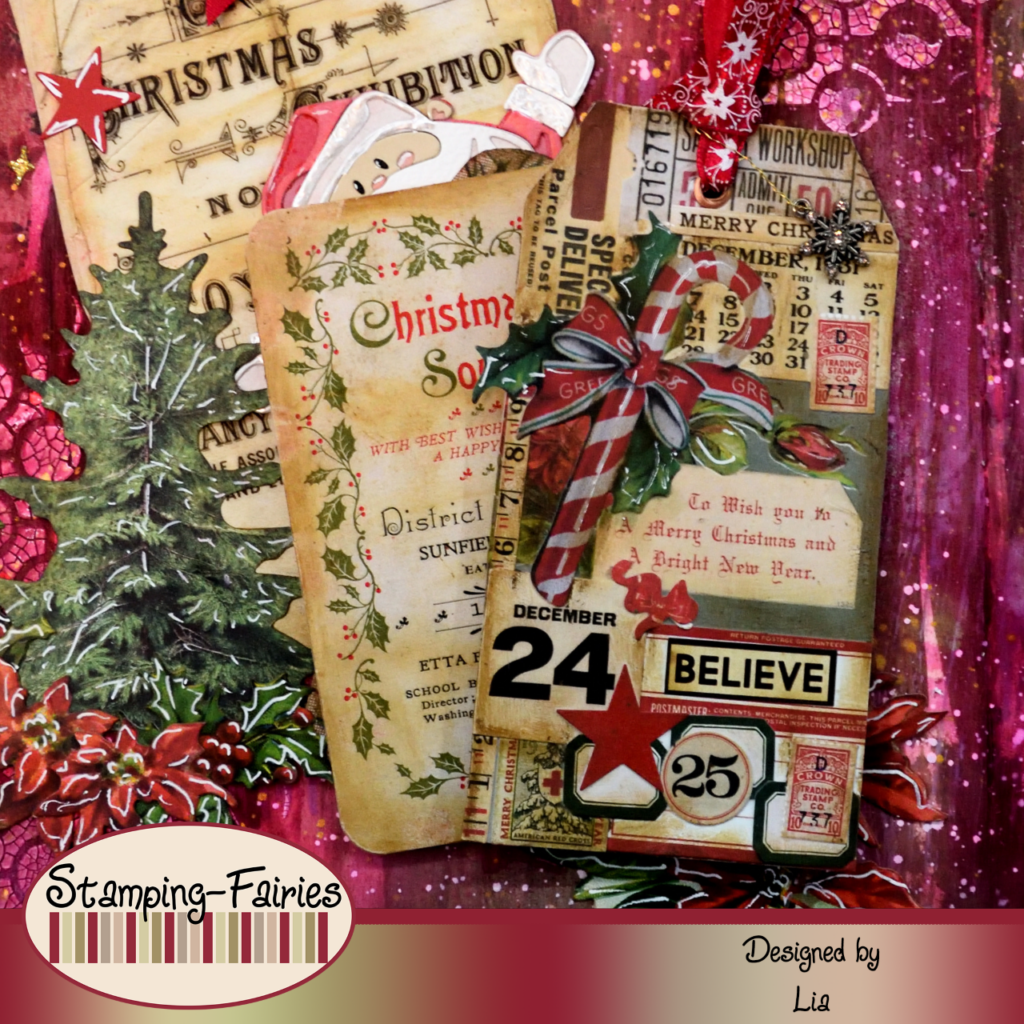
It was time to prepare my images! The first thing I did was to create a little pocket out of Idea-Ology Christmas Worn Wallpaper. Then I created a Tag to go into the pocket. I cut the Tag myself and then I used the Idea-Ology Christmas Ephemera Pack and Multi Medium Matte, to cover the Tag with a lovely Christmas collage. I used the Vintage Photo Distress Crayon, to add some shadows, and a We R memory Eyelet, to reinforce the hole of the Tag. The Tag’s ribbon comes from the ribbon pack you can get as a gift for your order with Stamping Fairies! I also added an Idea-Ology Snowflake Adornment. I chose a card from the Idea-Ology Christmas Botanicals Layers, to go in the pocket along with the Tag. The rest of my images come from these two packs, the Idea-Ology Christmas Ephemera Pack and the Idea-Ology Christmas Botanicals Layers Pack. The edges of these pieces are all treated with the Vintage Photo Distress Crayon. I picked some cards from the Ephemera Pack, added some colour with my Crayons and with the Lumberjack Plaid Distress Oxide ink pad, and then I attached them on the top of my left page, using the Idea-Ology Long Fasteners. I also used the top part of a Santa I had created for another project. The Santa is cut out of watercolour paper, with the Sizzix Santa Greetings Colorize Thinlits set, and is coloured with Distress Oxide inks. He is hiding behind the pocket, so even when I remove the content of the pocket, it is still not visible that he has no legs (LOL).
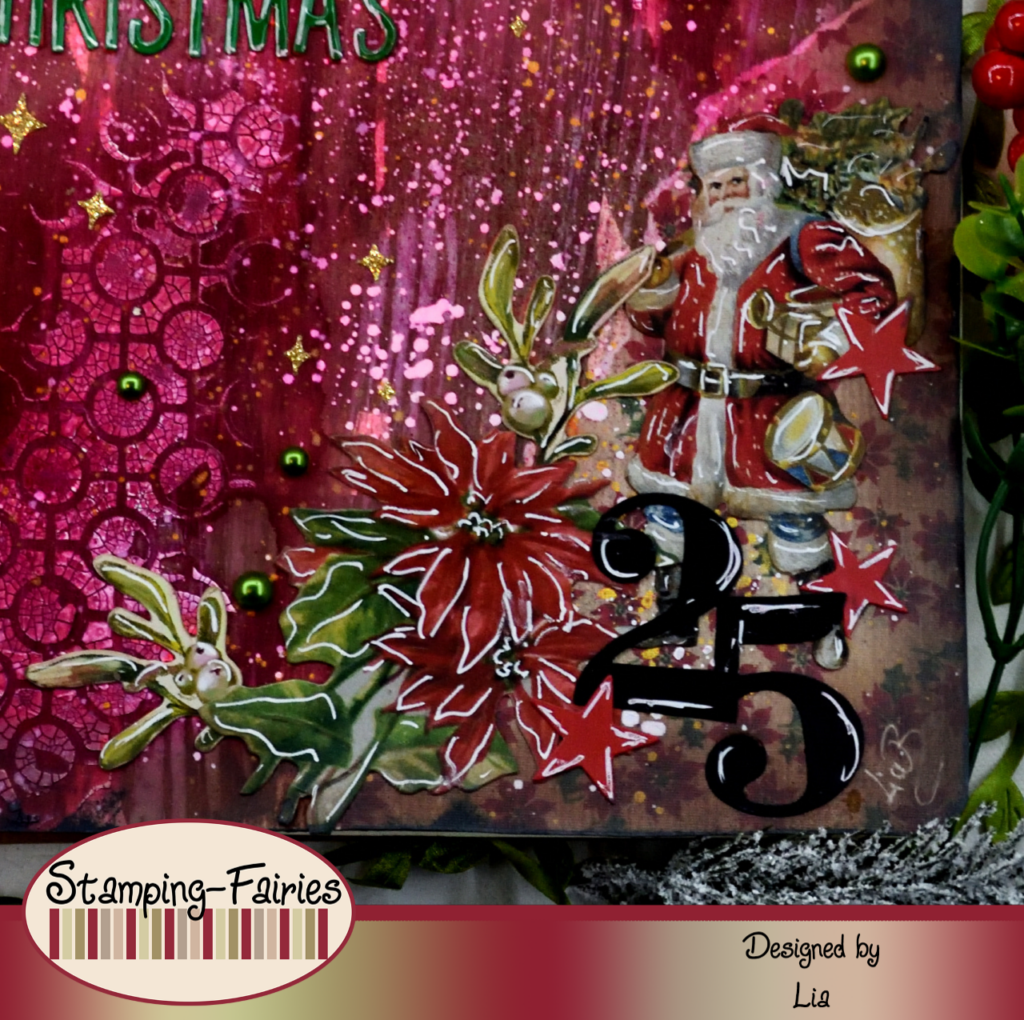
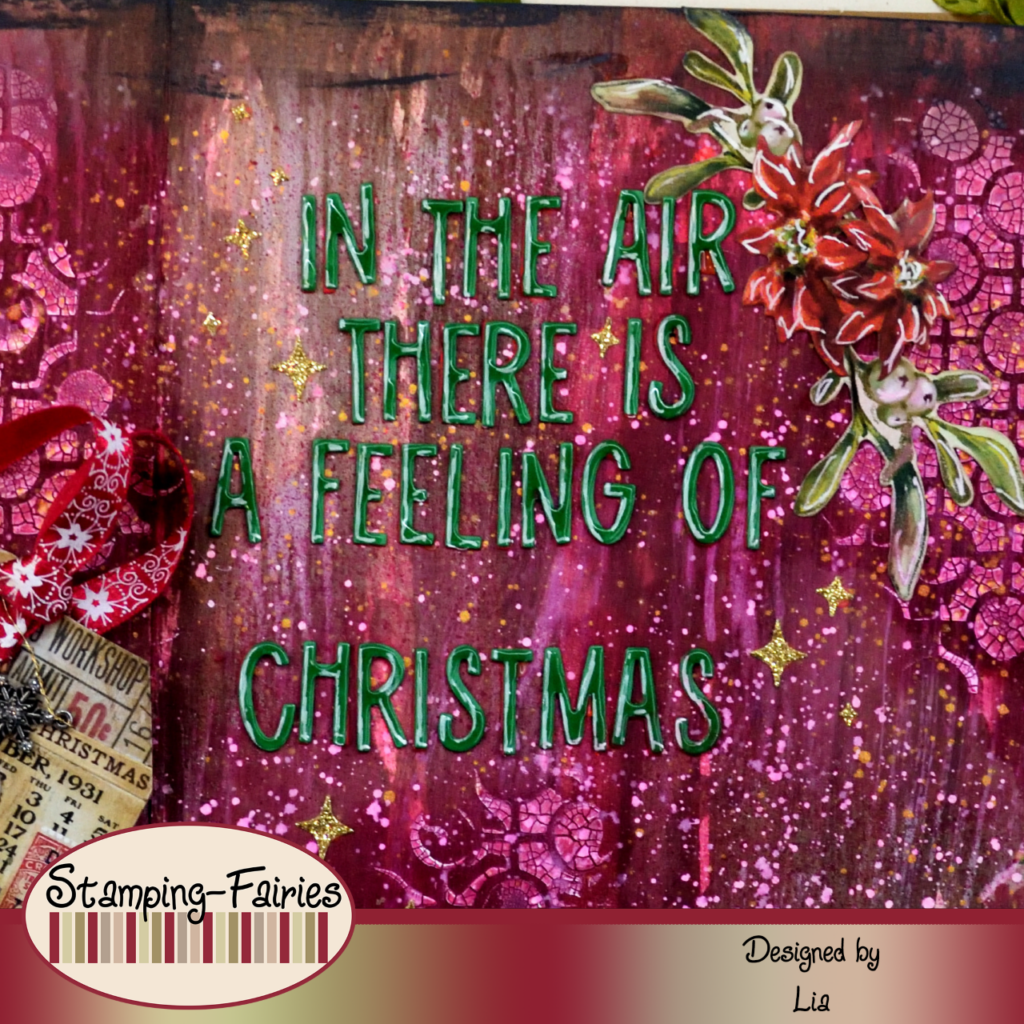
My sentiment is cut out of green cardstock, with the Sizzix Santa Greetings Colorize Thinlits set. I attached the letters on my right page and then I covered them with Glossy Accents, to make them look a little bit more dimensional. The sentence says “ In the air there is a feeling of Christmas“, a fitting sentiment for this time of the year. I took a last look at my pages and then I added a few highlights on my images with a white gel pen, to make them stand out a little better. I also decided to cut a few little stars out of gold glitter cardstock, with the Sizzix Forest Shadows Thinlits set, and add them to the page. I do not think they were necessary (plus, the dies are out of stock) but I like having them there. I added a few Idea-Ology Christmas Droplets and these two pages were done!
And that was the project for today! I went back and forth a lot with this one, but I really like how it turned out! This is also the first time I add a pocket in my Art Journal pages. I am very happy with myself (LOL)! Just a reminder: our Christmas/Winter challenge will be running until the 15th of January. You can find more information about it in the Stamping Fairies profiles on Instagram and Facebook. I really hope you like today’s project! I hope you got inspired! We will see each other again next Monday! Until then, stay creative and have fun!
*Deutsche Version*
Hallo zusammen! Willkommen zurück zu einem weiteren Mixed-Media-Projekt. Ich habe letzten Montag wegen Krankheit gefehlt, also habe ich heute ein relativ großes Projekt, das ich euch zeigen möchte! Es folgt dem Thema unserer neuen Challenge, nämlich Weihnachten/Winter. Ich habe zwei Seiten für ein Weihnachtskunstjournal erstellt. Beginnen wir mit den Materialien, die ich verwendet habe:
Materialien (wenn etwas nicht auf Lager ist, bitte einfach auf „Produkterinnerung“ klicken)
- Distress Paints
- Tim Holtz Worn Wallpaper
- Ranger Multi Medium – Matte
- Prima Marketing – Art Basic – Gesso Clear
- Tim Holtz Layering Stencil – Linked Circles
- Ranger Texture Paste Opaque Crackle
- Distress Spray Stain – Lumberjack Plaid
- Ranger – Tim Holtz Distress Oxide Pads
- Tim Holtz Ephemera Pack – Christmas
- Tim Holtz – Layers Christmas Botanicals
- We R memory keepers Standard Eyelets – metal
- Tim Holtz Distress Crayons – Set #3
- Tim Holtz – Large Fasteners
- Tim Holtz idea-ology – Adornments – Snowflakes
- Sizzix Tim Holtz Thinlits – Santa Greetings, Colorize
- Ranger Glossy Accents
- Tim Holtz – idea-ology – Droplets – Christmas
Diesmal habe ich an meinem großen Kunstjournal gearbeitet und mit meinem Hintergrund begonnen. Als erstes habe ich meine Seiten mit Distress Paint in den Farben Walnut Stain und Lost Shadow bemalt. Ich wollte einen warmen, aber nicht sehr dunklen Ton. Ich mag es sehr, Lost Shadow mit anderen Farben zu mischen, um sie ein wenig zu neutralisieren. Das funktioniert wirklich gut! Sobald meine Seiten trocken waren, habe ich ein Stück Idea-Ology Christmas Worn Wallpaper abgerissen und die Stücke in der oberen linken Ecke der linken Seite und in der unteren rechten Ecke der rechten Seite mit Multi Medium Matte befestigt. Ich habe meine Seiten mit klarem Gesso bedeckt und bin dann zum Schablonieren übergegangen. Ich habe die Linked Circles Layering Schablone von Tim Holtz mit Ranger Texture Crackle Paste verwendet, um einige Designdetails auf einigen Teilen meiner Seiten hinzuzufügen. Ich habe die Paste trocknen lassen und sie dann mit dem Lumberjack Plaid Distress Spray Stain eingefärbt. Ich habe nur die Farbe aufgesprüht, mit Wasser besprüht, einwirken lassen, den Überschuss auftupfen und trocknen lassen. Ich habe diesen Vorgang wiederholt, wo ich das Gefühl hatte, dass es nötig war. Lumberjack Plaid ist eine sehr kräftige Farbe, daher ist es immer gut, vorsichtig damit umzugehen, aber es ist auch eine sehr schöne Farbe und ich kann nicht die Finger davon lassen! Ich habe die Seite mit goldener Acrylfarbe bespritzt und getrocknet. Dann habe ich mit einem Mischpinsel Ground Espresso Distress Oxid Tinte verwendet und die Ränder meiner Seiten abgedunkelt. Das Braun war mir nicht gerade dunkel genug, daher habe ich die Black Soot Distress Oxide Tinte verwendet und das Stempelkissen direkt an den Seitenrändern gerieben. Ich habe alles noch einmal bespritzt, dieses Mal mit Picket Fence Distress Paint, und schon war der Hintergrund fertig!
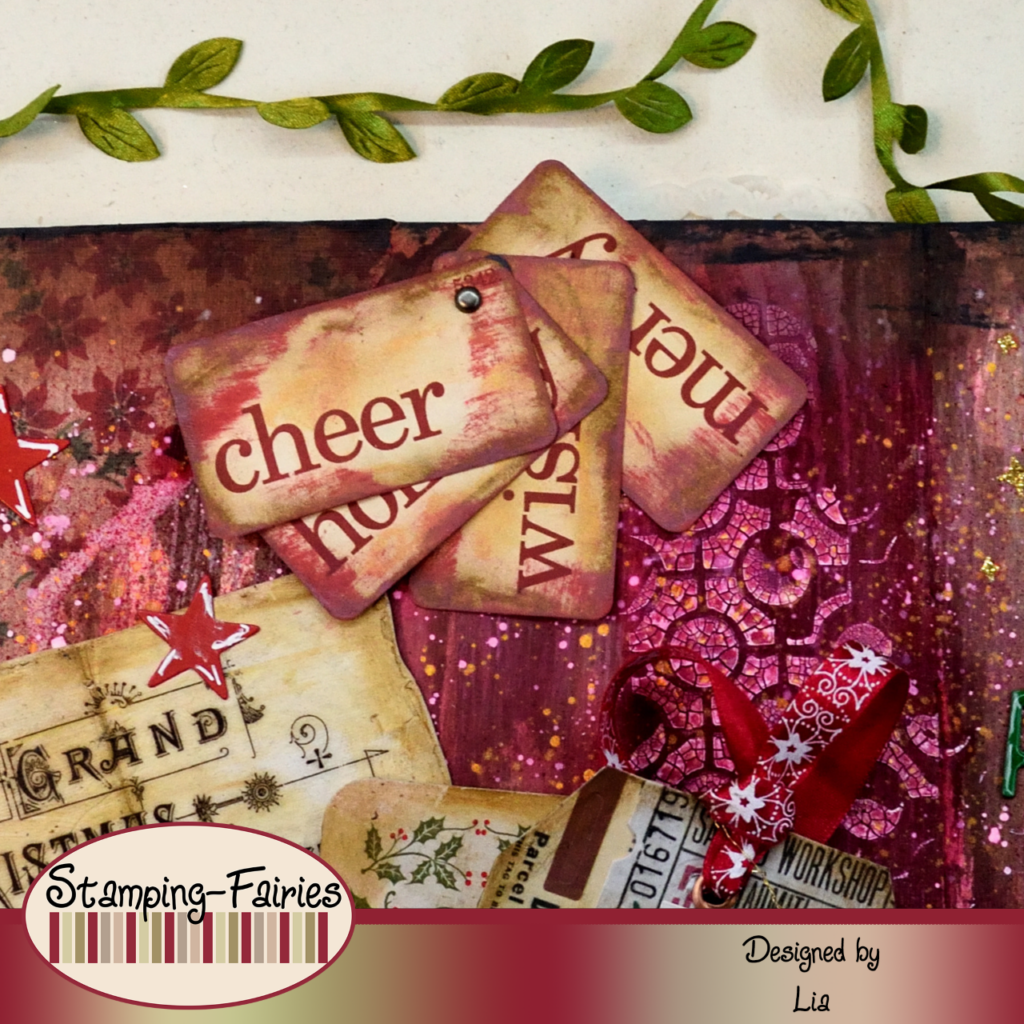
Zeit, meine Bilder vorzubereiten! Das Erste, was ich getan habe, war, eine kleine Tasche aus der Christmas Worn Wallpaper von Idea-Ology zu basteln. Dann habe ich einen Tag erstellt, der in die Tasche passt. Ich habe den Tag selbst ausgeschnitten und dann das Idea-Ology Christmas Ephemera Pack und Multi Medium Matte verwendet, um den Tag mit einer schönen Weihnachtscollage zu überziehen. Ich habe den Vintage Photo Distress Crayon verwendet, um einige Schatten hinzuzufügen, und eine We R Memory Öse, um das Loch des Tags zu verstärken. Das Band des Tags stammt aus der Bandpackung, die ihr als Geschenk für eure Bestellung bei Stamping Fairies erhalten können! Ich habe auch eine Idea-Ology Snowflake Adornment hinzugefügt. Ich habe eine Karte aus den Christmas Botanicals Layers von Idea-Ology ausgewählt, die ich zusammen mit dem Tag in die Tasche stecke. Der Rest meiner Bilder stammt aus diesen beiden Paketen, dem Idea-Ology Christmas Ephemera Pack und dem Idea-Ology Christmas Botanicals Layers Pack. Die Kanten dieser Stücke sind alle mit dem Vintage Photo Distress Crayon behandelt. Ich habe einige Karten aus dem Ephemera-Paket ausgewählt, etwas Farbe mit meinen Crayons und der Lumberjack Plaid Distress Oxide Tinte hinzugefügt und sie dann mit den Long Fasteners von Idea-Ology oben auf meiner linken Seite befestigt. Ich habe auch den oberen Teil eines Weihnachtsmanns verwendet, den ich für ein anderes Projekt erstellt hatte. Der Weihnachtsmann wird mit dem Sizzix Santa Greetings Colorize Thinlits Set aus Aquarellpapier ausgeschnitten und mit Distress Oxide Tinten koloriert. Er versteckt sich hinter der Tasche, sodass selbst wenn ich den Inhalt der Tasche herausnehme, immer noch nicht sichtbar ist, dass er keine Beine hat (LOL).

Mein Spuch ist aus grünem Karton ausgeschnitten, mit dem Sizzix Santa Greetings Colorize Thinlits Set. Ich habe die Buchstaben auf meiner rechten Seite angebracht und sie dann mit Glossy Accents bedeckt, damit sie etwas dreidimensionaler aussehen. Der Satz lautet „In der Luft liegt ein Gefühl von Weihnachten“, ein passender Ausdruck dieser Jahreszeit. Ich habe einen letzten Blick auf meine Seiten geworfen und dann mit einem weißen Gelstift ein paar Highlights auf meine Bilder gesetzt, damit sie etwas besser zur Geltung kommen. Ich habe außerdem beschlossen, mit dem Sizzix Forest Shadows Thinlits Set ein paar kleine Sterne aus goldenem Glitzerkarton auszuschneiden und sie der Seite hinzuzufügen. Ich glaube nicht, dass sie notwendig waren (außerdem sind die Stanzformen ausverkauft), aber es gefällt mir, sie dort zu haben. Ich habe ein paar Christmas Droplets von Idea-Ology hinzugefügt und diese beiden Seiten waren fertig!
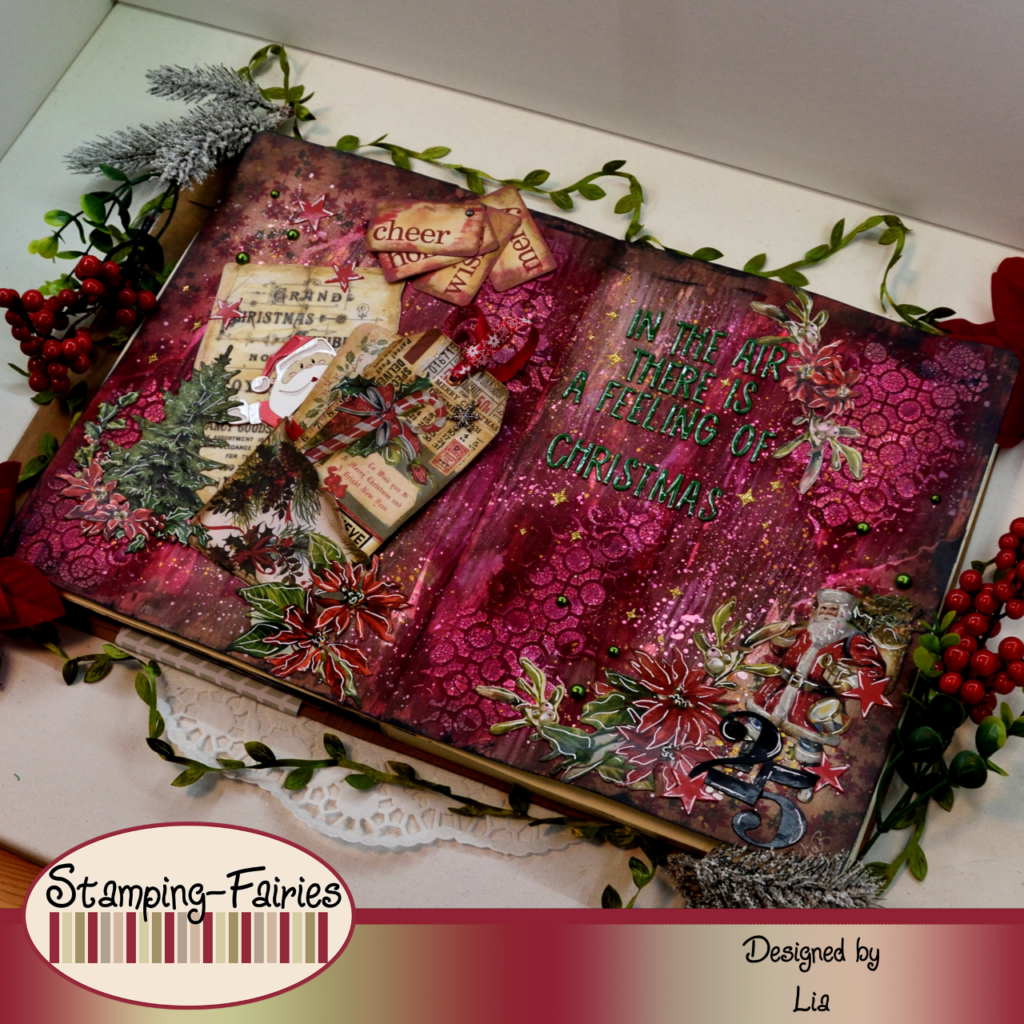
Und das war das Projekt für heute! Ich habe daran viel herum getüftelt, aber das Ergebnis gefällt mir wirklich gut! Dies ist auch das erste Mal, dass ich meinen Kunstjournalseiten eine Tasche hinzufüge. Ich bin sehr zufrieden mit mir (LOL)! Nur zur Erinnerung: Unsere Weihnacht/Winter- Challenge läuft bis zum 15. Januar. Weitere Informationen dazu finden ihr in den Stamping Fairies Profilen auf Instagram und Facebook. Ich hoffe sehr, dass euch das Projekt gefällt! Ich hoffe, ihr habt euch inspirieren lassen! Wir sehen uns nächsten Montag wieder! Bis dahin bleibt kreativ und habt Spaß!

Merry Christmas

Let´s Celebrate Together
Das könnte dich auch interessieren
Thinking of You
27. Januar 2024
„True Friend “ Deko-Dog-Box
3. Juli 2020
