Follow your heart
*German version below | Deutsche Version unten*
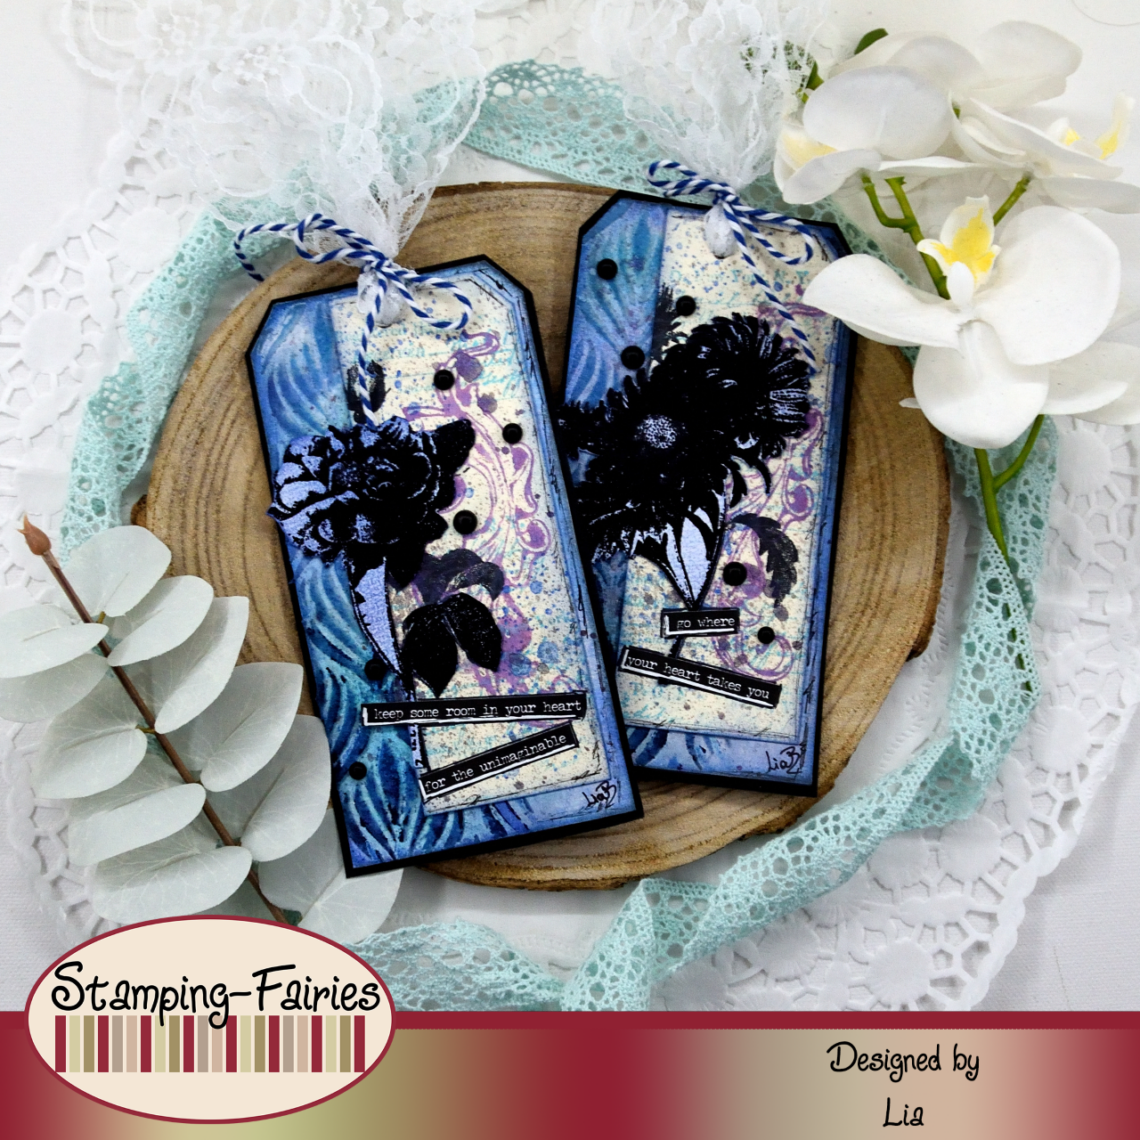
Hello everyone! Welcome back to another mixed media project. For today, I prepared a project inspired by Luise Heinzl, a junk journal artist I am a big fan of. I used different colours and shapes, but the basic idea comes from Luise. Let’s start with the materials I used:
Materials (If something is not in stock, please simply click on “Product reminder”/ “Produkterinnerung”)
- 20 Craft Tags Ranger -Kraft Cardstock 8″
- Finnabair Art Basics – Heavy Gesso White (Tube)
- Distress Oxide Sprays
- Tim Holtz Distress Grit Paste – Translucent
- Tim Holtz Layering Stencil – Deco Feather
- Tim Holtz Distress Crayons – Set #16
- Distress Spritz
- Tim Holtz Distress Mixed Media Heavystock 8 1/2″ x 11″
- Ranger – Tim Holtz Distress Oxide Pads
- Tim Holtz Stamp set – Foreboding
- Tim Holtz Stamp set – Flower Shop
- VersaFine Onyx Black
- Ranger Embossing Super Fine Powder- Black
- Tim Holtz Small Talk Sticker Book
- Tim Holtz – idea-ology – Droplets – Halloween

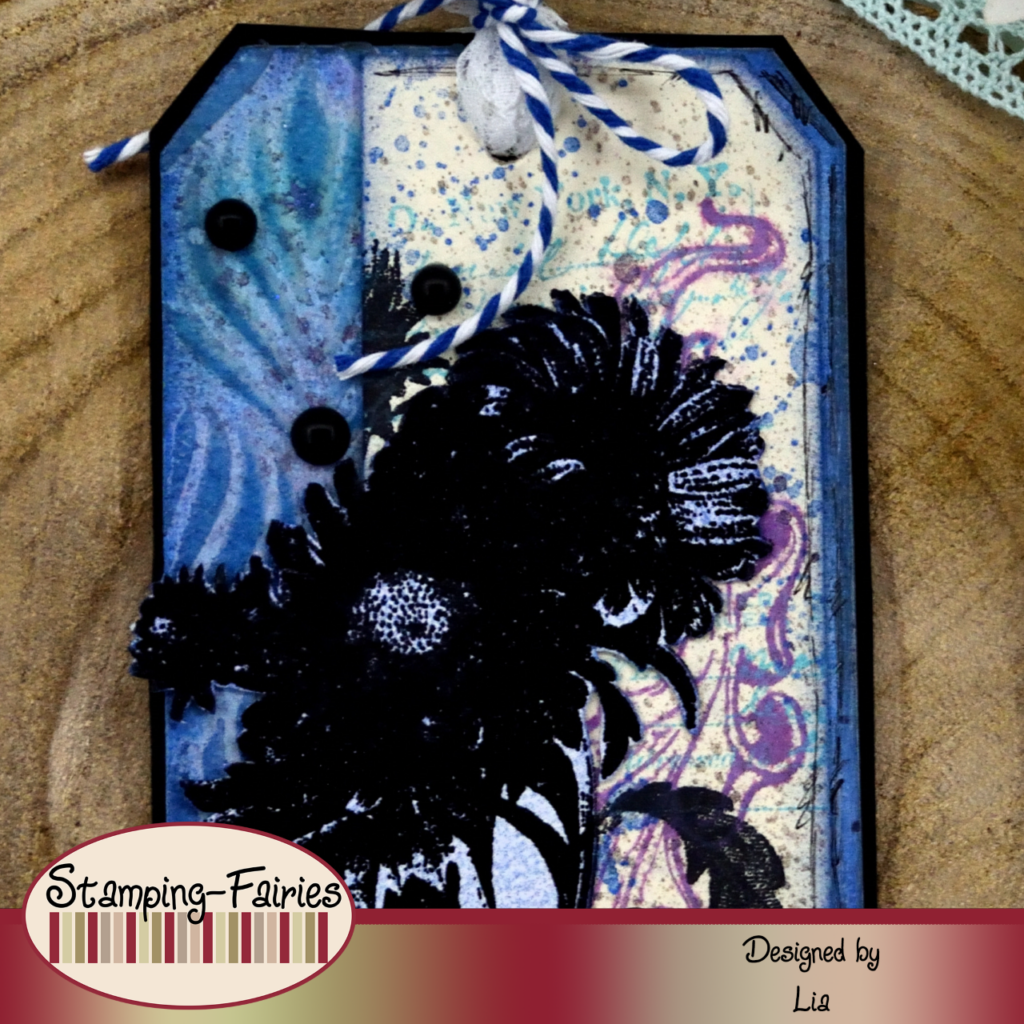
This project is a little different than my usual projects. So, instead of background and foreground, today we will talk about base layer and top layer. I started with my base layer, which is made on two Ranger Craft Tags. I covered the tags with white Gesso, I dried them and then I added colour, using Salvaged Patina, Stormy Sky and Shaded Lilac Distress Oxide Sprays. As always, I sprayed with the inks and then with water, I allowed the colours to move and blend, dabbed off the excess and then I dried the tags. I needed some texture (are you surprised???), so I used the Deco Feather Layering stencil with Distress Translucent Grit Paste on the left sides of the tags. I left the Paste to dry and then I put the stencil back on top of the design, to add some colour. I added a little bit of Uncharted Mariner Distress Crayon on the lower part of my design (through the stencil) and then I used a sponge tool to blend the colour towards the top. I was trying to create an ombre effect, with darker colour on the lower part and lighter colour on the top. Once the blue colour was blended, I added a little bit more colour, in the same way, this time with the Villainous Potion Distress Crayon. Both of these Crayons are from set no.16. After both of my tags had this lovely, colourful texture, I decided to add some splatter, using the new Distress Spritz in colour Wilted Violet. I dried the tags and my base layer was done!

Moving on to my top layer, which includes my focal points. I cut two pieces of Distress Mixed Media Heavystock. I made sure they are a little shorter and much thinner than my tags. I like the colour of this paper because it is not exactly white, it is somewhat creamy, so I already do not have to deal with a bright white surface. I stamped on it directly, without colouring it. I used one of the Scrollwork stamps, from the Tim Holtz Foreboding stamp set, with Dusty Concord Distress Oxide ink to add some design on my top layer. I stamped, sprayed with water to loosen the design and I immediately dried the paper. It didn’t work as I imagined it, but I don’t mind. I also used the blood spatter stamp, from the same set, with Prize Ribbon Distress Oxide ink, to add some controlled splatter. Next, I used the handwriting stamp, from the Tim Holtz Flower Shop stamp set, with Salvaged Patina Distress Oxide ink and I added that design all over my top layer. The next thing I needed was splatter. I used the Wilted Violet Distress Spritz again. I wish I could show in the photos how amazing this product is! It looks like nothing until the light hits it and then it shines. It is so beautiful!!! Time to work on the focal points. Those come from the Tim Holtz Flower Shop stamp set. I used two of the three flowers. First, I stamped them on the top layer pieces, using Versafine Onyx Black ink. Then I stamped them on a separate piece of Distress Heavystock, with the same ink and I heat embossed them with Ranger Black embossing powder. I used my sponge tool, which already had colour from the Distress Crayons on it, and I added some colour all around the flowers. I cut the heat embossed flowers and attached them on the stamped once. Then I attached my top layers on the base layers.

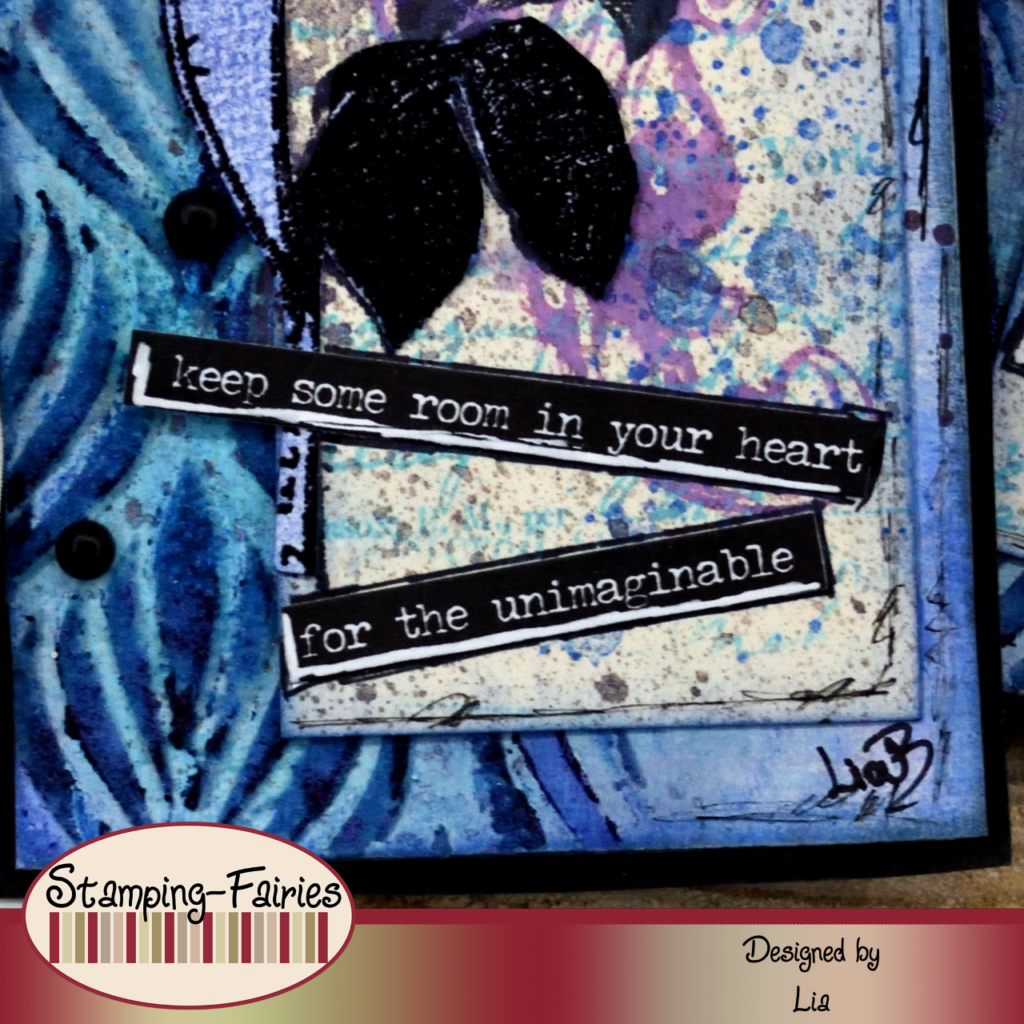
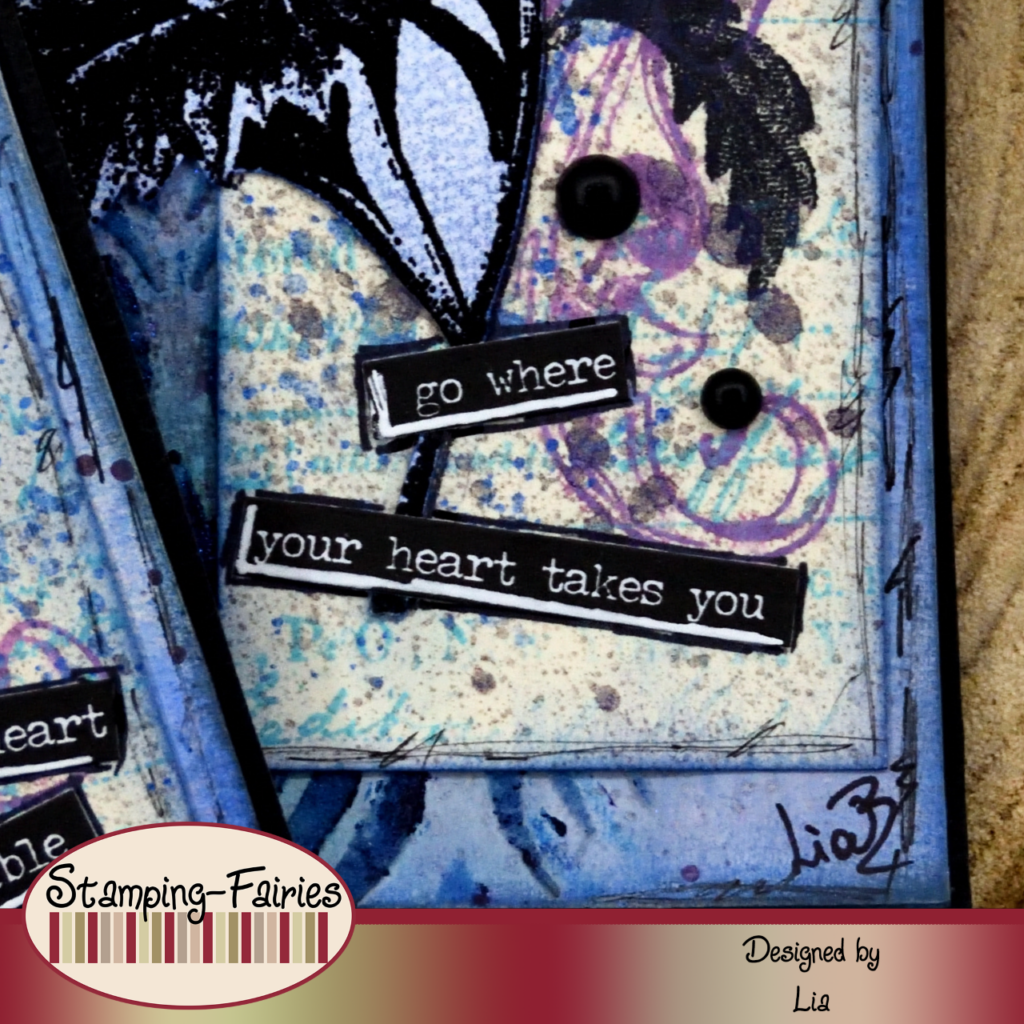
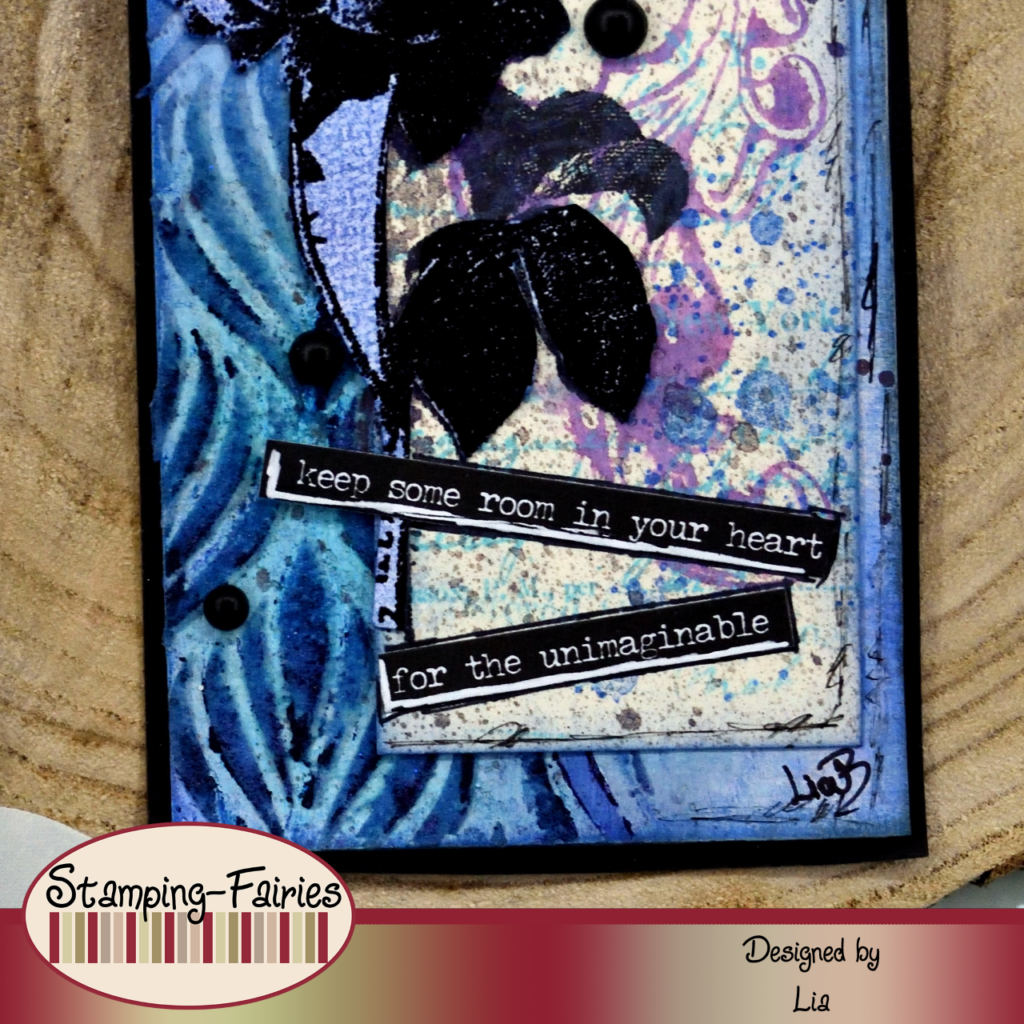
My sentiments comes from the Idea-Ology Small Talk Sticker Book. I chose two of the black sentiment stipes, because I wanted to bring in some more black to match the flowers. The two sentiments say: „Keep some room in your heart for the unimaginable“ and „go where your heart takes you“ and I find them both beautiful. I backed my tags with black cardstock and then I attached the sentiments on them. As a last little bit of embellishment, I added a few black Idea-Ology Droplets from the Halloween pack.
And that was the project for today! I had fun, trying new things and using new products! My project might be completely different from Luise’s, but the idea was never to copy but to be inspired and make something of my own. I hope I did well! I really hope you like today’s project! I hope you got inspired! We will see each other again next Monday! Until then, stay creative and have fun!
*Deutsche Version*
Hallo zusammen! Willkommen zurück zu einem weiteren Mixed-Media Projekt. Für heute habe ich ein Projekt vorbereitet, das von Luise Heinzl inspiriert ist, einer Junk-Journal Künstlerin, die mir sehr gefällt. Ich habe andere Farben und Formen verwendet, aber die Grundidee stammt von Luise. Beginnen wir mit den Materialien, die ich verwendet habe:
Materialien (wenn etwas nicht auf Lager ist, bitte einfach auf „Produkterinnerung“ klicken)
- 20 Craft Tags Ranger -Kraft Cardstock 8″
- Finnabair Art Basics – Heavy Gesso White (Tube)
- Distress Oxide Sprays
- Tim Holtz Distress Grit Paste – Translucent
- Tim Holtz Layering Stencil – Deco Feather
- Tim Holtz Distress Crayons – Set #16
- Distress Spritz
- Tim Holtz Distress Mixed Media Heavystock 8 1/2″ x 11″
- Ranger – Tim Holtz Distress Oxide Pads
- Tim Holtz Stamp set – Foreboding
- Tim Holtz Stamp set – Flower Shop
- VersaFine Onyx Black
- Ranger Embossing Super Fine Powder- Black
- Tim Holtz Small Talk Sticker Book
- Tim Holtz – idea-ology – Droplets – Halloween
Dieses Projekt unterscheidet sich ein wenig von meinen üblichen Projekten. Statt Hintergrund und Vordergrund sprechen wir heute von der Basis- und Deckschicht. Ich habe mit meiner Basisschicht begonnen, die zwei Ranger Craft Tags bedeckt. Ich habe die Tags mit weißem Gesso bedeckt, sie trocknen lassen und dann Farbe hinzugefügt, wobei ich Salvaged Patina, Stormy Sky und Shaded Lilac Distress Oxide Sprays verwendet habe. Wie immer habe ich Tinten und dann mit Wasser gesprüht, die Farben sich bewegen und vermischen lassen, das Überschüssige abgetupft und dann die Tags getrocknet. Ich brauchte etwas Textur, also habe ich die Deco Feather Layering Schablone mit Distress Translucent Grit Paste auf den linken Seiten der Tags verwendet. Ich habe die Paste trocknen lassen und dann die Schablone wieder auf das Design gelegt, um etwas Farbe hinzuzufügen. Ich habe ein wenig Uncharted Mariner Distress Crayon auf den unteren Teil meines Designs hinzugefügt (durch die Schablone) und dann ein Schwammwerkzeug verwendet, um die Farbe nach oben hin zu vermischen. Ich habe versucht, einen Ombre-Effekt zu erzeugen, mit dunklerer Farbe im unteren Teil und hellerer Farbe im oberen Teil. Nachdem die blaue Farbe verblendet war, habe ich auf die gleiche Weise noch etwas Farbe hinzugefügt, diesmal mit dem Villainous Potion Distress Crayon. Beide Crayons sind aus dem Set Nr. 16. Nachdem beide meiner Tags diese schöne, farbenfrohe Textur hatten, habe ich beschlossen, mit dem neuen Distress Spritz in der Farbe Wilted Violet etwas Spritzer hinzuzufügen. Ich habe die Tags getrocknet und meine Grundschicht war fertig!
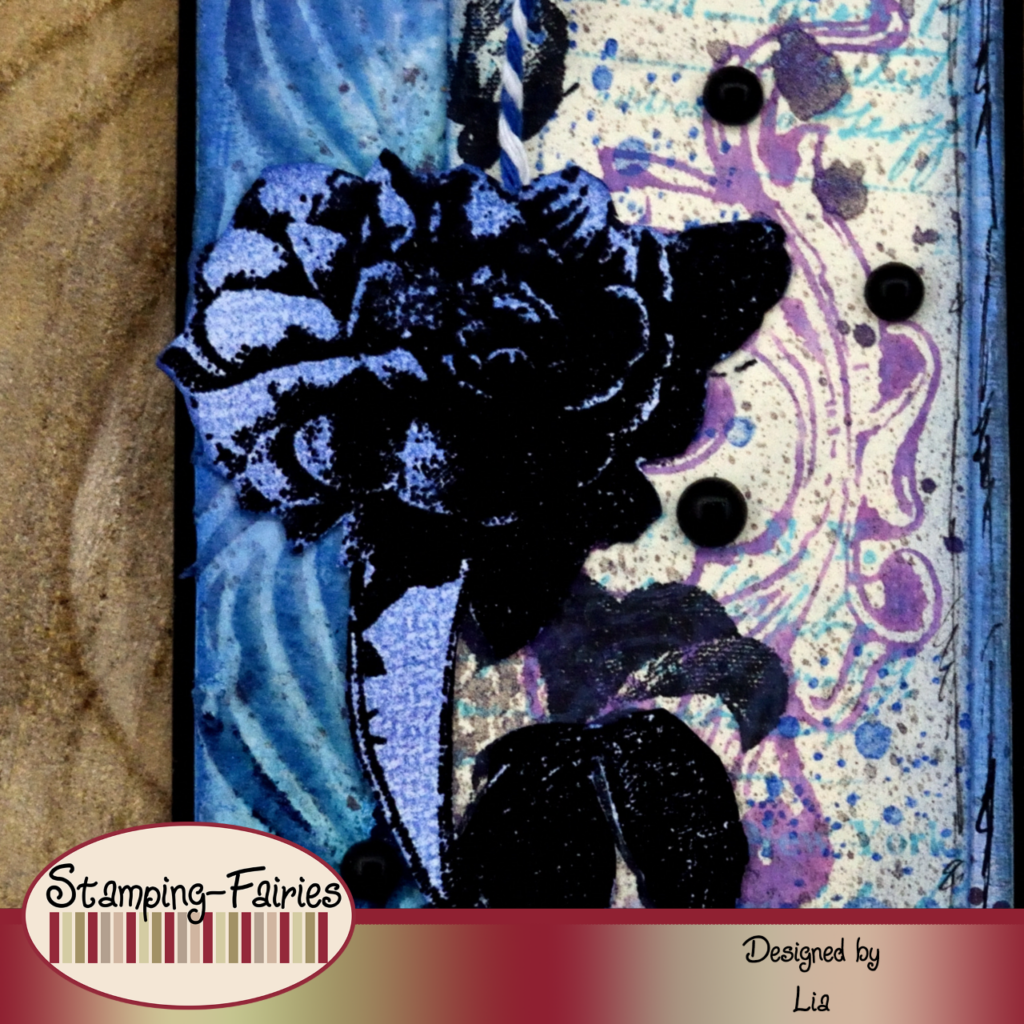
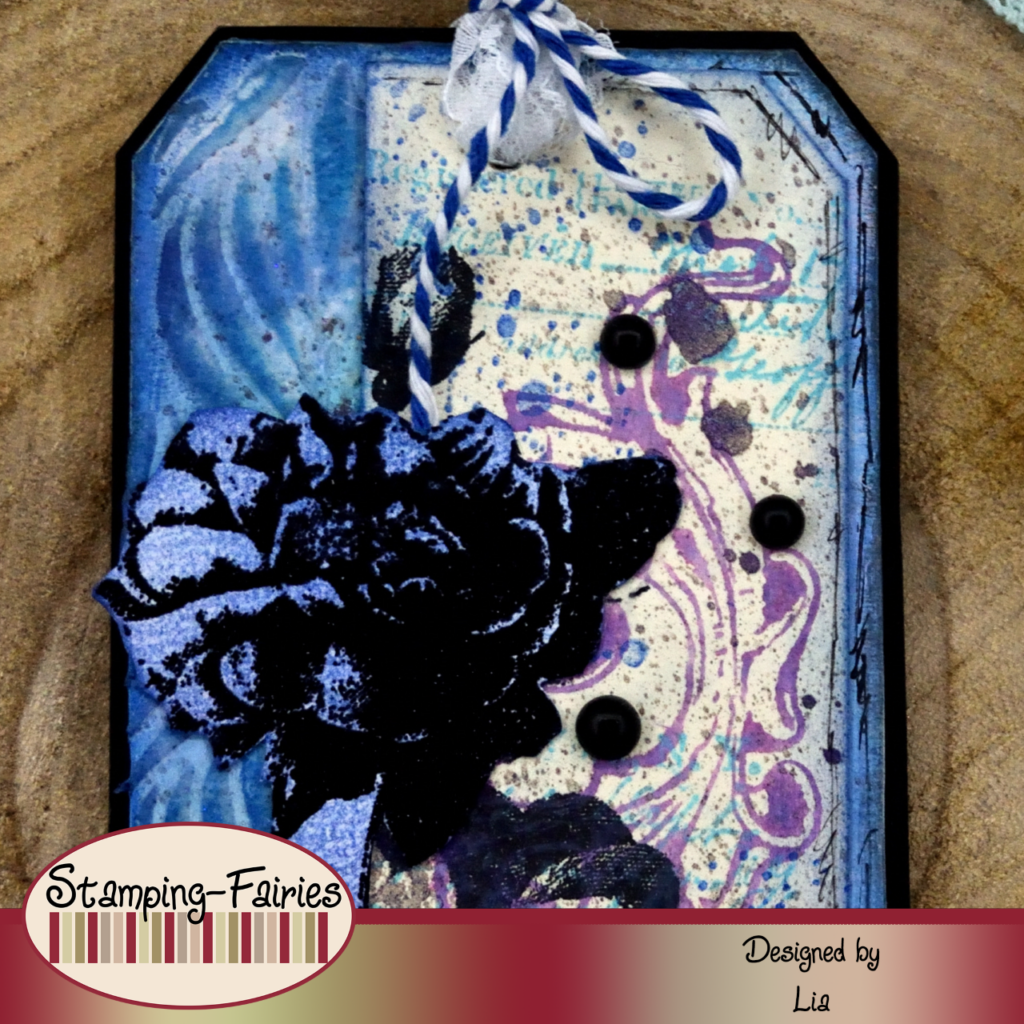
Weiter geht es mit meiner Deckschicht, die meine Schwerpunkte enthält. Ich habe zwei Stücke Distress Mixed Media Heavystock ausgeschnitten. Ich habe sicher gestellt, dass sie etwas kürzer und viel dünner sind als meine Etiketten. Ich mag die Farbe dieses Papiers, weil es nicht ganz weiß ist, sondern eher cremig, sodass ich mich nicht schon mit einer strahlend weißen Oberfläche herumschlagen muss. Ich habe direkt darauf gestempelt, ohne es einzufärben. Ich habe einen der Scrollwork Stempel aus dem Stempelset Foreboding von Tim Holtz mit Dusty Concord Distress Oxide Tinte verwendet, um meiner Deckschicht ein Design hinzuzufügen. Ich habe gestempelt, mit Wasser besprüht, um das Design aufzulockern, und das Papier sofort getrocknet. Es hat nicht so funktioniert, wie ich es mir vorgestellt hatte, aber das macht mir nichts aus. Ich habe auch den Blutspritzer Stempel aus demselben Set mit Prize Ribbon Distress Oxide Tinte verwendet, um einige kontrollierte Spritzer hinzuzufügen. Dann, habe ich den Handschriftstempel aus dem Stempelset Flower Shop von Tim Holtz mit Salvaged Patina Distress Oxide Tinte verwendet und dieses Design überall auf meiner Deckschicht hinzugefügt. Als Nächstes brauchte ich Spritzer. Ich habe wieder Wilted Violet Distress Spritz verwendet. Ich wünschte, ich könnte auf den Fotos zeigen, wie großartig dieses Produkt ist! Es sieht aus wie nichts, bis das Licht darauf fällt und es dann glänzt. Es ist so schön!!! Zeit, an den Schwerpunkten zu arbeiten. Diese stammen aus dem Stempelset Flower Shop von Tim Holtz. Ich habe zwei der drei Blumen verwendet. Zuerst habe ich sie mit Versafine Onyx Black Tinte auf die Deckschicht gestempelt. Dann habe ich sie mit derselben Tinte auf ein separates Stück Distress Heavystock gestempelt und sie mit Ranger Black Prägepulver heißgeprägt. Ich habe mein Schwammwerkzeug verwendet, das bereits Farbe von den Distress Crayons hatte, und habe rund um die Blumen etwas Farbe hinzugefügt. Ich habe die heißgeprägten Blumen ausgeschnitten und einmal auf dem Stempel befestigt. Dann habe ich meine Deckschichten auf den Basisschichten befestigt.
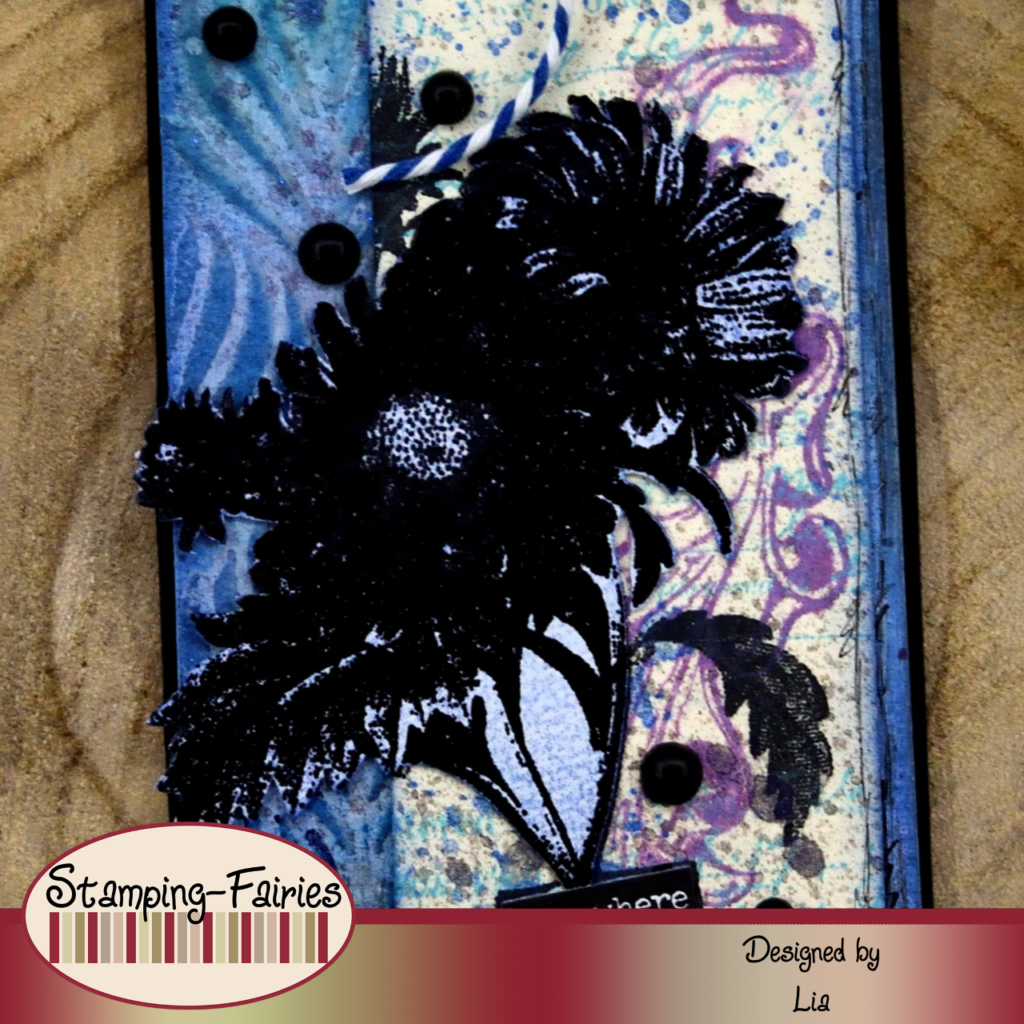
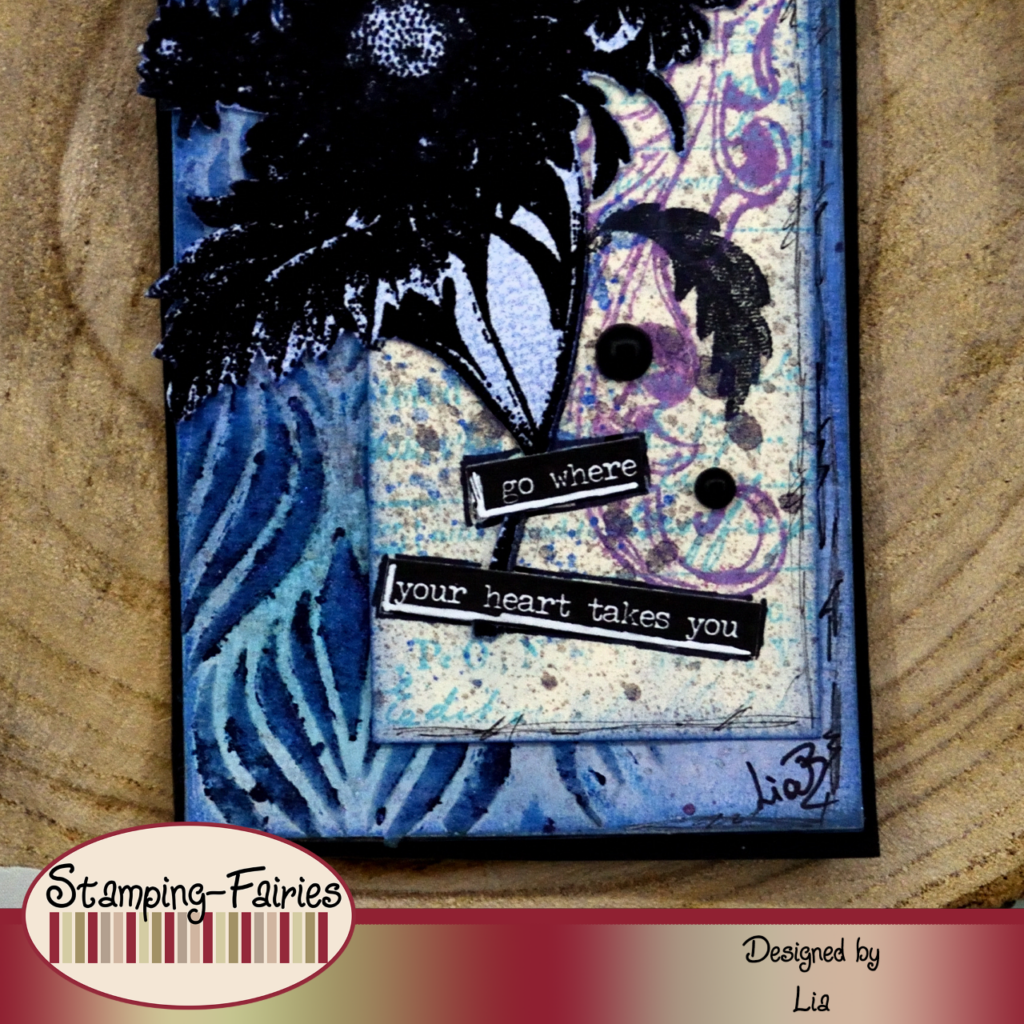
Meine Sprüche stammen aus dem Idea-Ology Small Talk Sticker Book. Ich habe zwei der schwarzen Spruchstreifen ausgewählt, weil ich etwas mehr Schwarz einbringen wollte, passend zu den Blumen. Die beiden Spruche lauten: „Bewahre in deinem Herzen Raum für das Unvorstellbare“ und „Geh, wohin dein Herz dich führt“, und ich finde sie beide wunderschön. Ich habe meine Etiketten mit schwarzem Karton hinterlegt und dann die Sprüche darauf befestigt. Als letzte kleine Verzierung habe ich ein paar schwarze Idea-Ology Droplets aus dem Halloween Paket hinzugefügt.
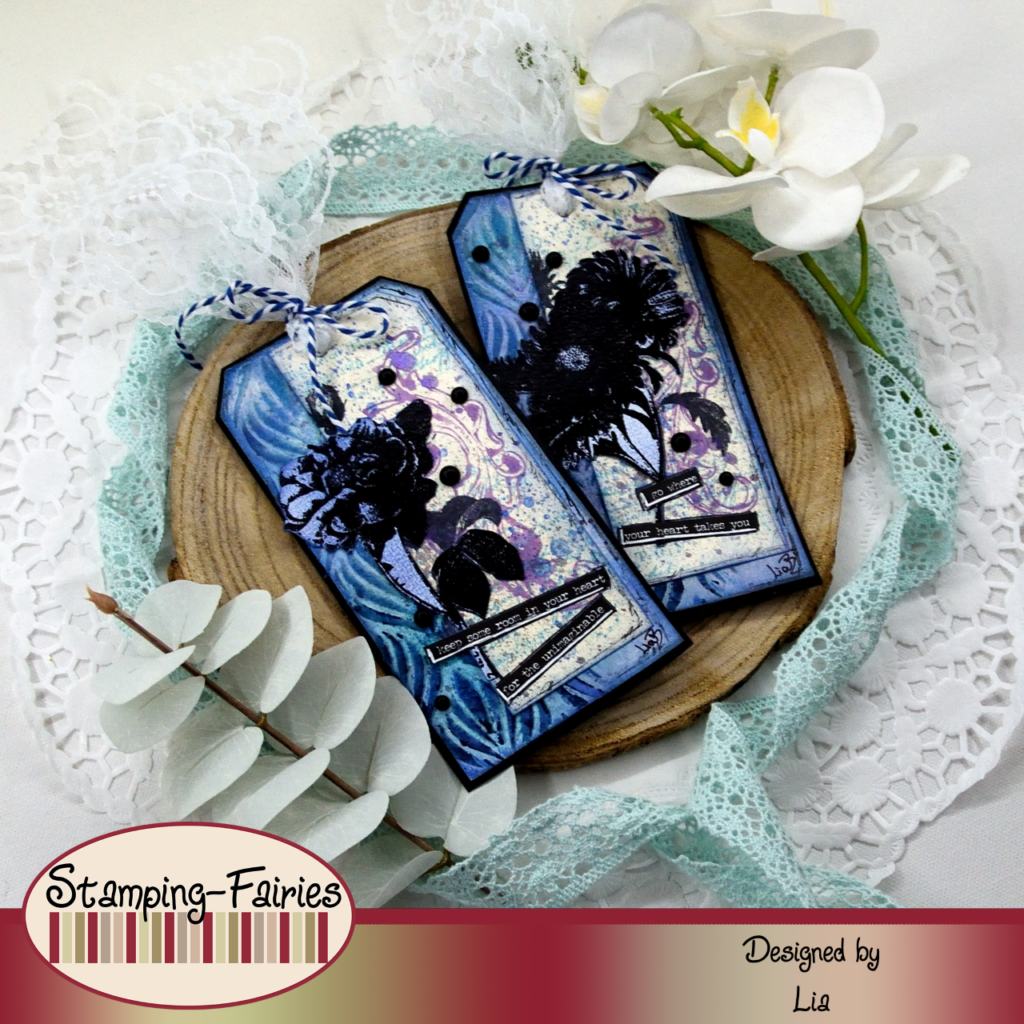
Und das war das Projekt für heute! Ich hatte Spaß, habe neue Dinge ausprobiert und neue Produkte verwendet! Mein Projekt mag sich völlig von dem von Luise unterscheiden, aber die Idee war nie, zu kopieren, sondern mich inspirieren zu lassen und etwas Eigenes zu machen. Ich hoffe, das ist mir gut gelungen! Ich hoffe sehr, dass euch das Projekt gefällt! Ich hoffe, ihr habt euch inspirieren lassen! Wir sehen uns nächsten Montag wieder! Bis dahin bleibt kreativ und habt Spaß!

Sweet & Sour

Hi Beach Girl
Das könnte dich auch interessieren
Cat Love
24. Juli 2022
merry little christmas
9. Dezember 2023