I love Boo
*German version below | Deutsche Version unten*
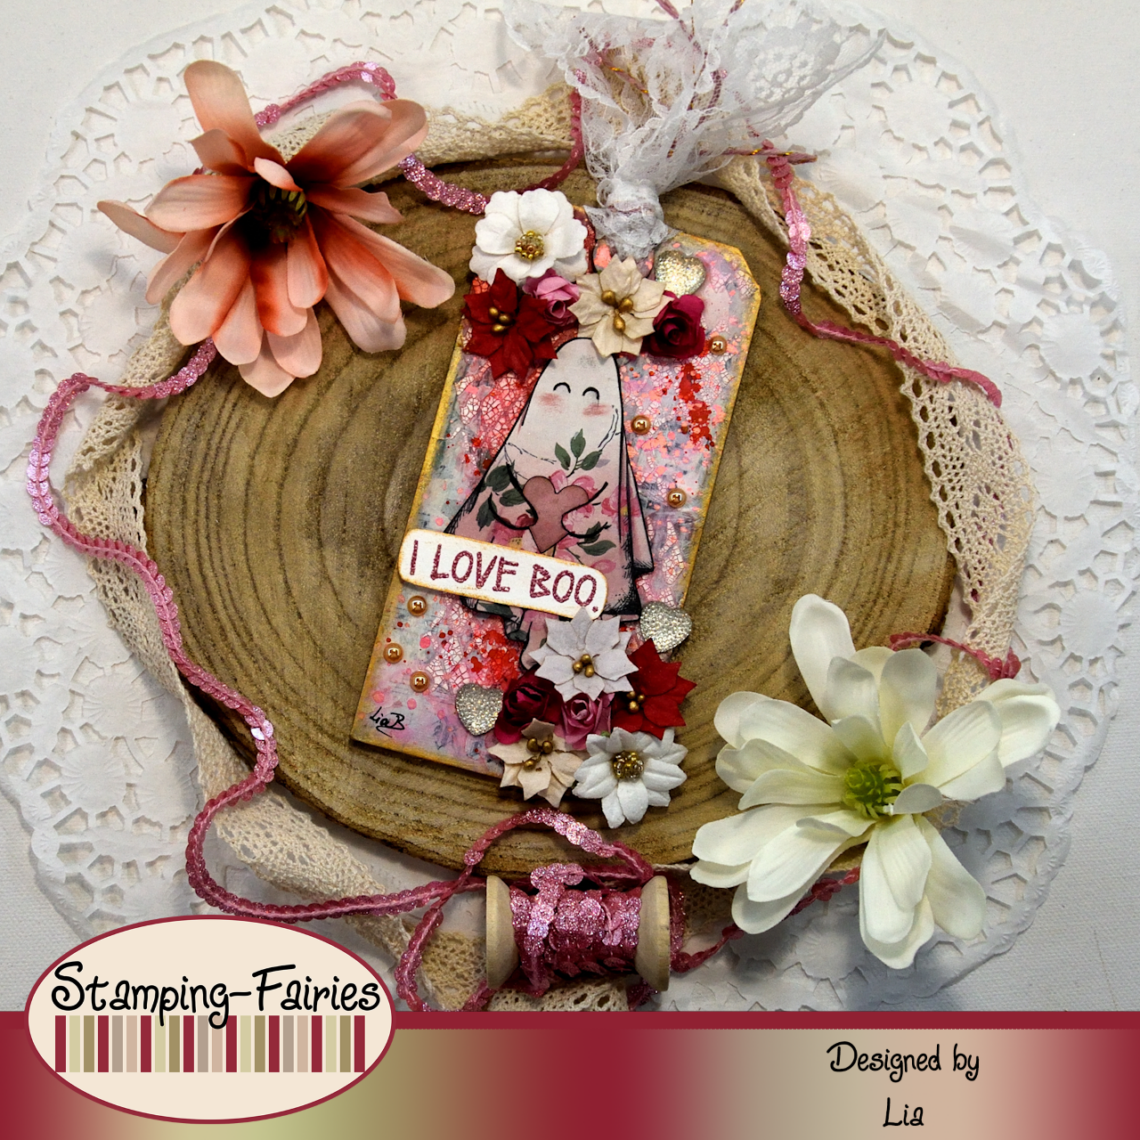
Hello everyone! Welcome back to another Mixed Media project. February and Valentine’s day are approaching, so I decided to make my first love project! Only, this is a love project with a twist… Let’s start with the materials I used:
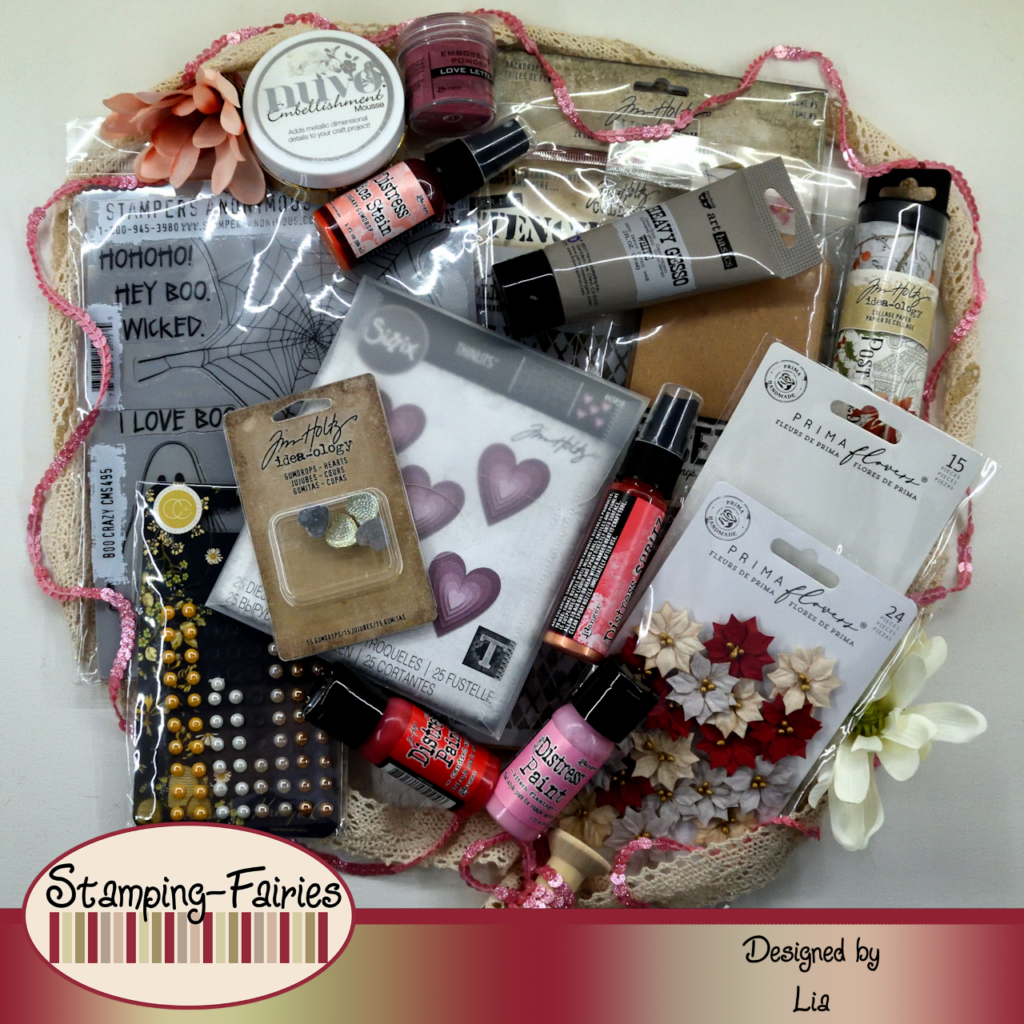
Materials (If something is not in stock, please simply click on “Product reminder”/ “Produkterinnerung”)
- Tim Holtz – Thickboard Tag #8
- Tim Holtz Collage Paper
- Ranger Multi Medium – Matte
- Finnabair Art Basics – Heavy Gesso White (Tube)
- Ranger Texture Paste Opaque Crackle
- Tim Holtz Layering Stencil – Argyle
- Distress Paints
- Distress Mica Stain – Sugary Gumdrop
- Distress Spritz – Worn Lipstick
- Nuvo Mousse
- Tim Holtz Stamp Set – Boo Crazy
- Tim Holtz Backdrops – Volume #5
- Ranger – Tim Holtz Distress Oxide Pad – Victorian Velvet
- Sizzix Tim Holtz Thinlits – Stacked Tiles, Hearts
- Prima Marketing Paper Flowers
- Ranger Embossing Powder – Love Letter
- Craft Consortium – Tell the Bees (Special Edition) – Enamel Dots
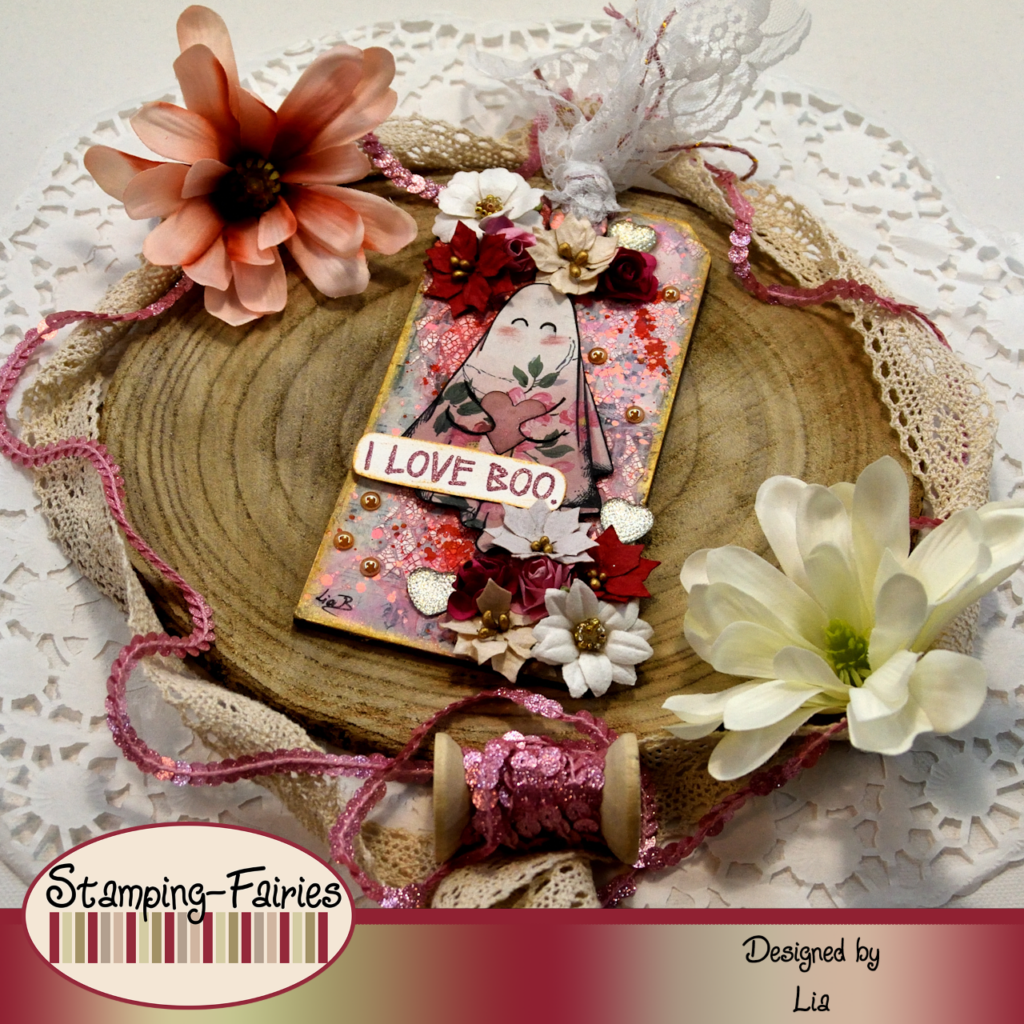
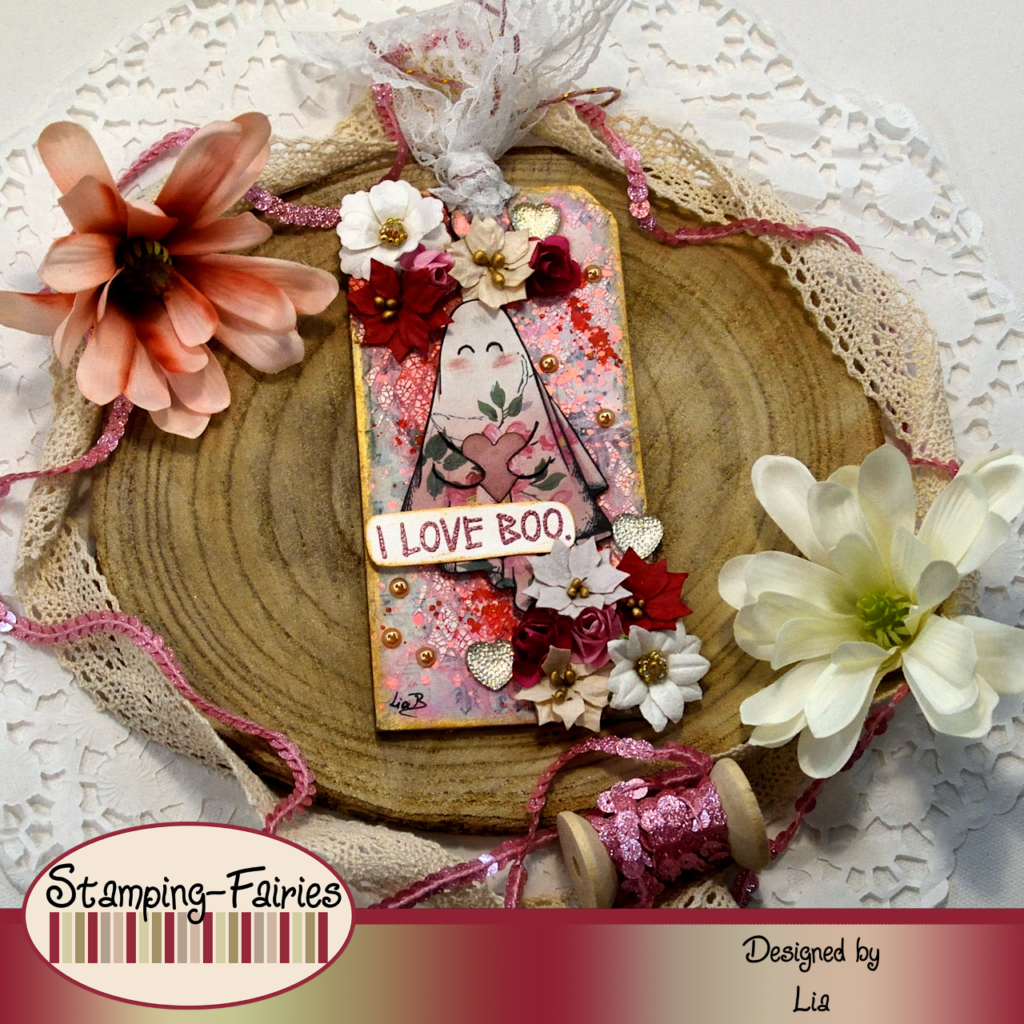
For this project, I worked on an Etcetera thickboard Tag #8 and I started with the background. My Tag is brown and I needed it to be white, so I covered it with white Gesso. Then I added a little bit of visual texture, using collage paper and Multi Medium Matte. I used the Idea- Ology Christmas collage paper, but just about any collage paper would be fine, as I just wanted something in the background and most of it was going to be covered anyway. I dried my glue and then I added a little bit more white Gesso with a spatula, just to soften the colours. Next is actual texture. I used the Argyle Layering stencil with Ranger Texture Crackle Paste and I added the design just on some parts of the Tag. This Paste needs to be left to dry on its own, otherwise it will not crackle. Once it was dry, I added some colour on my background, using Candied Apple and Kitsch Flamingo Distress Paints. I added the Paints with a brush, one at a time, and then I sprayed them with water to make them drip and spread. I also used the same Paints to splatter the Tag. I dried the Paints and then I added more splatter, first with the Sugary Gumdrop Distress Mica Stain Spray and then with the Worn Lipstick Distress Spritz. I added a little bit of Indian Gold Nuvo Embellishment Mousse all around the edges of my Tag and the background was done.
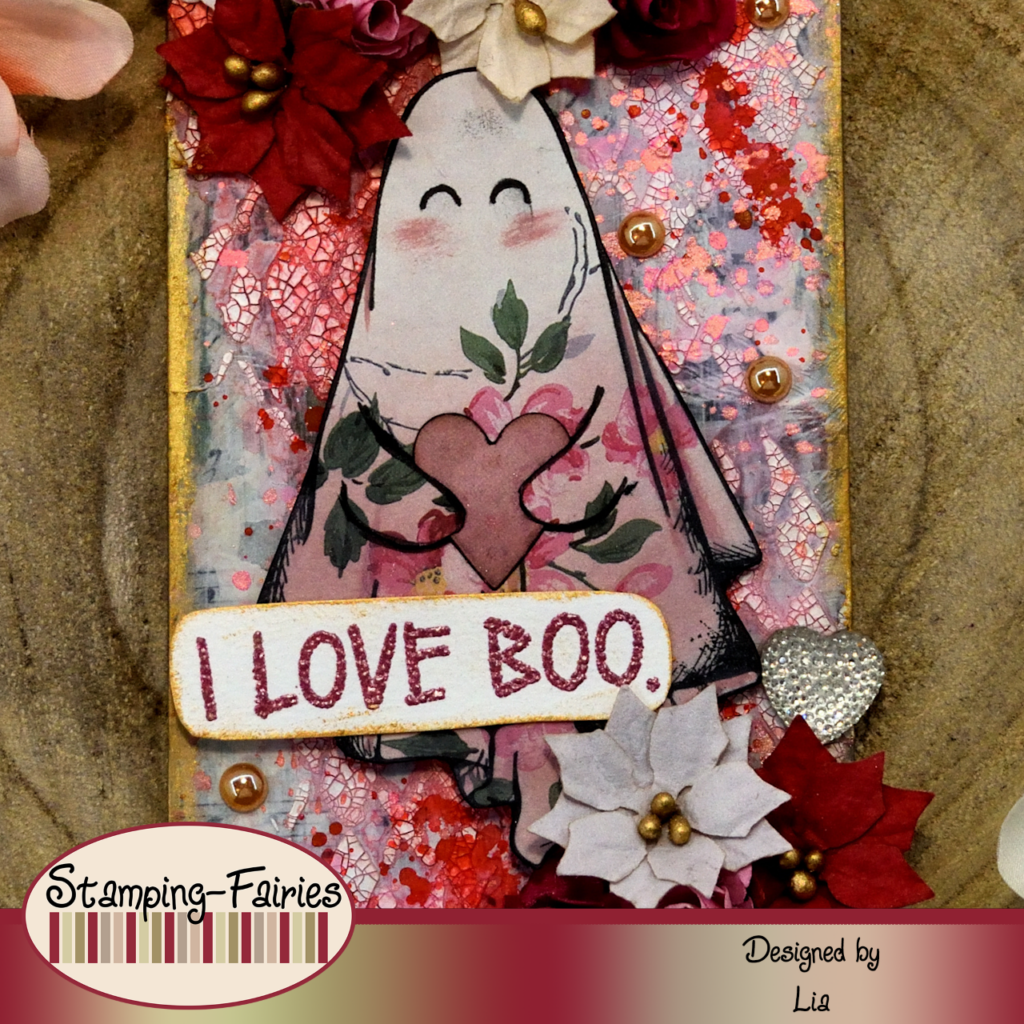
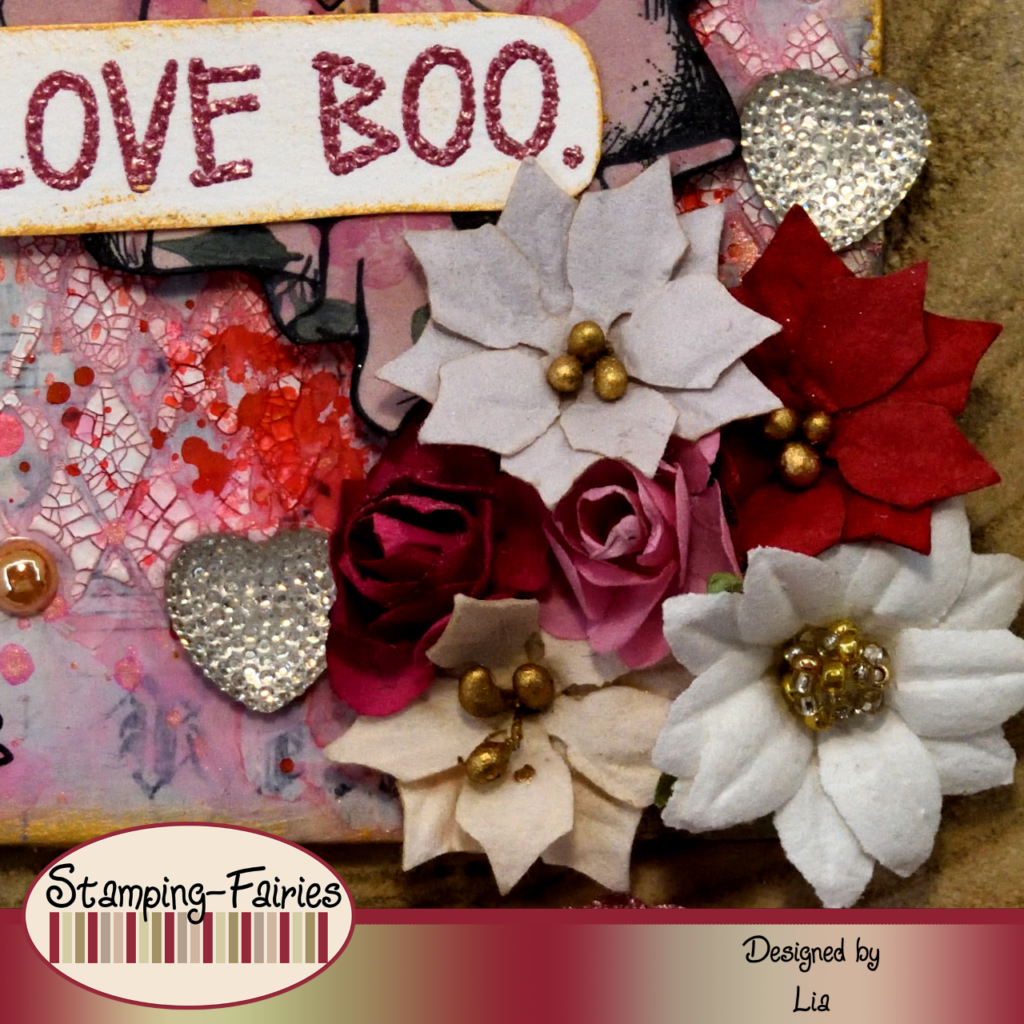
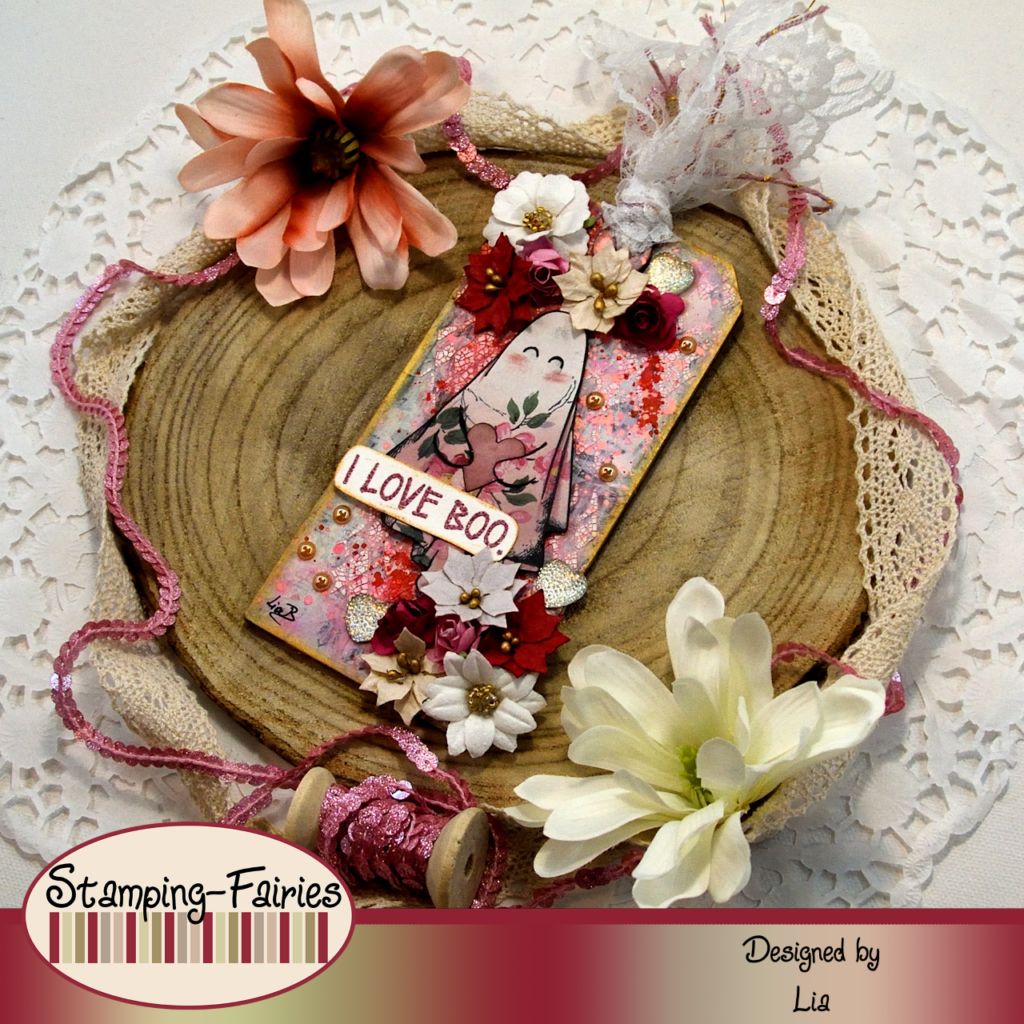
Time to prepare my images. My main image is the ghost holding the heart. My ghost comes from the „Boo Crazy“ stamp set by Tim Holtz and it is stamped on one of the papers from the Idea-Ology Backdrops Volume #5. I really like the vibrant colours of this paper pack! They are just perfect for Valentine’s day creations! So, I stamped the ghost on the Backdrop paper, making sure I won’t stamp the eyes, and then I added a little bit of Victorian Velvet Distress Oxide ink on the bottom part of it. I cut it out and then I gave it different eyes and a set of hands. To cut the heart my ghost is holding, I used the Sizzix Stacked Tiles, Hearts Thinlits set and another paper piece from the same Backdrops pack. I darkened the edges of the heart with some Victorian Velvet Distress Oxide ink and then I outlined it with a black marker. I placed the heart in my ghost’s hands and I think it looks soooo cute! To dress the areas around my ghost, I used some Prima paper flowers. I keep all of my Prima flowers together so I can not really tell which package they come from, but just about any set would do. I used small flowers, because those fit better on my project. I also used some Idea-Ology Gumdrops-Hearts mixed with my flowers. I believe these hearts are discontinued, but I couldn’t help it! I really like them!
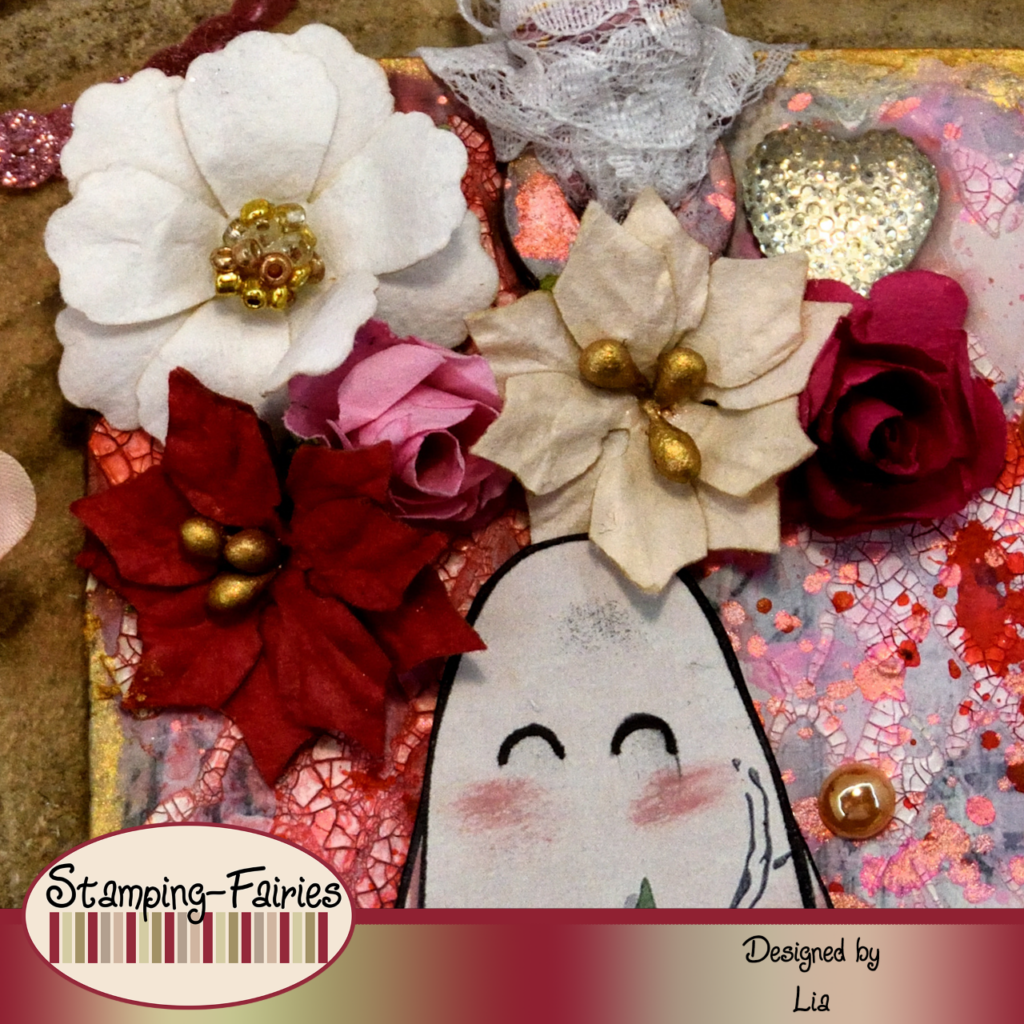
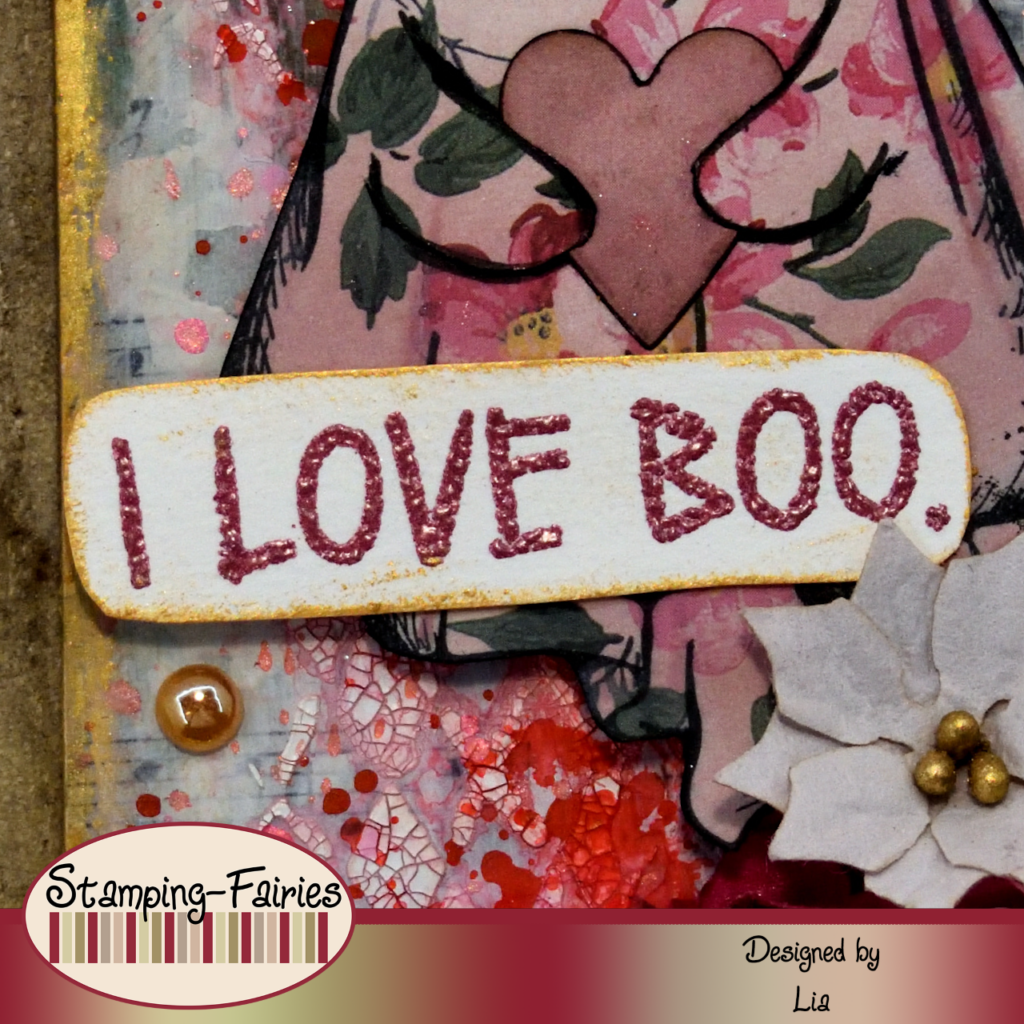
My sentiment also comes from the „Boo Crazy“ stamp set by Tim Holtz. It is heat embossed on white cardstock, with Ranger Love Letter embossing powder. I cut it out and then I added a little bit of Indian Gold Nuvo Embellishment Mousse all around the edges of the sentiment piece. The sentiment says: „I love Boo“ in true Tim Holtz style. I really like how this stamp set can be used in so many ways even though it was supposed to be a Halloween product. Shapes are just shapes. We can do whatever we want with them! As a last little bit of embellishment, I added a few champagne/gold enamel dots from the Craft Consortium Tell the Bees – Enamel Dots set.
And that was the project for today! I had a lot of fun making this Tag, playing with the colours and preparing the little ghost. I find that little fellow really cute! Ghosts can really be good for every occasion. I really hope you like today’s project! I hope you got inspired! We will see each other again next Monday! Until then, stay creative and have fun!
*Deutsche Version*
Hallo zusammen! Willkommen zurück zu einem weiteren Mixed-Media Projekt. Der Februar und der Valentinstag stehen vor der Tür, also habe ich beschlossen, mein erstes Projekt mit einem Liebesthema zu machen! Allerdings nimmt es eine überraschende Wendung… Beginnen wir mit den Materialien, die ich verwendet habe:
Materialien (wenn etwas nicht auf Lager ist, bitte einfach auf „Produkterinnerung“ klicken)
- Tim Holtz – Thickboard Tag #8
- Tim Holtz Collage Paper
- Ranger Multi Medium – Matte
- Finnabair Art Basics – Heavy Gesso White (Tube)
- Ranger Texture Paste Opaque Crackle
- Tim Holtz Layering Stencil – Argyle
- Distress Paints
- Distress Mica Stain – Sugary Gumdrop
- Distress Spritz – Worn Lipstick
- Nuvo Mousse
- Tim Holtz Stamp Set – Boo Crazy
- Tim Holtz Backdrops – Volume #5
- Ranger – Tim Holtz Distress Oxide Pad – Victorian Velvet
- Sizzix Tim Holtz Thinlits – Stacked Tiles, Hearts
- Prima Marketing Paper Flowers
- Ranger Embossing Powder – Love Letter
- Craft Consortium – Tell the Bees (Special Edition) – Enamel Dots
Für dieses Projekt habe ich an einem Etcetera Thickboard Tag #8 gearbeitet und mit dem Hintergrund begonnen. Mein Tag war braun und ich brauchte ihn weiß, also habe ich ihn mit weißem Gesso bedeckt. Dann habe ich ein wenig visuelle Textur hinzugefügt, indem ich Collagepapier und Multi Medium Matte verwendet habe. Ich habe das Idea-Ology Christmas Collagepapier verwendet, aber so ziemlich jedes Collagepapier wäre in Ordnung, da ich nur etwas im Hintergrund haben wollte und das meiste davon sowieso bedeckt werden würde. Ich habe meinen Kleber getrocknet und dann mit einem Spachtel ein wenig mehr weißes Gesso hinzugefügt, nur um die Farben abzumildern. Als nächstes kommt die eigentliche Textur. Ich habe die Argyle Layering Schablone mit Ranger Texture Crackle Paste verwendet und das Design nur auf einige Teile des Tags aufgetragen. Diese Knisterpaste muss von selbst trocknen, sonst knistert sie nicht. Nachdem sie trocken war, habe ich meinem Hintergrund etwas Farbe hinzugefügt, indem ich Candied Apple und Kitsch Flamingo Distress Paints verwendet habe. Ich habe die Farben mit einem Pinsel einzeln aufgetragen und sie dann mit Wasser besprüht, damit sie tropfen und sich verteilen. Ich habe auch dieselben Farben verwendet, um das Tag zu bespritzen. Ich habe die Farben getrocknet und dann weitere Spritzer hinzugefügt, zuerst mit dem Sugary Gumdrop Distress Mica Stain Spray und dann mit dem Worn Lipstick Distress Spritz. Ich habe rund um die Ränder meines Tags ein wenig Indian Gold Nuvo Embellishment Mousse hinzugefügt und der Hintergrund war fertig.
Zeit, meine Bilder vorzubereiten. Mein Hauptbild ist der Geist, der das Herz hält. Mein Geist stammt aus dem Stempelset „Boo Crazy“ von Tim Holtz und ist auf eines der Papiere aus Idea-Ology Backdrops Volume #5 gestempelt. Ich mag die leuchtenden Farben dieses Papierpakets wirklich! Sie sind einfach perfekt für Valentinstagskreationen! Also habe ich den Geist auf das Backdrop Papier gestempelt, wobei ich darauf geachtet habe, die Augen nicht zu stempeln, und dann habe ich ein wenig Victorian Velvet Distress Oxide Tinte auf den unteren Teil aufgetragen. Ich habe es ausgeschnitten und ihm dann andere Augen und ein Paar Hände gegeben. Um das Herz auszuschneiden, das mein Geist hält, habe ich das Sizzix Stacked Tiles, Hearts Thinlits Set und ein weiteres Papierstück aus demselben Backdrops Paket verwendet. Ich habe die Ränder des Herzens mit etwas Victorian Velvet Distress Oxide Tinte abgedunkelt und es dann mit einem schwarzen Marker umrandet. Ich habe das Herz in die Hände meines Geistes gelegt und ich finde, es sieht soooo süß aus! Um die Bereiche um meinen Geist herum zu verzieren, habe ich einige Prima Papierblumen verwendet. Ich bewahre alle meine Prima Blumen zusammen auf, sodass ich nicht wirklich sagen kann, aus welchem Paket sie kommen, aber so ziemlich jedes Set würde genügen. Ich habe kleine Blumen verwendet, weil diese besser zu meinem Projekt passen. Ich habe auch einige Idea-Ology Gumdrops-Hearts mit meinen Blumen gemischt. Ich glaube, diese Herzen werden nicht mehr hergestellt, aber ich konnte nicht anders! Ich mag sie wirklich!
Mein Spruch stammt ebenfalls aus dem Stempelset „Boo Crazy“ von Tim Holtz. Er ist mit Ranger Love Letter Prägepulver auf weißem Karton heißgeprägt. Ich habe ihn ausgeschnitten und dann ein wenig Indian Gold Nuvo Embellishment Mousse rund um die Ränder des Spruchstücks hinzugefügt. Der Spruch lautet, in echtem Tim Holtz Stil: „Ich liebe Boo“. Mir gefällt wirklich, wie vielseitig dieses Stempelset verwendet werden kann, obwohl es eigentlich ein Halloween Produkt sein sollte. Formen sind einfach nur Formen. Wir können damit machen, was wir wollen! Als letzte kleine Verzierung habe ich ein paar champagner/goldfarbene Emaille Punkte aus dem Craft Consortium Tell the Bees – Enamel Dots Set hinzugefügt.
Und das war das Projekt für heute! Ich hatte viel Spaß beim Gestalten dieses Tags, beim Spielen mit den Farben und beim Vorbereiten des kleinen Geists. Ich finde das kleine Kerlchen wirklich süß! Geister können wirklich zu jedem Anlass gut sein. Ich hoffe sehr, dass euch das heutige Projekt gefällt! Ich hoffe, ihr habt euch inspirieren lassen! Wir sehen uns nächsten Montag wieder! Bis dahin bleibt kreativ und habt Spaß!

It's your day

Love Letter
Das könnte dich auch interessieren
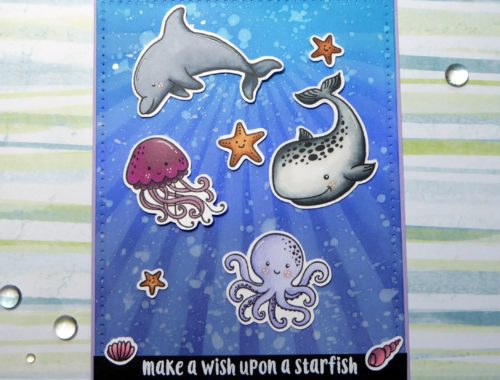
Make a Wish upon a Starfish

Limited Color Palette