Love is in the air
*German version below | Deutsche Version unten*
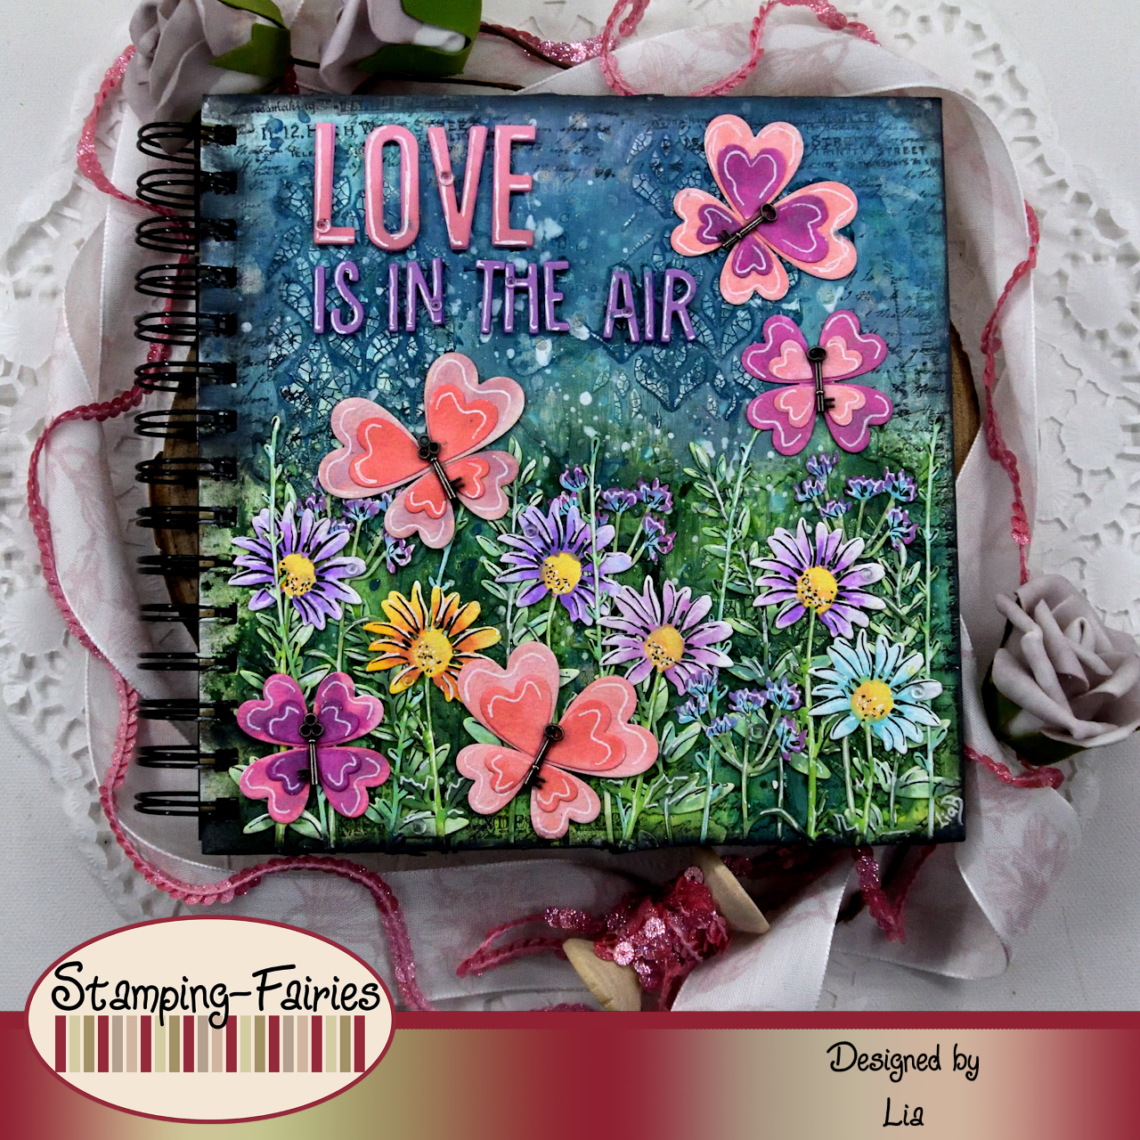
Hello everyone! Welcome back to another Mixed Media project. February is here and Valentine’s day approaches. So, for today, I prepare a project full of heart! Can you see them all? Let’s start with the materials I used:
Materials (If something is not in stock, please simply click on “Product reminder”/ “Produkterinnerung”)
- Sizzix Tim Holtz Thinlits – Vault Wildflowers
- Ranger Multi Medium – Matte
- Finnabair Art Basics – Heavy Gesso White (Tube)
- Ranger Texture Paste Opaque Crackle
- Tim Holtz Layering Stencil – Deco Floral
- Distress Oxide Sprays
- Distress Spray Stain – Rustic Wilderness
- Distress Mica Stain – Winter Frost
- Distress Spritz
- Distress Paint – Picket Fence
- VersaFine Onyx Black
- Tim Holtz Stempelset – Dearly Departed
- Sheer Shimmer Spritz Spray – Sparkle (7ml)
- Ranger – Tim Holtz Distress Oxide Pads
- Sizzix Tim Holtz Thinlits – Stacked Tiles, Hearts
- Tim Holtz – Idea-Ology Adornments Oddities – Keys
- Sizzix Tim Holtz Thinlits – Alphanumeric Shadow Upper
- Sizzix Tim Holtz Thinlits – Santa Greetings, Colorize
- Craft Consortium Essential Adhesive Dew Drops – Clear

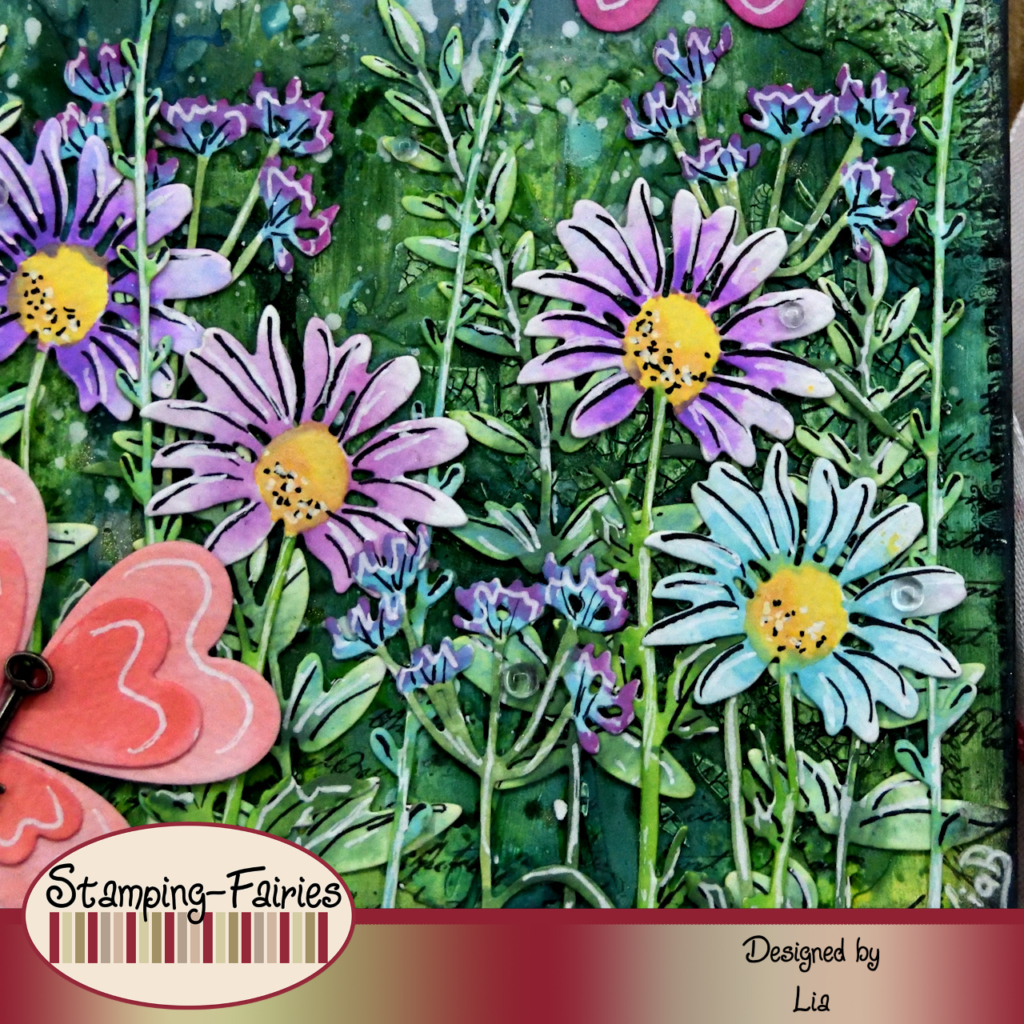
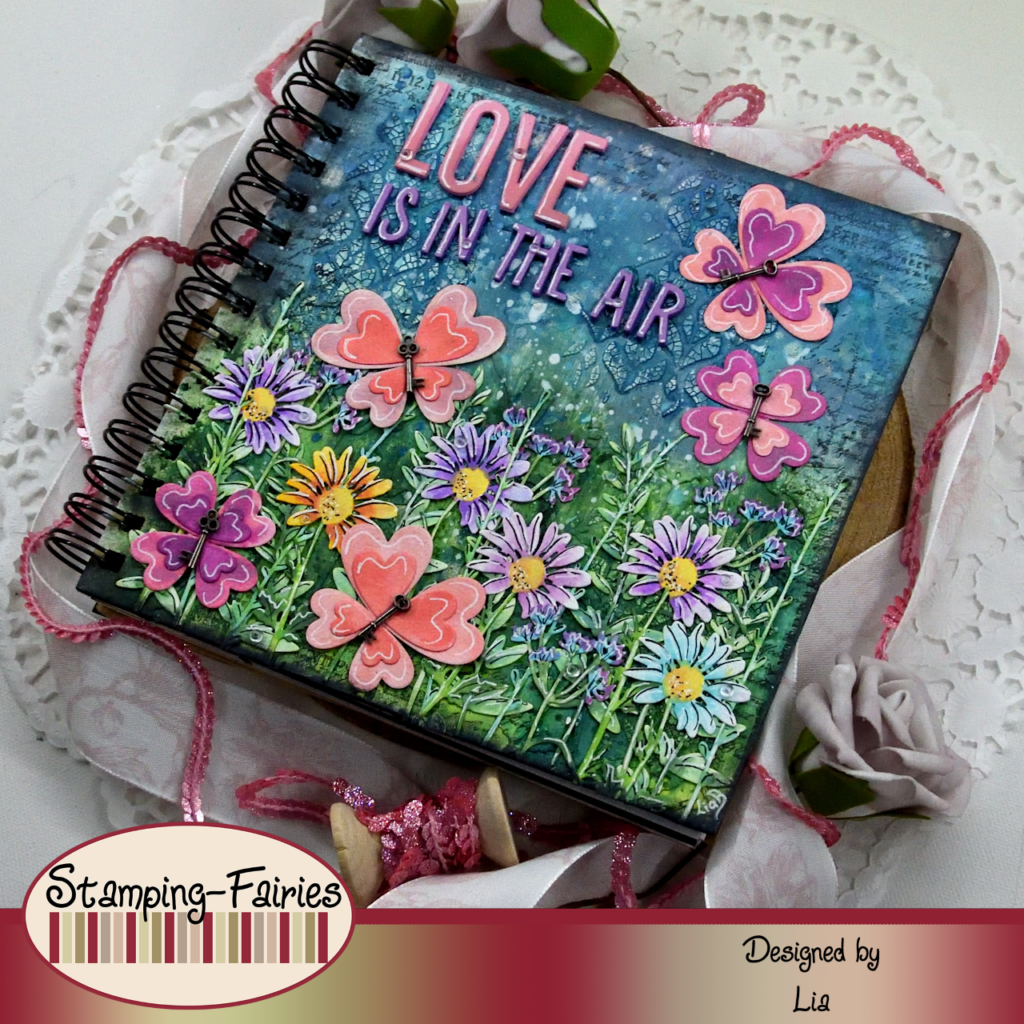
For this project, I worked on the cover of my new 20 x 20 cm art Journal book. The cover is made out of brown kraft material, so I had to make it white, but first I added some texture to it. I used the Sizzix Vault Wildflowers Thinlits set and I cut a lot of flowers out of watercolour paper. I stuck some of these flowers on the book cover, using Multi Medium Matte. I dried the glue and then I covered everything with white Gesso. So, I had texture right from the beginning, but that was not enough. To add more texture, I used the Deco Floral Layering stencil with Ranger Texture Crackle Paste on some small spots of the cover. I had to wait for the paste to dry before I add colour. I wanted to create a meadow, so I used blue colours on the top of the cover and greens on the bottom. For my blues, I used Salvaged Patina and Stormy Sky Distress Oxide inks along with Winter Frost Distress Mica Stain Spray and Peacock Feathers Distress Spritz. For my green colours, I used Twisted Citron and Pine Needles Distress Oxide inks along with Rustic Wilderness Distress Spray Stain and the same colour of Distress Spritz. I dried my colours and then I splattered the project with Picket Fence (white) Distress Paint. Next is stamping. I used some stamps from the Tim Holtz Dearly Departed stamp set with VersaFine Onyx Black ink and I added some text details around the edges of the cover. I also used Black Soot Distress Oxide ink to darken the edges. I wanted to try a new (to me) product, so I brought it in at this point. It is the Sheer Shimmer Craft Spray, in colour Sparkle. I used it to splatter and I absolutely love it! With that, my background was done!
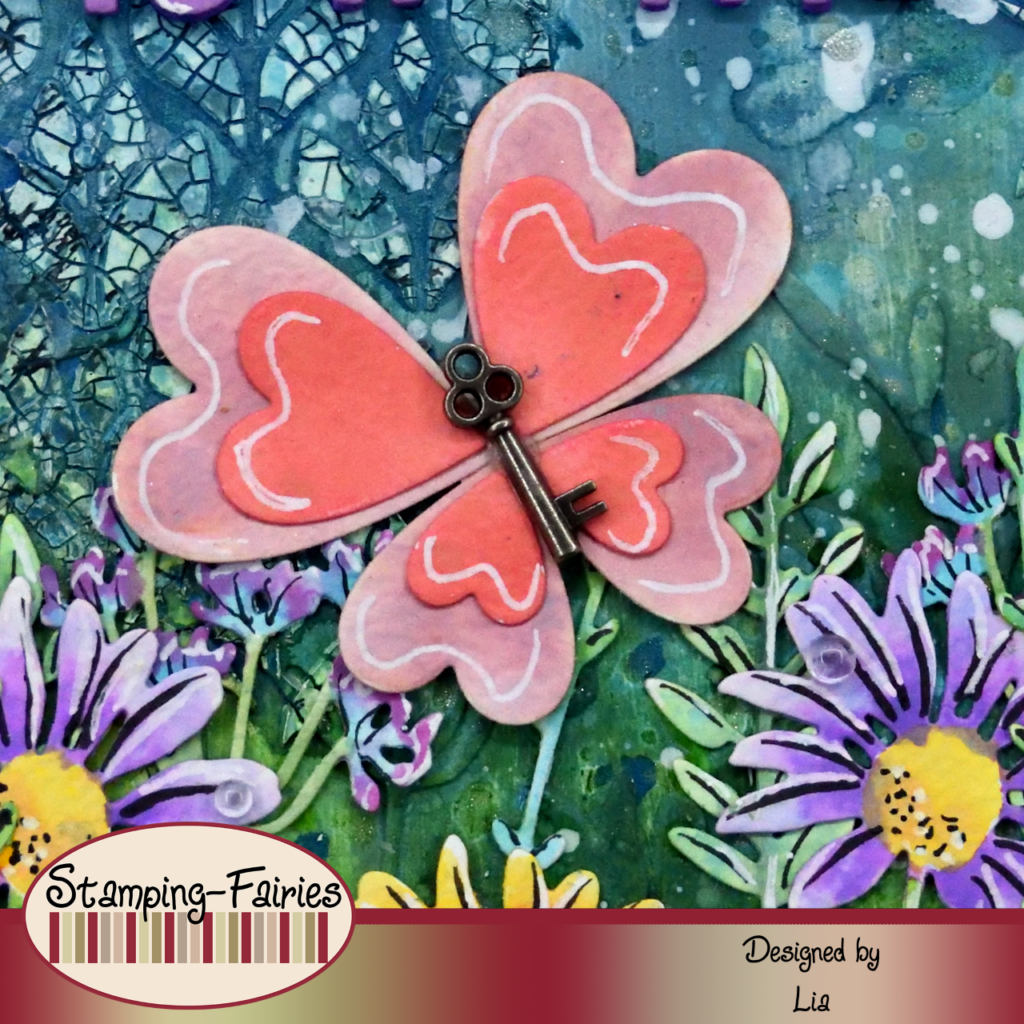
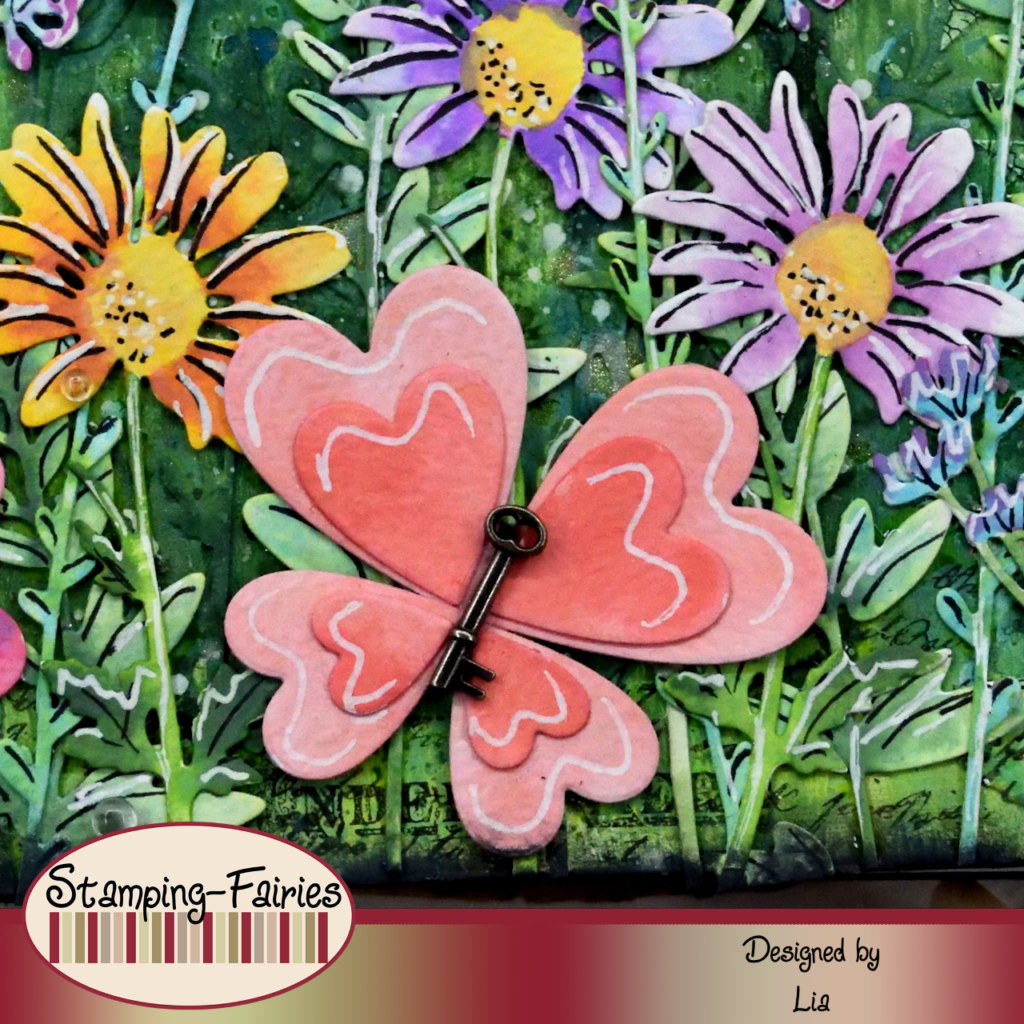
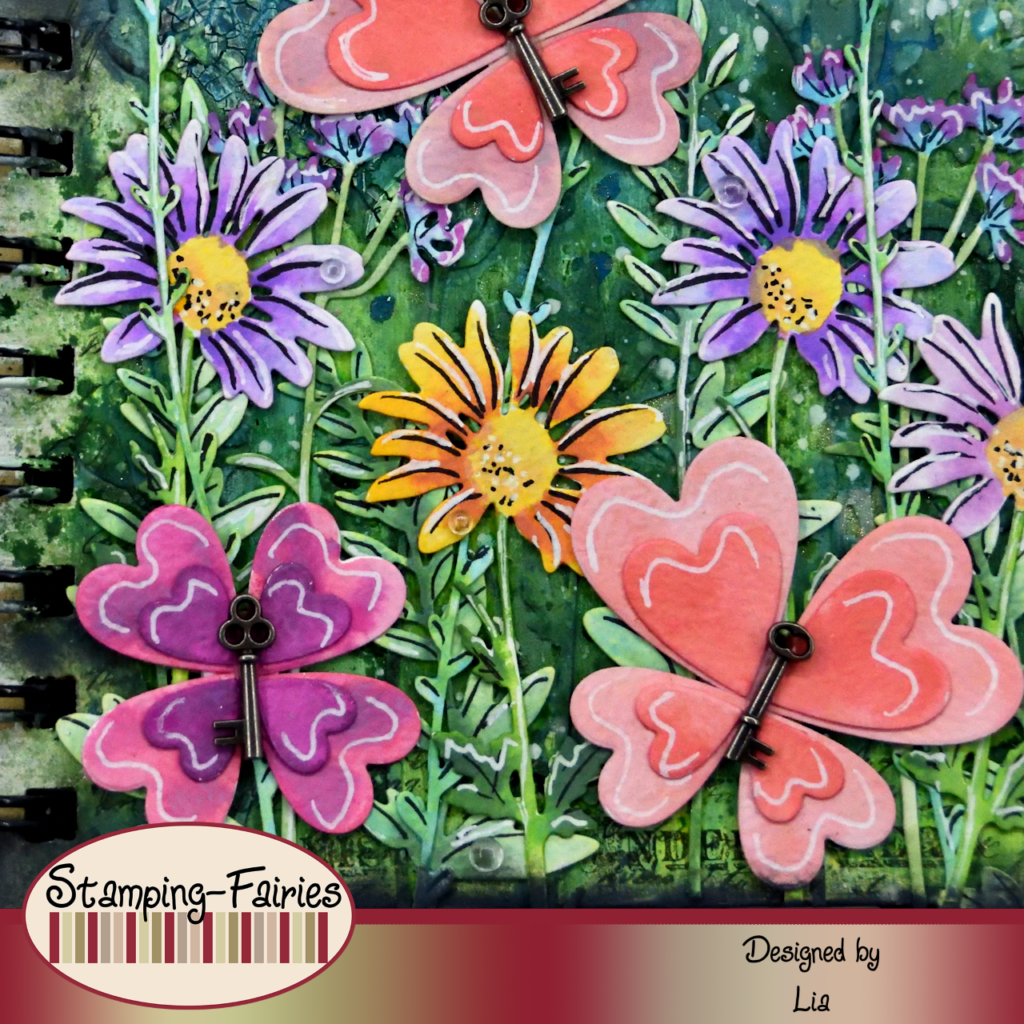
Time to prepare my images! Do you remember those Wildflowers I cut with the Sizzix Thinlits set? I used watercolour paper for them because I wanted to watercolour on them. I also cut a few hearts using the Sizzix Stacked Tiles, Hearts Thinlits set and more watercolour paper. Then I coloured everything using Distress Oxide inks as watercolours. I used a lot, a lot of Distress Oxide inks for this project. Some colours I used as they are, some others I mixed with each other on the paper and some I mixed on the pallet to create a completely different tone. I dried everything and then I added some black lines on the flowers, with a fine black marker. The hearts I turned into butterflies. I cut very small pieces of paper to use as bases to help me put my butterflies together and I used tiny Idea-Ology keys as the butterflies‘ bodies. Aren’t they cute?
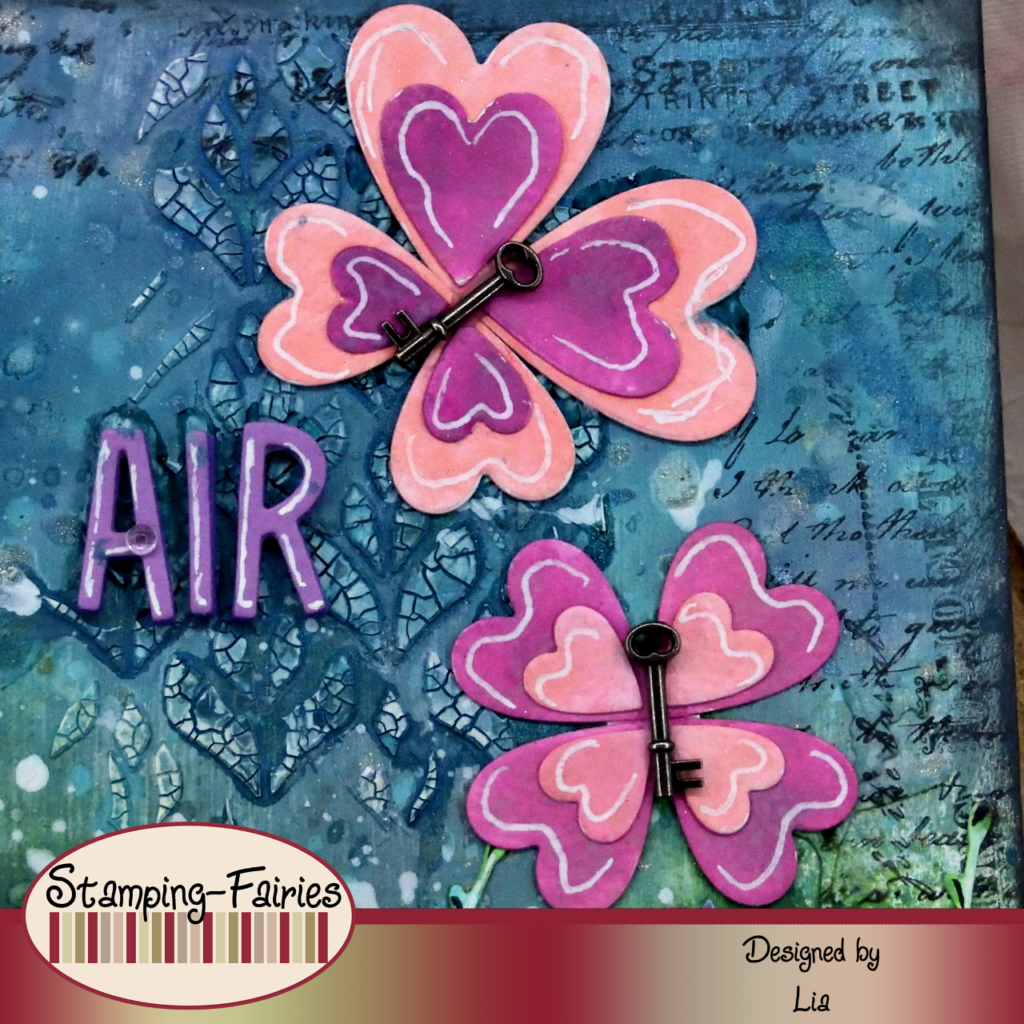
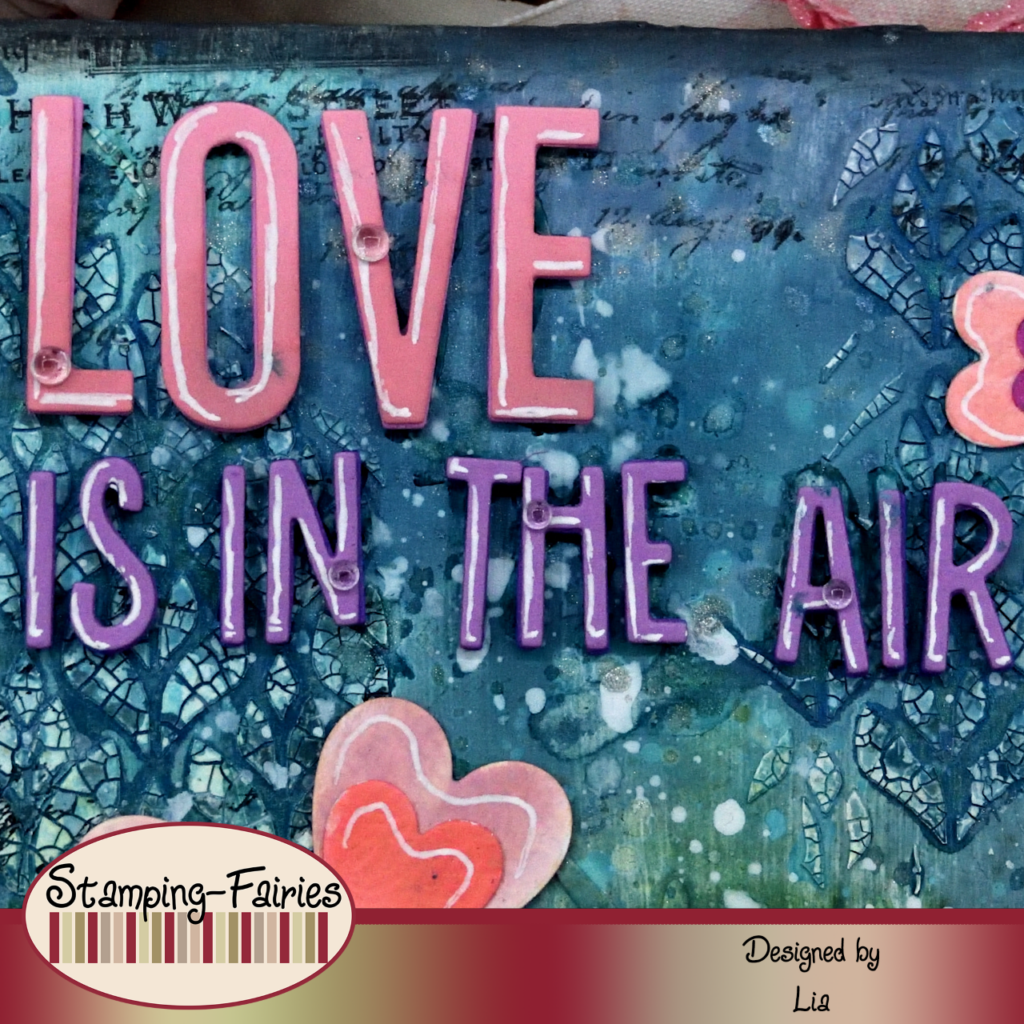
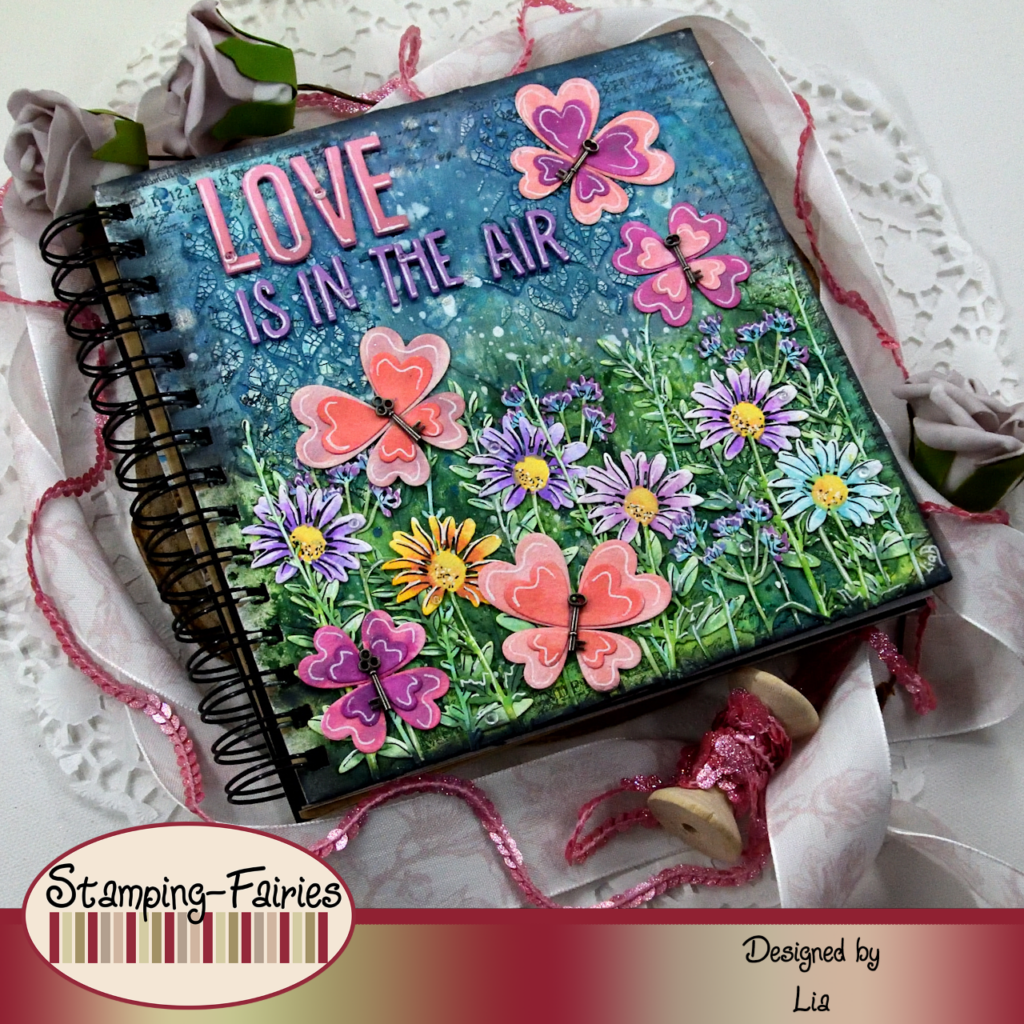
My sentiment consists of two parts. The first is the big „love“ word and it is cut with the Sizzix Alphanumeric Shadow Upper Thinlits set, out of pink cardstock. I added some Victorian Velvet Distress Oxide ink on the bottom part of the letters, to add a little bit more dimension to them. The second part of the sentiment is cut with the alphabet dies from the Sizzix Santa Greetings, Colorize Thinlits set, out of purple cardstock. I cut both parts out of fun foam too, so I could stuck them and give them more dimension. The whole sentiment says: „Love is in the air“ and it is intended to be funny. I have butterflies made out of hearts flying all over this project! I used a white Gelly Roll pen to add some highlights on everything and bind the foreground with the background a little better. As a last little bit of embellishment, I added some Craft Consortium Dew Drops. I really love these embellishments! They really look like dew drops and are discreet and beautiful!
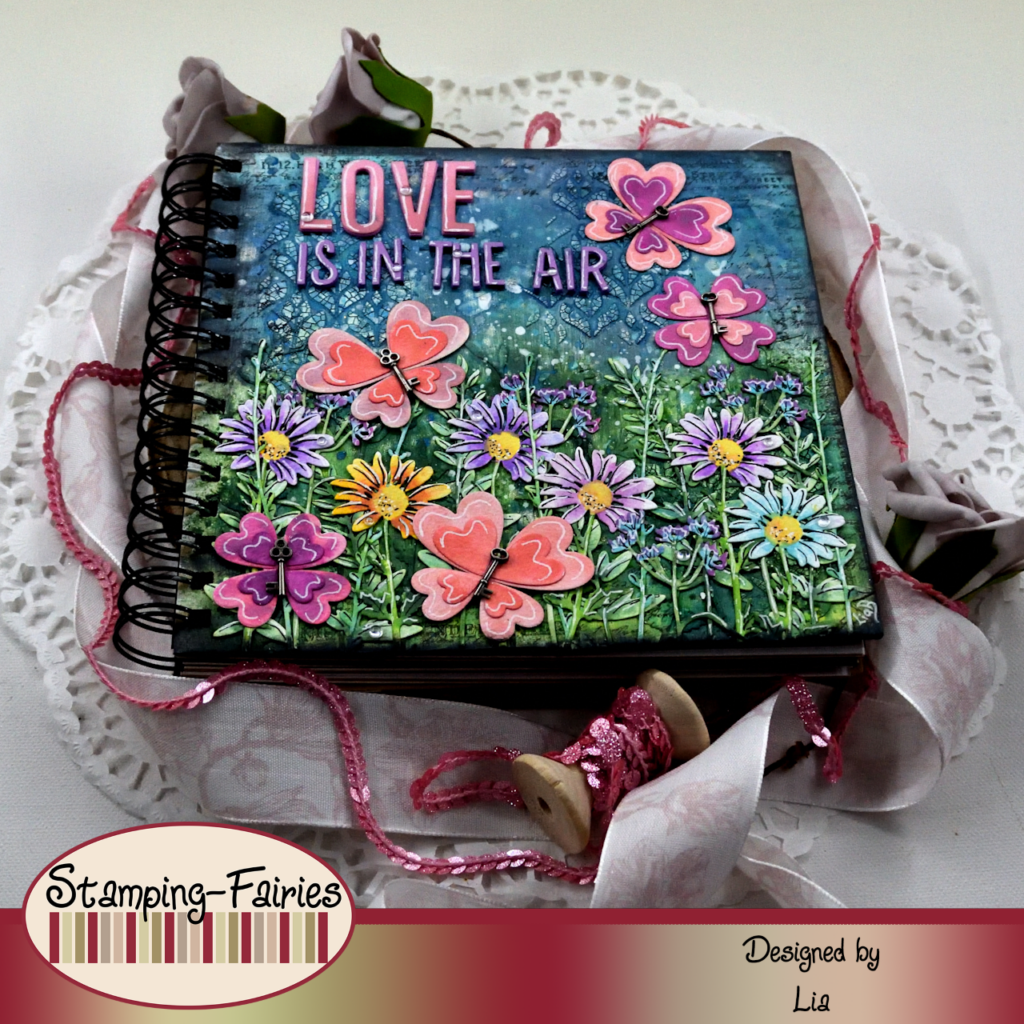
And that was the project for today! I will admit, this is a project I really like looking at. I just stop and stare at it. I missed the colours! I am really looking forward to spending time in the garden again! For now, a paper garden will have to do. I really hope you like today’s project! I hope you got inspired! We will see each other again next Monday! Until then, stay creative and have fun!
*Deutsche Version*
Hallo zusammen! Willkommen zurück zu einem weiteren Mixed-Media Projekt. Der Februar ist da und der Valentinstag steht vor der Tür. Also habe ich für heute ein Projekt voller Herzen vorbereitet! Könnt ihr sie alle sehen? Beginnen wir mit den Materialien, die ich verwendet habe:
Materialien (wenn etwas nicht auf Lager ist, bitte einfach auf „Produkterinnerung“ klicken)
- Sizzix Tim Holtz Thinlits – Vault Wildflowers
- Ranger Multi Medium – Matte
- Finnabair Art Basics – Heavy Gesso White (Tube)
- Ranger Texture Paste Opaque Crackle
- Tim Holtz Layering Stencil – Deco Floral
- Distress Oxide Sprays
- Distress Spray Stain – Rustic Wilderness
- Distress Mica Stain – Winter Frost
- Distress Spritz
- Distress Paint – Picket Fence
- VersaFine Onyx Black
- Tim Holtz Stempelset – Dearly Departed
- Sheer Shimmer Spritz Spray – Sparkle (7ml)
- Ranger – Tim Holtz Distress Oxide Pads
- Sizzix Tim Holtz Thinlits – Stacked Tiles, Hearts
- Tim Holtz – Idea-Ology Adornments Oddities – Keys
- Sizzix Tim Holtz Thinlits – Alphanumeric Shadow Upper
- Sizzix Tim Holtz Thinlits – Santa Greetings, Colorize
- Craft Consortium Essential Adhesive Dew Drops – Clear
Für dieses Projekt habe ich am Deckel meines neuen 20 x 20 cm großen Art Journal Buchs gearbeitet. Der Deckel ist aus braunem Kraftmaterial, also musste ich es weiß machen, aber zuerst habe ich ihm etwas Struktur verliehen. Ich habe das Sizzix Vault Wildflowers Thinlits Set verwendet und viele Blumen aus Aquarellpapier ausgeschnitten. Einige dieser Blumen habe ich mit Multi Medium Matte auf den Buchdeckel geklebt. Ich habe den Kleber getrocknet und dann alles mit weißem Gesso bedeckt. So hatte ich von Anfang an Struktur, aber das war nicht genug. Um mehr Struktur hinzuzufügen, habe ich die Deco Floral Layering Schablone mit Ranger Texture Crackle Paste auf einigen kleinen Stellen des Deckels verwendet. Ich musste warten, bis die Paste getrocknet war, bevor ich Farbe hinzufügen konnte. Ich wollte eine Wiese schaffen, also habe ich oben auf dem Deckel blaue Farben und unten grüne Farben verwendet. Für meine Blautöne habe ich Salvaged Patina und Stormy Sky Distress Oxide Tinten zusammen mit Winter Frost Distress Mica Stain Spray und Peacock Feathers Distress Spritz verwendet. Für meine Grüntöne habe ich Twisted Citron und Pine Needles Distress Oxide Tinten zusammen mit Rustic Wilderness Distress Spray Stain und derselben Farbe Distress Spritz verwendet. Ich habe meine Farben getrocknet und dann das Projekt mit Picket Fence (weißer) Distress Paint bespritzt. Als Nächstes kommt das Stempeln. Ich habe einige Stempel aus dem Dearly Departed Stempelset von Tim Holtz mit VersaFine Onyx Black Tinte verwendet und einige Textdetails an den Rändern des Deckels hinzugefügt. Ich habe außerdem Black Soot Distress Oxide Tinte verwendet, um die Ränder abzudunkeln. Ich wollte ein (für mich) neues Produkt ausprobieren, also habe ich es an dieser Stelle mitgebracht. Es ist das Sheer Shimmer Craft Spray in der Farbe Sparkle. Ich habe es zum Spritzen verwendet und bin absolut begeistert davon! Damit war mein Hintergrund fertig!
Zeit, meine Bilder vorzubereiten! Erinnert ihr euch an die Wildblumen, die ich mit dem Sizzix Thinlits Set ausgeschnitten habe? Ich habe dafür Aquarellpapier verwendet, weil ich sie mit Aquarellfarben bemalen wollte. Ich habe auch ein paar Herzen ausgeschnitten und dazu das Sizzix Stacked Tiles, Hearts Thinlits Set und noch mehr Aquarellpapier verwendet. Dann habe ich alles mit Distress Oxide Tinten als Wasserfarben eingefärbt. Ich habe für dieses Projekt sehr, sehr viele Distress Oxide Tinten verwendet. Manche Farben habe ich so verwendet, wie sie sind, andere habe ich auf dem Papier miteinander gemischt und manche habe ich auf der Palette gemischt, um einen völlig anderen Ton zu erzeugen. Ich habe alles getrocknet und dann mit einem feinen schwarzen Stift ein paar schwarze Linien auf die Blumen gezogen. Aus den Herzen habe ich Schmetterlinge gemacht. Ich habe sehr kleine Papierstücke ausgeschnitten, um sie als Unterlage zu verwenden und damit ich meine Schmetterlinge zusammensetzen konnte, und ich habe winzige Idea-Ology Schlüssel als Körper der Schmetterlinge verwendet. Sind sie nicht süß?
Mein Spruch besteht aus zwei Teilen. Der erste ist das große Wort „Love“ und es ist mit dem Sizzix Alphanumeric Shadow Upper Thinlits Set aus rosa Karton ausgestanzt. Ich habe etwas Victorian Velvet Distress Oxide Tinte auf den unteren Teil der Buchstaben aufgetragen, um ihnen etwas mehr Dimension zu verleihen. Der zweite Teil des Spruchs ist mit den Alphabet Stanzen aus dem Sizzix Santa Greetings, Colorize Thinlits Set aus lila Karton ausgestanzt. Ich habe auch beide Teile aus Schaumstoff ausgestanzt, damit ich sie aufkleben und ihnen mehr Dimension verleihen konnte. Der ganze Spruch sagt: „Liebe liegt in der Luft“ und soll lustig sein. Überall in diesem Projekt fliegen Schmetterlinge aus Herzen! Ich habe einen weißen Gelly Roll Stift verwendet, um ein paar Highlights auf alles zu setzen und den Vordergrund etwas besser mit dem Hintergrund zu verbinden. Als letzte kleine Verzierung habe ich einige Craft Consortium Dew Drops hinzugefügt. Ich liebe diese Verzierungen sehr! Sie sehen wirklich aus wie Tautropfen und sind diskret und wunderschön!
Und das war das Projekt für heute! Ich gebe zu, das ist ein Projekt, das ich mir wirklich gerne anschaue. Ich bleibe einfach stehen und starre es an. Ich habe die Farben vermisst! Ich freue mich wirklich darauf, wieder Zeit im Garten zu verbringen! Fürs Erste muss ein Papiergarten reichen. Ich hoffe sehr, dass euch das heutige Projekt gefällt! Ich hoffe, ihr habt euch inspirieren lassen! Wir sehen uns nächsten Montag wieder! Bis dahin bleibt kreativ und habt Spaß!

Winter wishes