Butterfly Wishes
*German version below | Deutsche Version unten*
Hello everyone! Welcome back to another Mixed Media project. I was watching Tim Holtz playing with the Distress products during his last Live video, and I thought that I haven’t used my paints for some time. So, I have a project full of colour for you today! Let’s start with the materials I used:
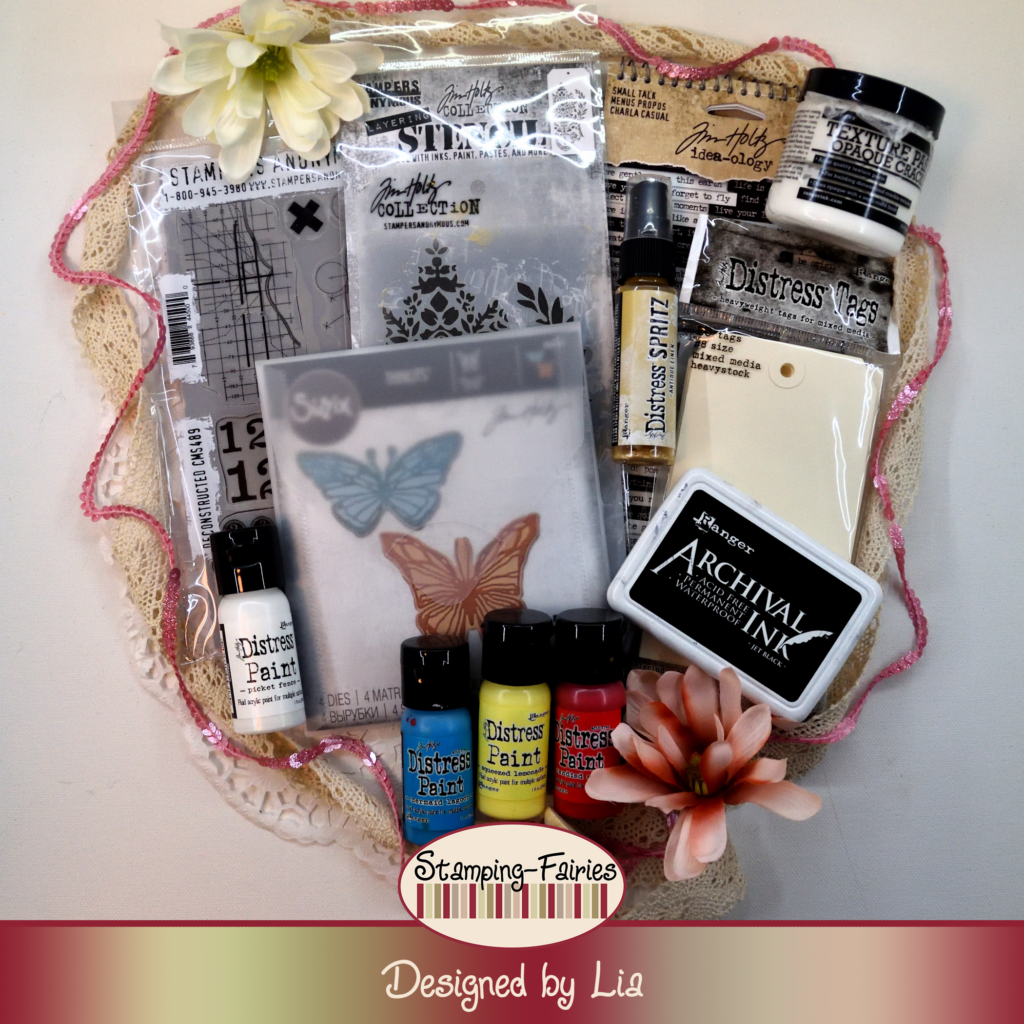
Materials (If something is not in stock, please simply click on “Product reminder”/ “Produkterinnerung”)
- Tim Holtz Distress Heavystock Tags #8
- Distress Paints
- Archival Ink – Jet Black
- Tim Holtz Stamp Set – Deconstructed
- Tim Holtz Layering Stencil – Crest
- Ranger Texture Paste Opaque Crackle
- Sizzix Tim Holtz Thinlits – Vault Scribbly Butterfly
- Black Cardstock
- Distress Spritz – Antique Linen
- Tim Holtz Small Talk Sticker Book
- Tim Holtz – Idea-Ology – Droplets – Halloween
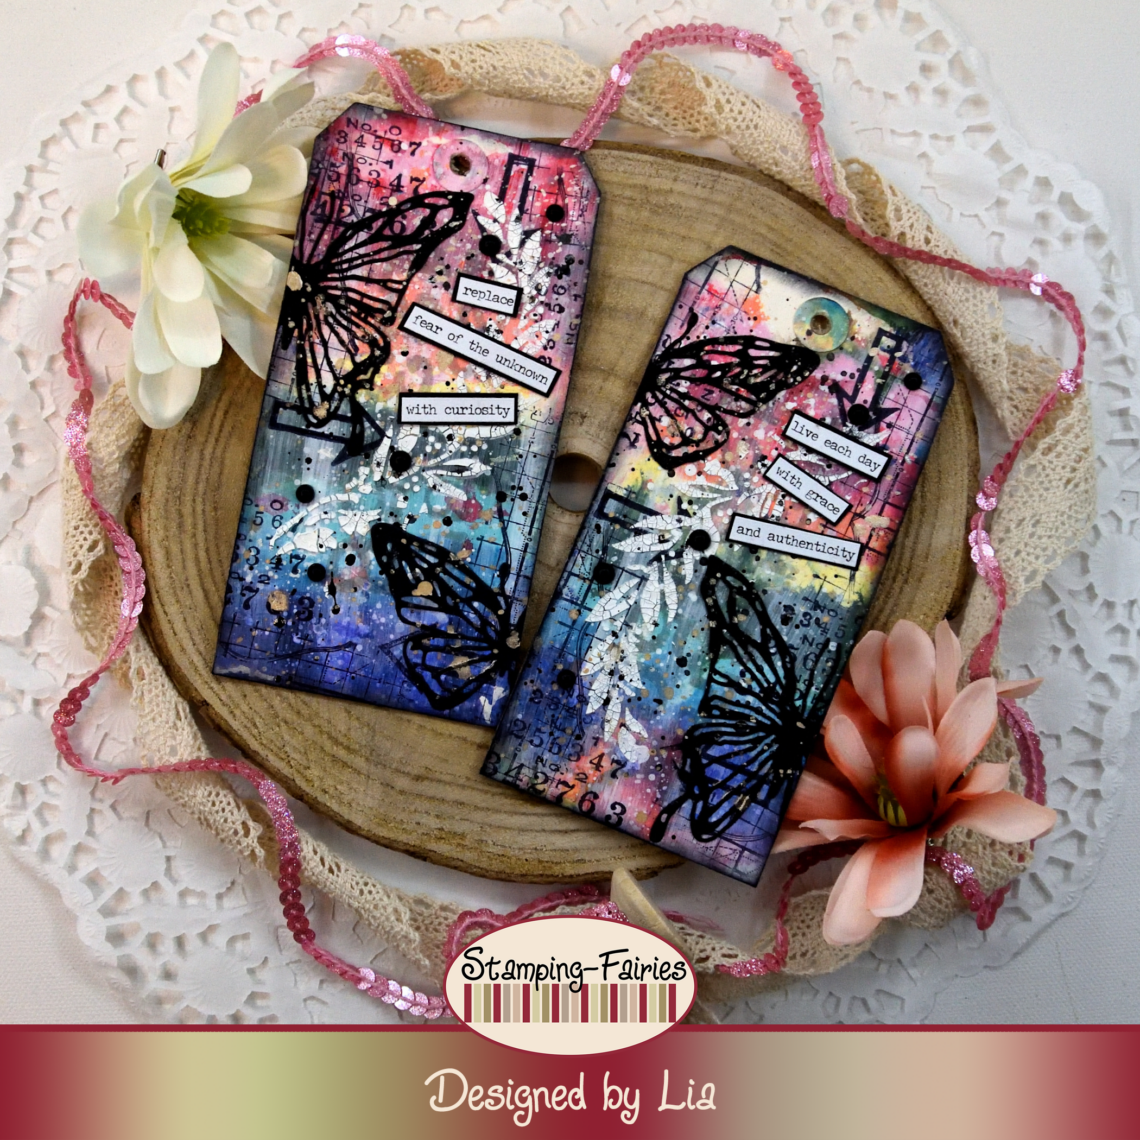
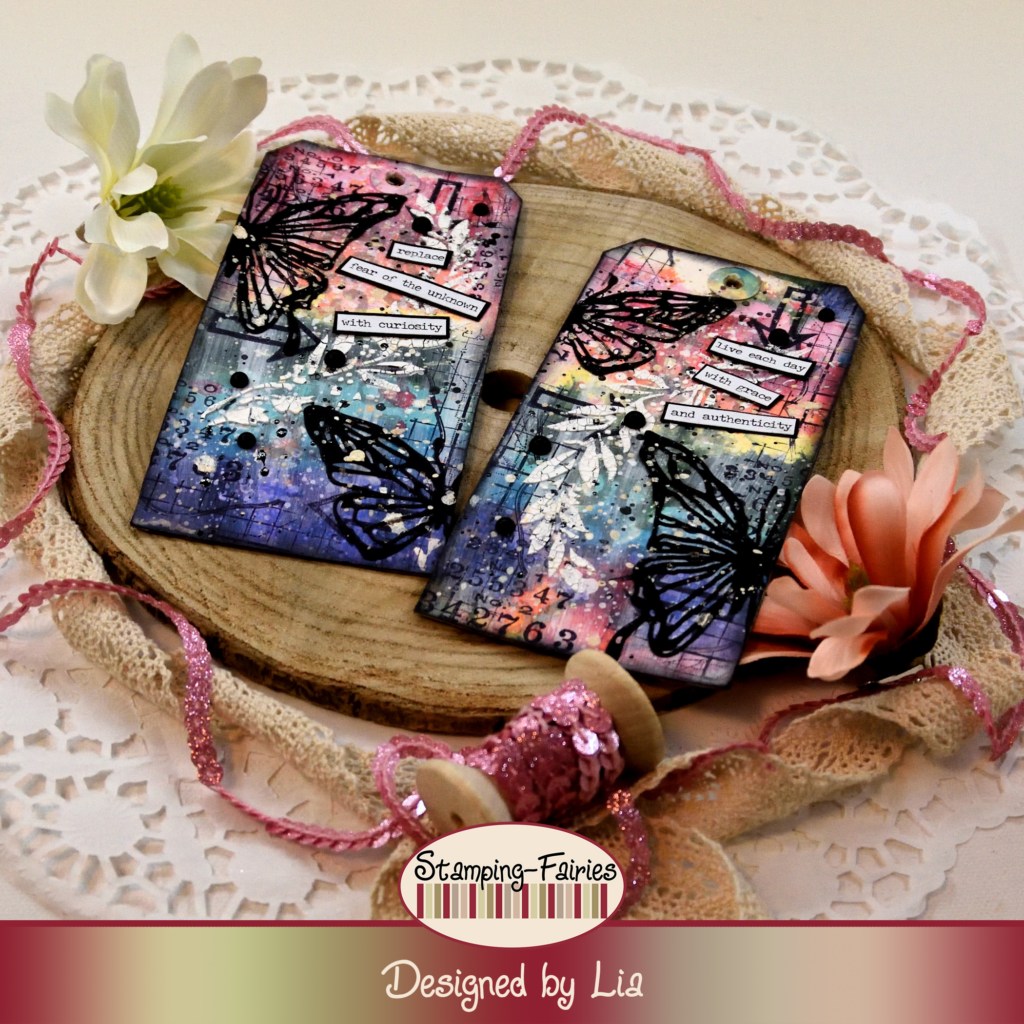
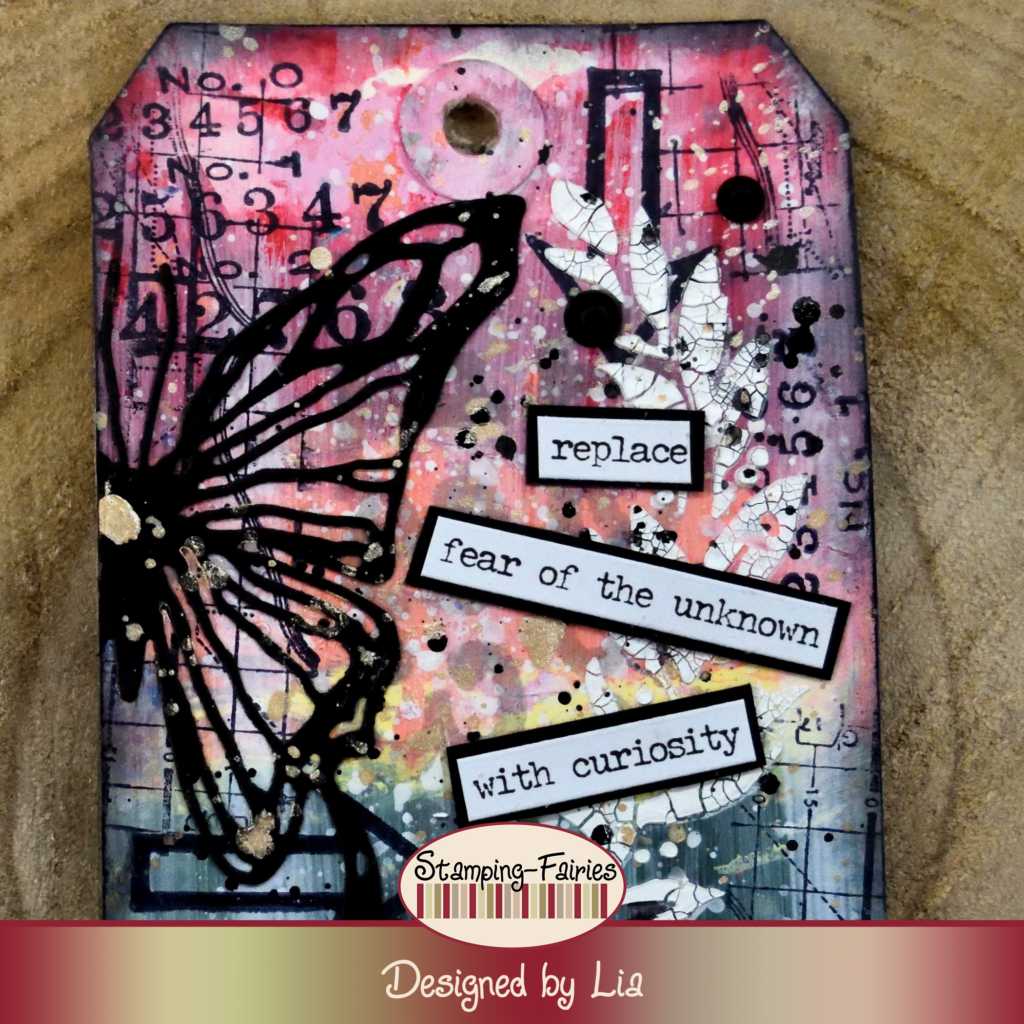
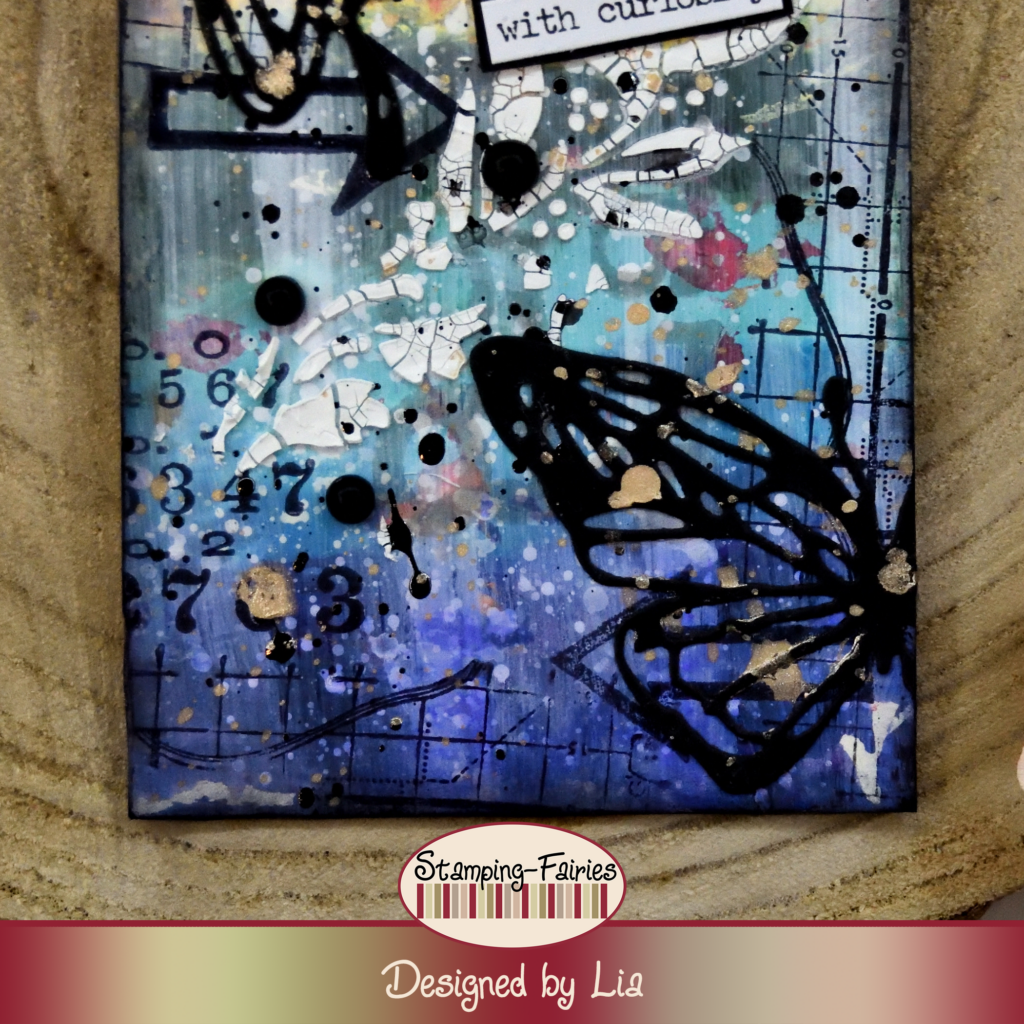
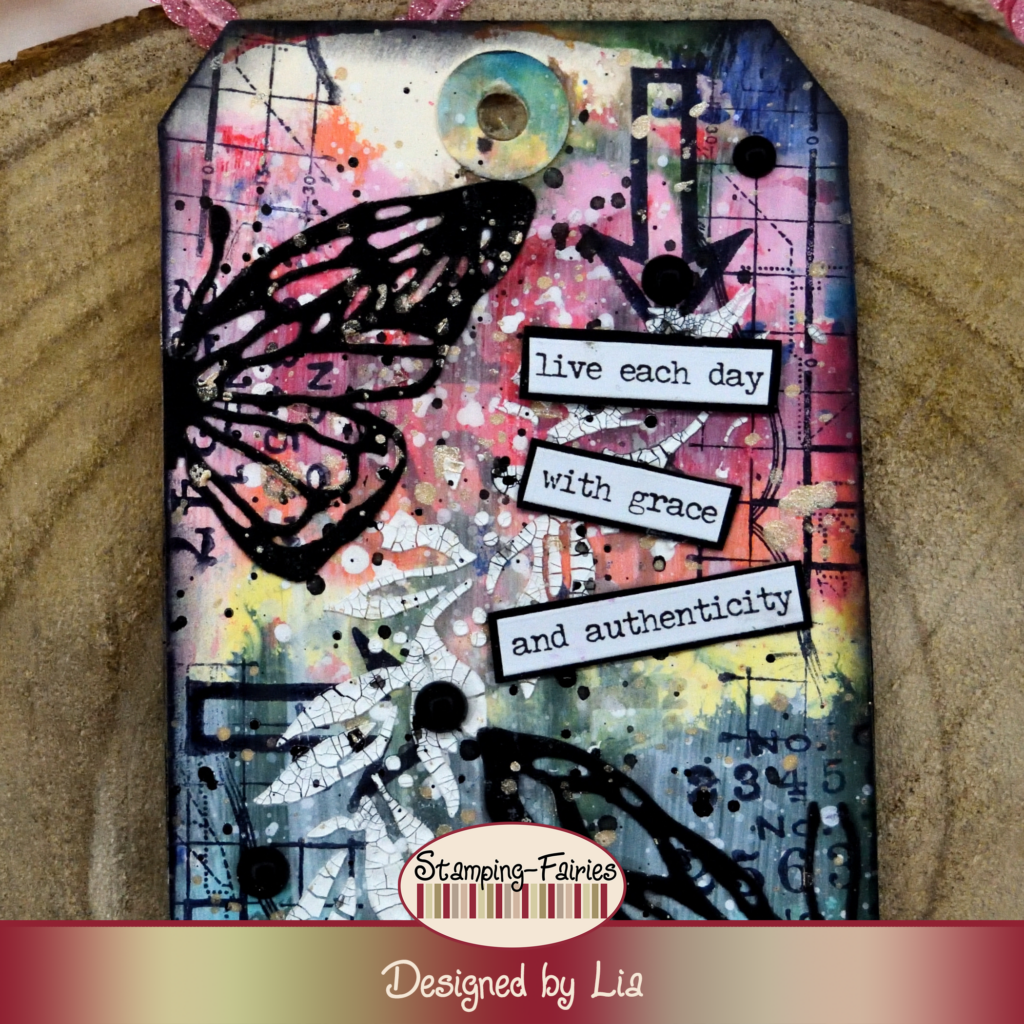
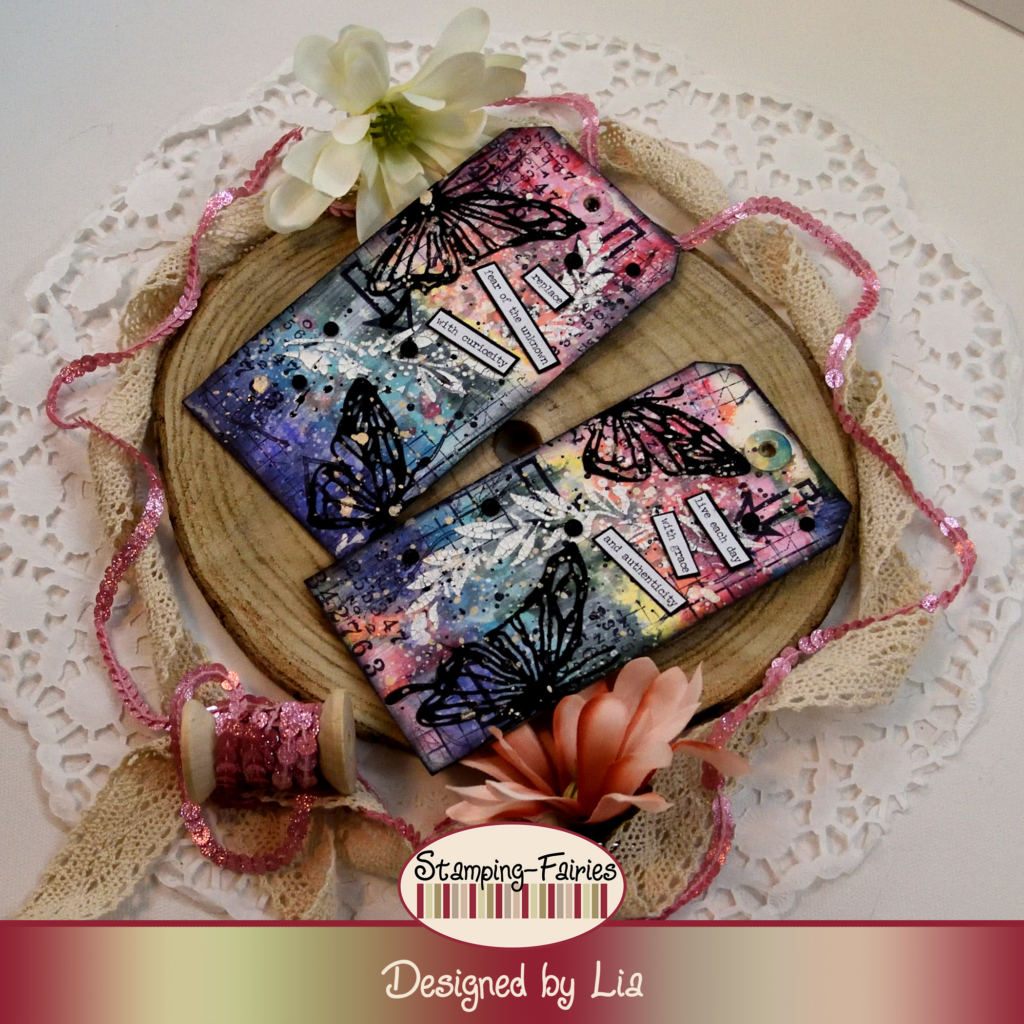
For today’s project, I worked on two Ranger Distress Tags size #8. These Tags are made of heavyweight mixed media paper and they are perfect for using Distress products on them. I did not start with Gesso this time, mostly because I forgot about it (I was excited to play with the colours), but also because it was not really necessary. I used Distress Paints (acrylics) and very little water. These Tags can easily handle that. My colours are (top to bottom) Candied Apple, Kitsch Flamingo, Carved Pumpkin, Squeezed Lemonade, Rustic Wilderness, Salvaged Patina, Mermaid Lagoon and Villainous Potion. I put drops of the colours on my glass surface, in a line, sprayed them with a little bit of water and then I just swiped the Tags over the colours. I gave the Tags a mist of water, just to make the colours move a little bit more, and then I dried them. The colours were a bit too strong so I diluted a little bit of Picket Fence (white) Distress Paind and painted it over the Tags. That made my colours a little more pale and eventually helped my images stand out better. Time for some stamping! I used stamps from the Tim Holtz Deconstructed stamp set with Ranger Jet Black Archival ink and I added some details, mostly around the edges of the Tags. I really love how the crisp black stands out against all these colours! I wanted a leafy design in the middle of the Tags and I did not have this sort of greenery but there is a really lovely wreath in the Crest Layering stencil. So I used that with Ranger Texture Crackle Paste, right in the middle of each Tags, going upwards for the one and downwards for the other. I splattered my Tags with Black Soot Distress Paint and I dried them. I darkened the edges with my Jet Black Archival ink and the backgrounds were done.
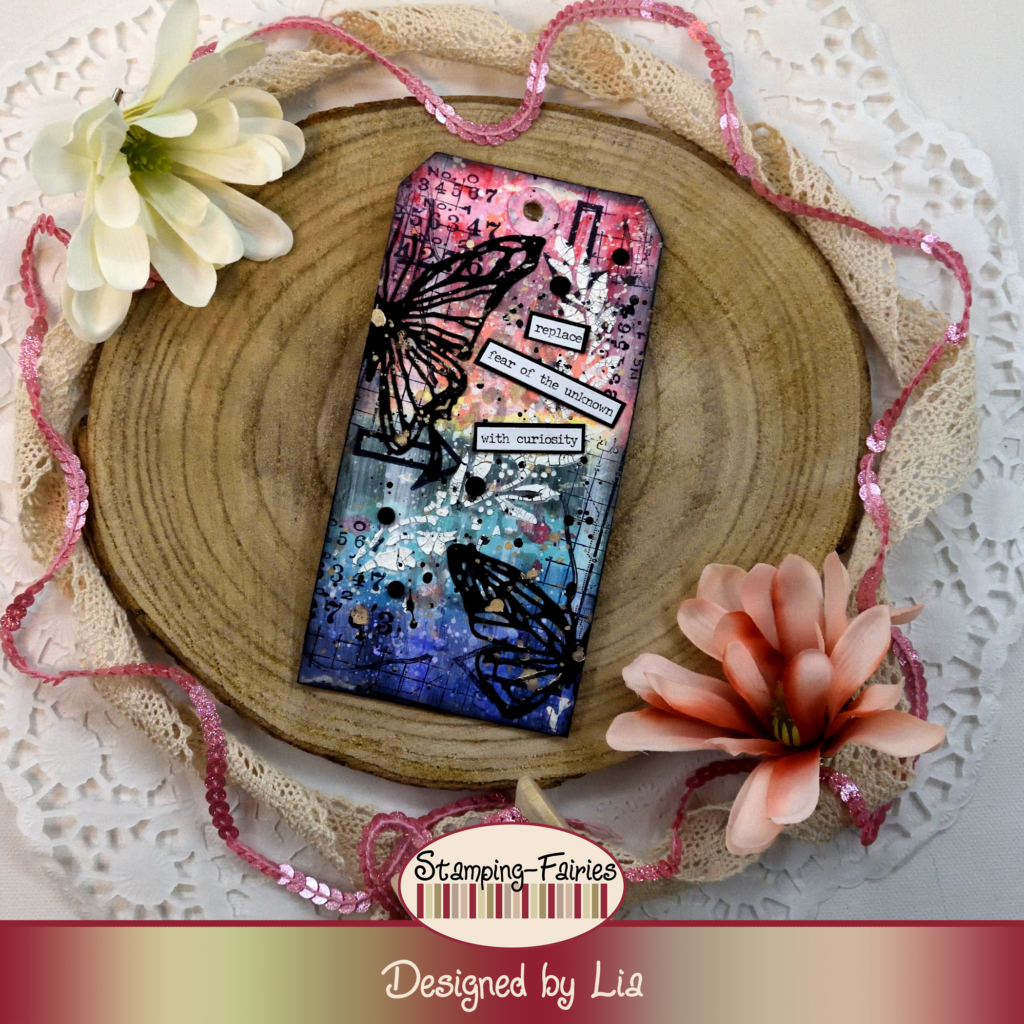
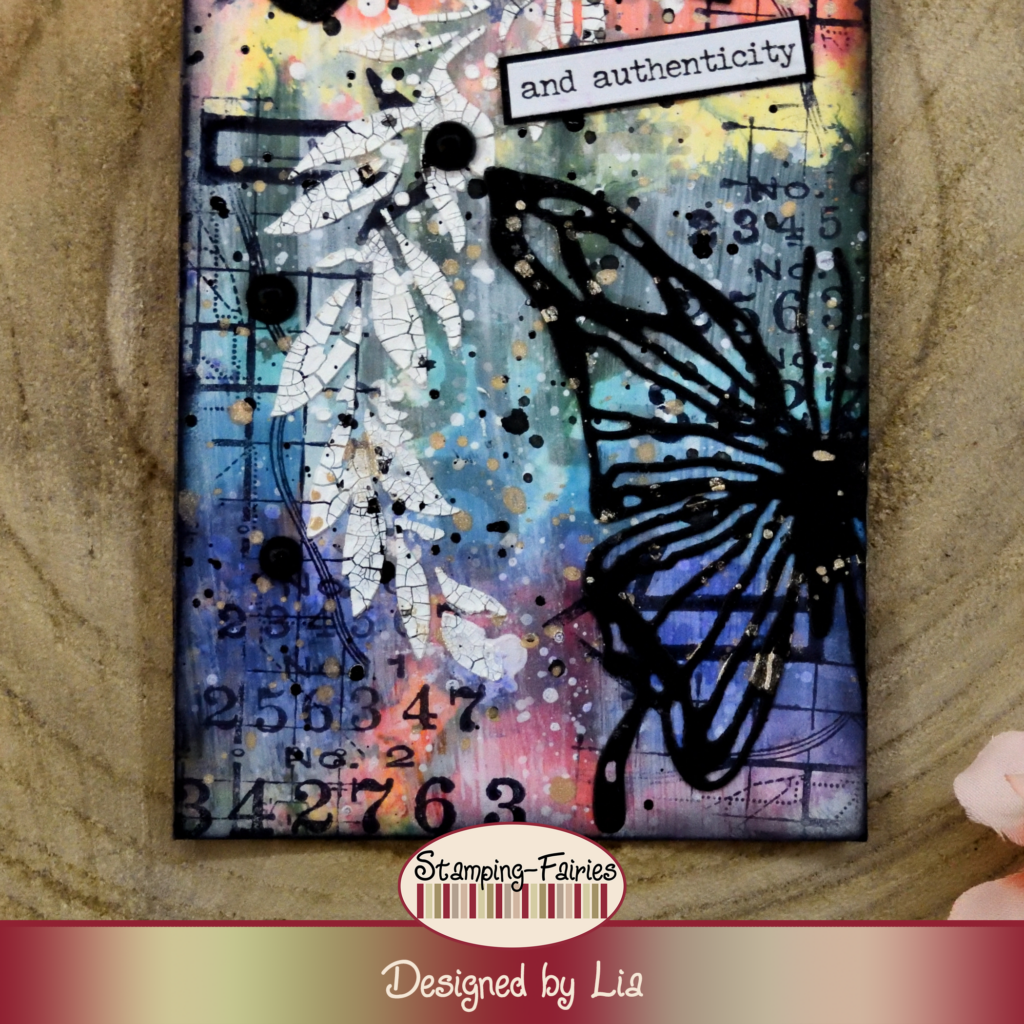
Time to prepare my images. I used the Sizzix Vault Scribbly Butterfly Thinlits set to cut four butterflies (two of each size). I cut only the detail parts, without the shadow layers. I attached the butterflies on the Tags, leaving on wing of each butterfly out. They nearly seem like they are peeking from a corner. To add some sparkle, I splattered the Tags with Antique Linen Distress Spritz and I dried them.

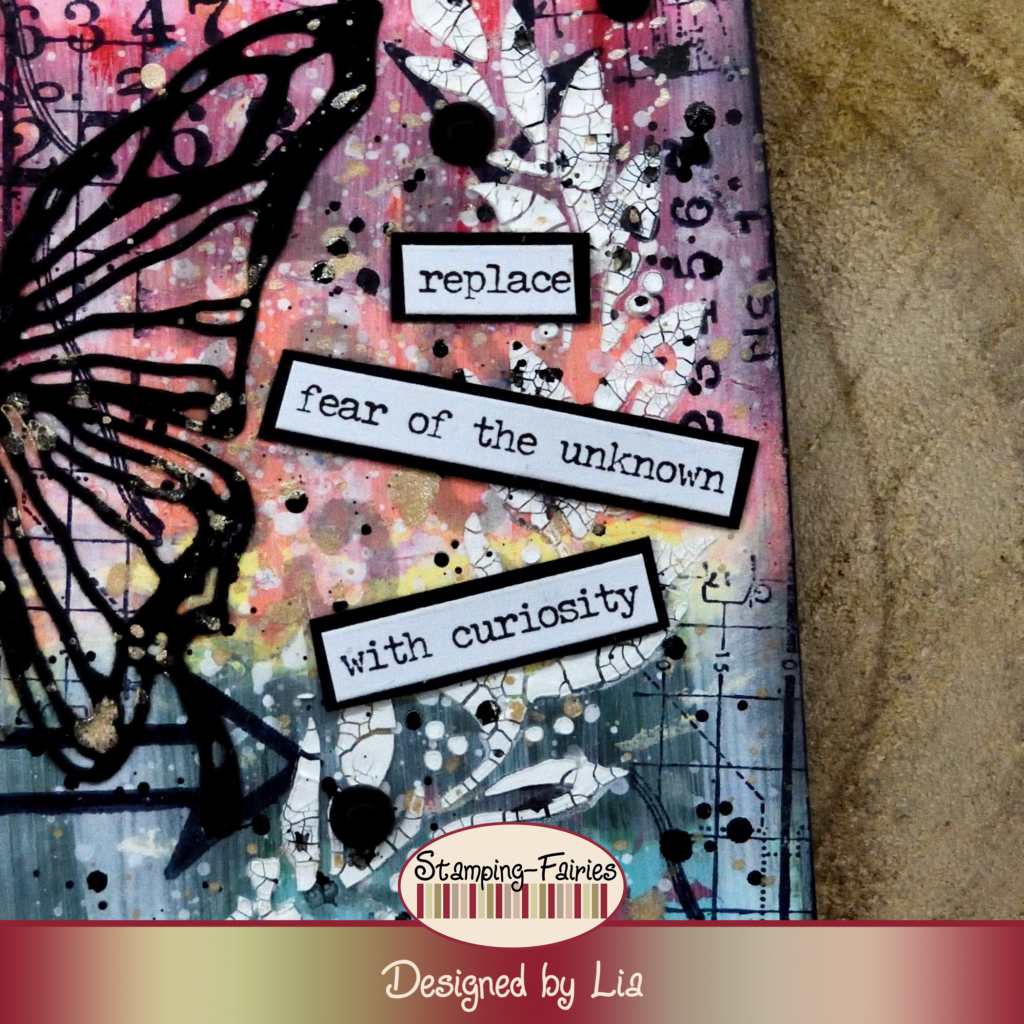
My sentiments come from the Idea-Ology Small Talk Sticker Book. I chose the white stripes, I attached them on black cardstock and cut them out. The sentiments says: „Replace fear of the unknown with curiosity“ and „Live each day with grace and authenticity“ and I find both of them really lovely! As a last little bit of embellishment, I added a few black Idea-Ology Droplets from the Halloween pack.

And that was the project for today! I had so much fun playing with the paints! It took me a couple of days to get them out of my hands afterwards, but that is ok! I did not add any ribbon to these Tags, because I keep my Tags on a ring until it is time to use them. But you can always decorate them with ribbon, string or lace, as you like. I really hope you like today’s project! I hope you got inspired! We will see each other again next Monday! Until then, stay creative and have fun!
*Deutsche Version*
Hallo zusammen! Willkommen zurück zu einem weiteren Mixed-Media Projekt. Ich habe Tim Holtz während seines letzten Live Videos beim Spielen mit den Distress Produkten zugesehen und dachte, ich habe meine Farben schon lange nicht mehr benutzt. Also habe ich heute ein farbenfrohes Projekt für euch! Beginnen wir mit den Materialien, die ich verwendet habe:
Materialien (wenn etwas nicht auf Lager ist, bitte einfach auf „Produkterinnerung“ klicken)
- Tim Holtz Distress Heavystock Tags #8
- Distress Paints
- Archival Ink – Jet Black
- Tim Holtz Stamp Set – Deconstructed
- Tim Holtz Layering Stencil – Crest
- Ranger Texture Paste Opaque Crackle
- Sizzix Tim Holtz Thinlits – Vault Scribbly Butterfly
- Black Cardstock
- Distress Spritz – Antique Linen
- Tim Holtz Small Talk Sticker Book
- Tim Holtz – Idea-Ology – Droplets – Halloween
Für das heutige Projekt habe ich an zwei Ranger Distress Tags der Größe #8 gearbeitet. Diese Tags sind aus schwerem Mixed-Media Papier und eignen sich perfekt für die Verwendung von Distress Produkten. Dieses Mal habe ich nicht mit Gesso angefangen, hauptsächlich, weil ich es vergessen habe (ich war so aufgeregt, mit den Farben zu spielen), aber auch, weil es nicht wirklich nötig war. Ich habe Distress Paints (Acrylfarben) und sehr wenig Wasser verwendet. Diese Tags vertragen das problemlos. Meine Farben sind (von oben nach unten) Candied Apple, Kitsch Flamingo, Carved Pumpkin, Squeezed Lemonade, Rustic Wilderness, Salvaged Patina, Mermaid Lagoon und Villainous Potion. Ich habe Tropfen der Farben in einer Linie auf meine Glasoberfläche geträufelt, sie mit ein wenig Wasser besprüht und dann die Tags einfach über die Farben gezogen. Ich habe die Tags mit Wasser besprüht, damit sich die Farben ein wenig mehr bewegen, und sie dann getrocknet. Die Farben waren ein bisschen zu kräftig, daher habe ich ein wenig Picket Fence Distress Paint (weiß) verdünnt und über die Tags gemalt. Dadurch werden meine Farben ein wenig blasser, und meine Bilder werden besser hervortreten. Zeit zum Stempeln! Ich habe Stempel aus dem Deconstructed Stempelset von Tim Holtz mit Ranger Jet Black Archival Tinte verwendet und einige Details hinzugefügt, hauptsächlich an den Rändern der Tags. Mir gefällt wirklich, wie das klare Schwarz sich von all diesen Farben abhebt! Ich wollte ein Blättermuster in der Mitte der Tags, und ich hatte diese Art von Grün nicht, aber in der Crest Layering Schablone ist ein wirklich schöner Kranz. Also habe ich ihn mit Ranger Texture Crackle Paste verwendet, genau in der Mitte jedes Tags, bei dem einen nach oben, bei dem anderen nach unten. Ich habe meine Tags mit Black Soot Distress Paint bespritzt und sie getrocknet. Ich habe die Ränder mit meiner Jet Black Archival Tinte abgedunkelt und die Hintergründe waren fertig.
Zeit, meine Bilder vorzubereiten. Ich habe das Sizzix Vault Scribbly Butterfly Thinlits Set verwendet, um vier Schmetterlinge auszuschneiden (zwei von jeder Größe). Ich habe nur die Detailteile ausgeschnitten, ohne die Schattenebenen. Ich habe die Schmetterlinge an den Tags befestigt und dabei einen Flügel jedes Schmetterlings herausgelassen. Es sieht fast so aus, als würden sie aus einer Ecke herausgucken. Um etwas Glanz hinzuzufügen, habe ich die Tags mit Antique Linen Distress Spritz bespritzt und sie getrocknet.
Meine Sprüche stammen aus dem Idea-Ology Small Talk Sticker Book. Ich habe die weißen Streifen gewählt, sie auf schwarzen Karton geklebt und ausgeschnitten. Die Sprüche lauten übersetzt: „Ersetze die Angst vor Unbekanntem durch Neugier“ und „Lebe jeden Tag mit Anmut und Authentizität“ und ich finde beide wirklich schön! Als letzte kleine Verzierung habe ich ein paar schwarze Idea-Ology Droplets aus dem Halloween Paket hinzugefügt.
Und das war das Projekt für heute! Ich hatte so viel Spaß beim Spielen mit den Farben! Es hat ein paar Tage gedauert, bis ich sie wieder von meinen Händen bekommen habe, aber das ist ok! Ich habe keine Bänder an diese Tags angebracht, weil ich meine Tags an einem Ring behalte, bis es Zeit ist, sie zu verwenden. Aber ihr könnt sie jederzeit mit Bändern, Schnüren oder Spitze dekorieren, ganz wie ihr möchtet. Ich hoffe sehr, dass euch das heutige Projekt gefällt! Ich hoffe, ihr habt euch inspirieren lassen! Wir sehen uns nächsten Montag wieder! Bis dahin bleibt kreativ und habt Spaß!

the sweet life