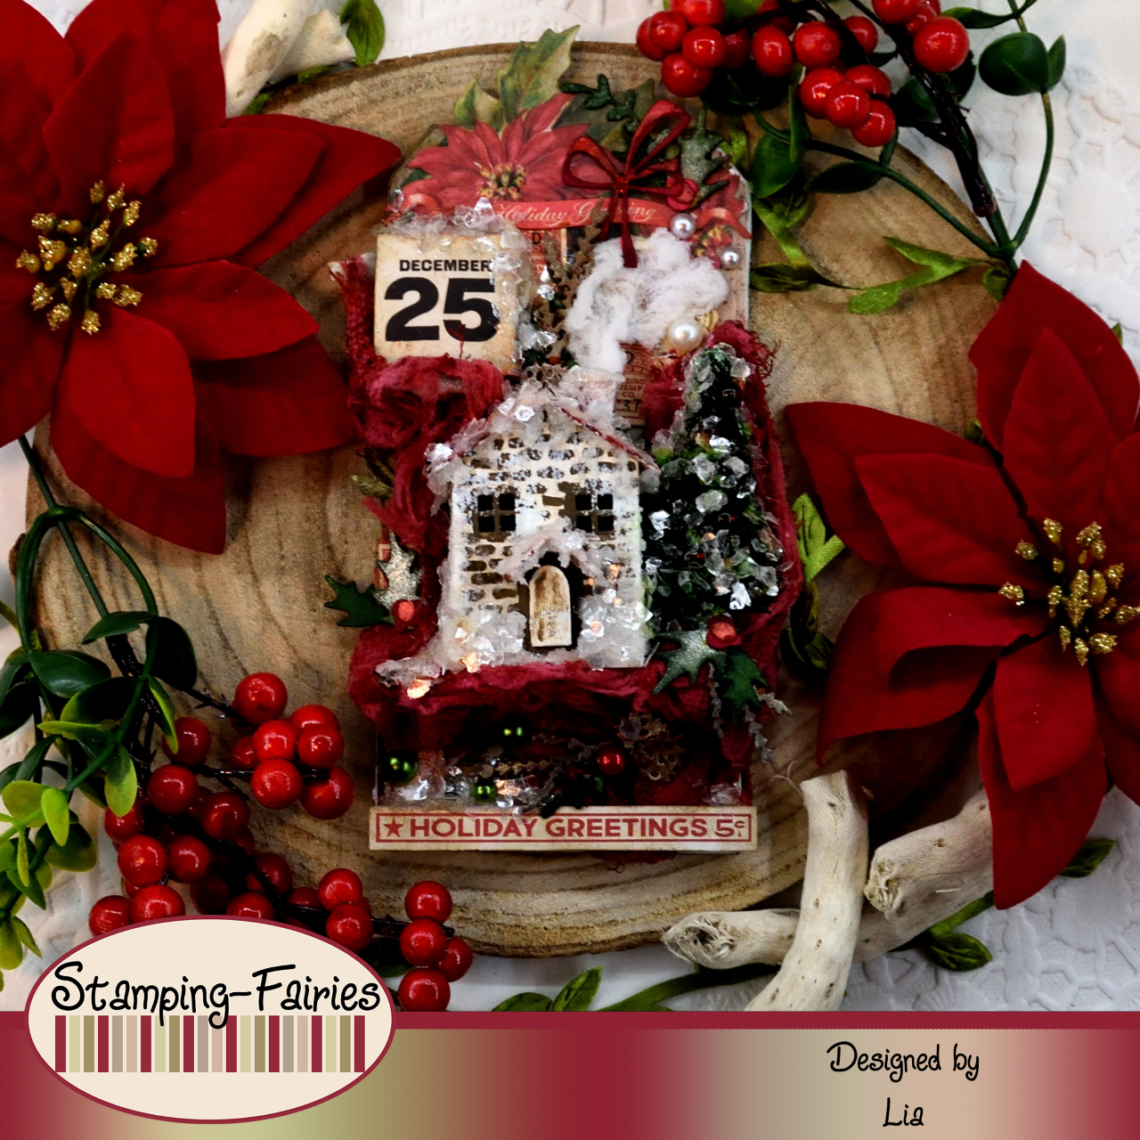
Holiday Greetings
*German version below | Deutsche Version unten*
Hello everyone! Welcome back to another mixed media project. I was a bit sick this week and I was not sure if I would manage to have a project to show you, but I did it! I had a lot of fun with this project! Let’s start with the materials I used:
Materials (If something is not in stock, please simply click on “Product reminder”/ “Produkterinnerung”)
- Tim Holtz – Thickboard Tag #8
- Tim Holtz Etcetera – Pinked Trims
- Tim Holtz Worn Wallpaper Scraps – Christmas
- Ranger Multi Medium – Matte
- Tim Holtz Ephemera Pack – Christmas
- Sizzix Tim Holtz Thinlits – Paper Village #2
- Sizzix Tim Holtz Thinlits – Vintage Sled
- Tim Holtz Texture Paste – Black Opaque
- Distress Paints
- Tim Holtz Distress Grit Paste – Snowfall
- Tim Holtz – Woodlands – Tree Lot
- Distress Spray Stains
- Distress Oxide Sprays
- Distress Mica Stains
- Alcohol Inks
- Tim Holtz idea-ology – Bubbles
- Distress – Mica Flakes
- Tim Holtz – idea-ology – Droplets – Christmas

For this project, I worked on one of the smallest Etcetera Tags. These Tags are made out of thickboard, which makes them a very sturdy surface to work on. I also used an Etcetera Trim. I chose a piece from the Idea-Ology Christmas Worn Wallpaper Scraps and I dressed both the Tag and the Trim. I picked a few pieces from the Idea-Ology Christmas Ephemera Pack, I treated their edges with Ground Espresso Distress Oxide ink and attached them on the Tag. Most of those pieces are not easily visible in the end, but they are there and they do provide some structure. I cut an edge off of the Trim, to make it fit the Tag, and I attached both the main Trim and that edge on the Tag. And with that, the background was ready!

For my images I used a lot of different things today. The center piece is a house made with the Sizzix Paper Village #2 Thinlits set. I cut it out of craft cardstock and then I added details. For the roof, I used Black Texture Paste with my spatula and I tried to create shapes to look like roof tiles. Then I painted the roof and the house with Distress Paints. All the little bricks on it are hand painted. Once the paint was dry, I added some Grit Paste Snowfall on it and I tried to create some icicles hanging from the roof. Next to my house there is a little tree. That comes from the Idea-Ology Woodlands Tree Lot Pack and it is coloured with Rustic Wilderness Distress Spray Stain and Fresh Balsam Distress Mica Stain Spray. It is decorated with Christmas balls I made out of the Idea-Ology Bubbles Pack. I coloured the Bubbles with Terra Cotta alcohol ink. I was going for red but I got the wrong colour and I realized it too late (what can I say, I was sick! I am surprised I realized it at all!). I cut a few more Christmas greenery and a bow, using the Sizzix Vintage Sled Thinlits set. For colouring them, I used Vintage Photo Distress Oxide ink, Rustic Wilderness and Lumberjack Plaid Distress Spray Stains and Tart Cranberry, Fresh Balsam and Unravelled Distress Mica Stains. I also cut a piece of bandage cloth and coloured it with Lumberjack Plaid Distress Spray Stain and Tart Cranberry Distress Mica Stain Spray. Instead of the bandage cloth, a better product would be some Idea-Ology Mummy Cloth or Trimmings, but I was out of both, so I used the bandage cloth. I placed everything on my Tag, adding some more Christmas Ephemeras and some white cloth on the house’s chimney.
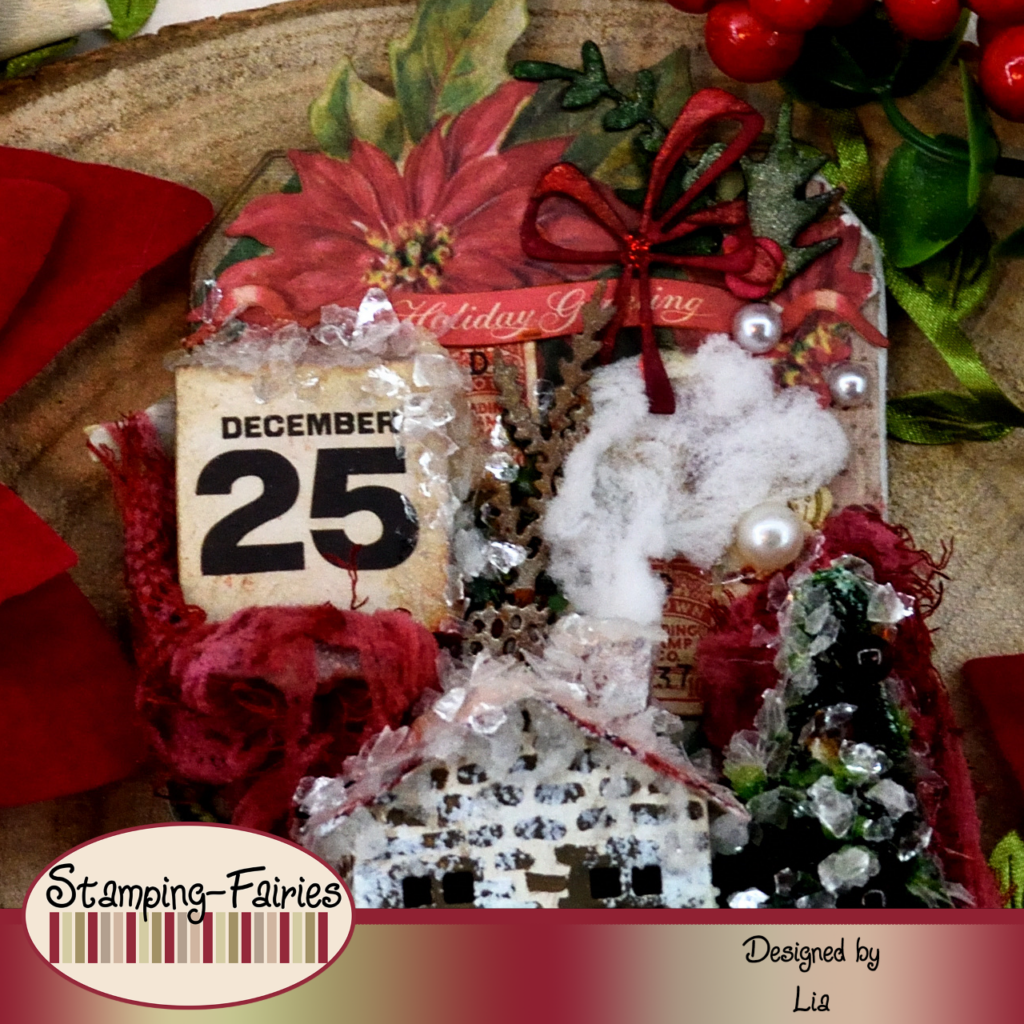
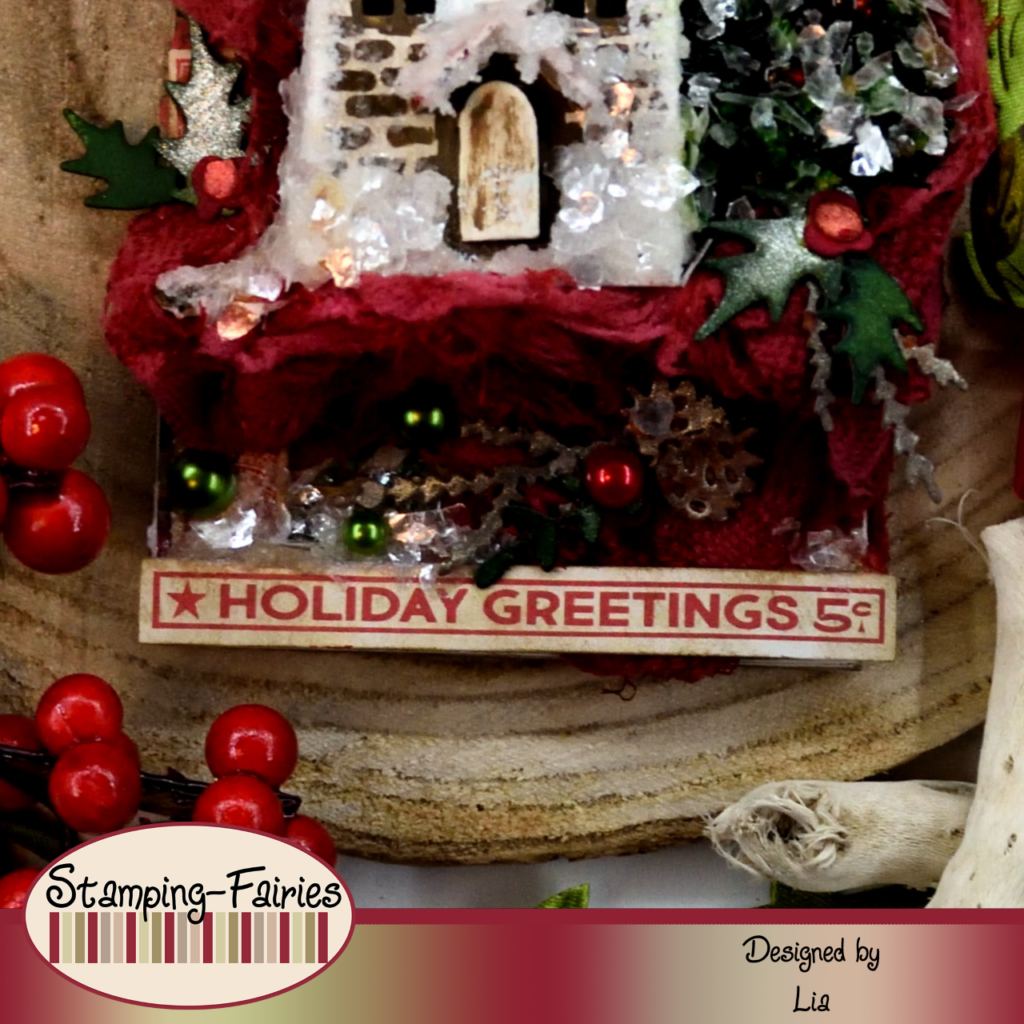
My sentiment also comes from the Idea-Ology Christmas Ephemera Pack. It is a little stripe of paper saying „Holiday Greetings“ on it. I attached it right on the bottom of my Tag. There is yet another little ephemera piece carrying the same sentiment and it is attached on the top of my Tag, right on the Poinsettia ephemeras, but that one is not so visible. After my sentiment was placed on the Tag, I added some more Grit Paste Snowfall all over my elements and then I sprinkled some Mica Flakes on it. I added some Idea-Ology Christmas Droplets and this project was done!
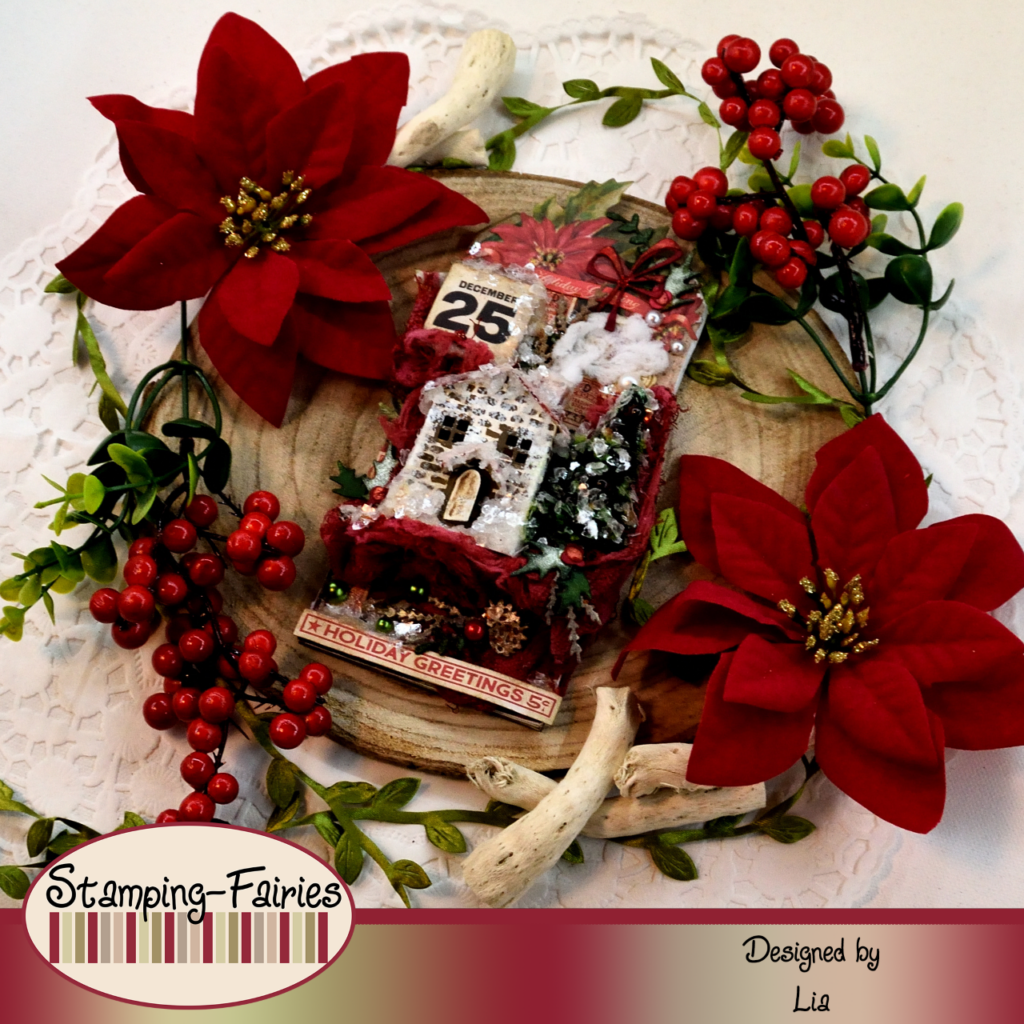
And that was the project for today! I really needed to make something after being sick for nearly an entire week. I apologize if I was not very careful with my work (using the wrong colours and all…). I really hope you like today’s project! I hope you got inspired! We will see each other again next Monday! Until then, stay creative and have fun!
*Deutsche Version*
Hallo zusammen! Willkommen zurück zu einem weiteren Mixed-Media Projekt. Ich war diese Woche etwas krank und war mir nicht sicher, ob ich es schaffen würde, euch ein Projekt zu zeigen, aber ich habe es geschafft! Mir hat dieses Projekt sehr viel Spaß gemacht! Beginnen wir mit den Materialien, die ich verwendet habe:
Materialien (wenn etwas nicht auf Lager ist, bitte einfach auf „Produkterinnerung“ klicken)
- Tim Holtz – Thickboard Tag #8
- Tim Holtz Etcetera – Pinked Trims
- Tim Holtz Worn Wallpaper Scraps – Christmas
- Ranger Multi Medium – Matte
- Tim Holtz Ephemera Pack – Christmas
- Sizzix Tim Holtz Thinlits – Paper Village #2
- Sizzix Tim Holtz Thinlits – Vintage Sled
- Tim Holtz Texture Paste – Black Opaque
- Distress Paints
- Tim Holtz Distress Grit Paste – Snowfall
- Tim Holtz – Woodlands – Tree Lot
- Distress Spray Stains
- Distress Oxide Sprays
- Distress Mica Stains
- Alcohol Inks
- Tim Holtz idea-ology – Bubbles
- Distress – Mica Flakes
- Tim Holtz – idea-ology – Droplets – Christmas
Für dieses Projekt habe ich an einem der kleinsten Etcetera Tags gearbeitet. Diese Tags sind aus Thickboard gefertigt, was sie zu einer sehr stabilen Oberfläche zum Arbeiten macht. Ich habe auch einen Etcetera Trim verwendet. Ich habe ein Stück aus den Christmas Worn Wallpaper Pack von Idea-Ology ausgewählt und sowohl das Etikett als auch den Trim angebracht. Ich habe ein paar Stücke aus dem Christmas Ephemera Paket von Idea-Ology ausgewählt, ihre Kanten mit Ground Espresso Distress Oxide Tinte behandelt und sie am Tag befestigt. Die meisten dieser Teile sind am Ende nicht leicht sichtbar, aber sie sind vorhanden und sorgen für eine gewisse Struktur. Ich habe eine Kante des Trims abgeschnitten, damit er zum Tag passt, und ich habe sowohl den Haupt Trim als auch diese Kante am Tag befestigt. Und damit war der Hintergrund fertig!

Für meine Bilder habe ich heute viele verschiedene Dinge verwendet. Das Herzstück ist ein Haus, das mit dem Sizzix Paper Village #2 Thinlits Set gebaut wurde. Ich habe es aus Bastelkarton ausgeschnitten und dann Details hinzugefügt. Für das Dach habe ich mit meinem Spachtel Black Texture Paste verwendet und versucht, Formen zu erzeugen, die wie Dachziegel aussehen. Anschließend habe ich das Dach und das Haus mit Distress Paints gestrichen. Alle kleinen Mauersteine darauf sind handbemalt. Sobald die Farbe trocken war, habe ich etwas Grit Paste Snowfall darauf aufgetragen und versucht, ein paar Eiszapfen zu formen, die vom Dach hängen. Neben meinem Haus steht ein kleiner Baum. Der stammt aus dem Idea-Ology Woodlands Tree Lot Pack und ist mit Rustic Wilderness Distress Spray Stain und Fresh Balsam Distress Mica Stain Spray eingefärbt. Er ist mit Weihnachtskugeln dekoriert, die ich aus dem Idea-Ology Bubbles Pack gemacht habe. Ich färbe die Bubbles mit Terrakotta Alkoholtinte. Ich hatte mich für Rot entschieden, aber ich habe die falsche Farbe gewählt und es zu spät gemerkt (was soll ich sagen, ich war krank! Ich bin überrascht, dass ich es überhaupt bemerkt habe!). Ich habe mit dem Sizzix Vintage Sled Thinlits Set noch ein paar Weihnachtsgrüns und eine Schleife zugeschnitten. Zum Färben habe ich Vintage Photo Distress Oxide Tinte, Rustic Wilderness und Lumberjack Plaid Distress Spray Stains sowie Tart Cranberry, Fresh Balsam und Unraveled Distress Mica Stains verwendet. Ich habe auch ein Stück Verbandstoff zugeschnitten und es mit Lumberjack Plaid Distress Spray Stain und Tart Cranberry Distress Mica Stain Spray eingefärbt. Anstelle des Verbandstoffs wären ein Mummy Cloth oder Trimmings von Idea-Ology ein besseres Produkt, aber da ich nichts davon hatte, habe ich den Verbandstoff verwendet. Ich habe alles auf meinen Tag geklebt und noch ein paar Weihnachts Ephemeras und etwas weißen Stoff auf den Schornstein des Hauses gelegt.
Mein Spruch stammt auch aus dem Christmas Ephemera Pack von Idea-Ology. Es ist ein kleiner Papierstreifen mit der Aufschrift „Feiertagsgrüße“. Ich habe es direkt unten an meinem Tag angebracht. Es gibt noch ein weiteres kleines Ephemera Stück, das den gleichen Spruch trägt und oben auf meinem Tag angebracht ist, direkt auf den Weihnachtsstern Ephemeras, aber dieses ist nicht so sichtbar. Nachdem mein Spruch auf dem Tag angebracht war, habe ich noch etwas Grit Paste Snowfall auf alle meine Elemente aufgetragen und dann ein paar Mica Flakes darüber gestreut. Ich habe einige Idea-Ology Christmas Droplets hinzugefügt und dieses Projekt war fertig!
Und das war das Projekt für heute! Ich musste unbedingt etwas machen, nachdem ich fast eine Woche lang krank war. Ich entschuldige mich, wenn ich bei meiner Arbeit nicht sehr sorgfältig vorgegangen bin (falsche Farben verwendet usw.). Ich hoffe sehr, dass euch das Projekt gefällt! Ich hoffe, ihr habt euch inspirieren lassen! Wir sehen uns nächsten Montag wieder! Bis dahin bleibt kreativ und habt Spaß!

Herbstgrüße

Summ, summ, summ...
Das könnte dich auch interessieren
Buntes blumiges Kartenset
11. März 2023
Strong Connection Tag
6. Mai 2021
