Summer Baby
*German version below | Deutsche Version unten*
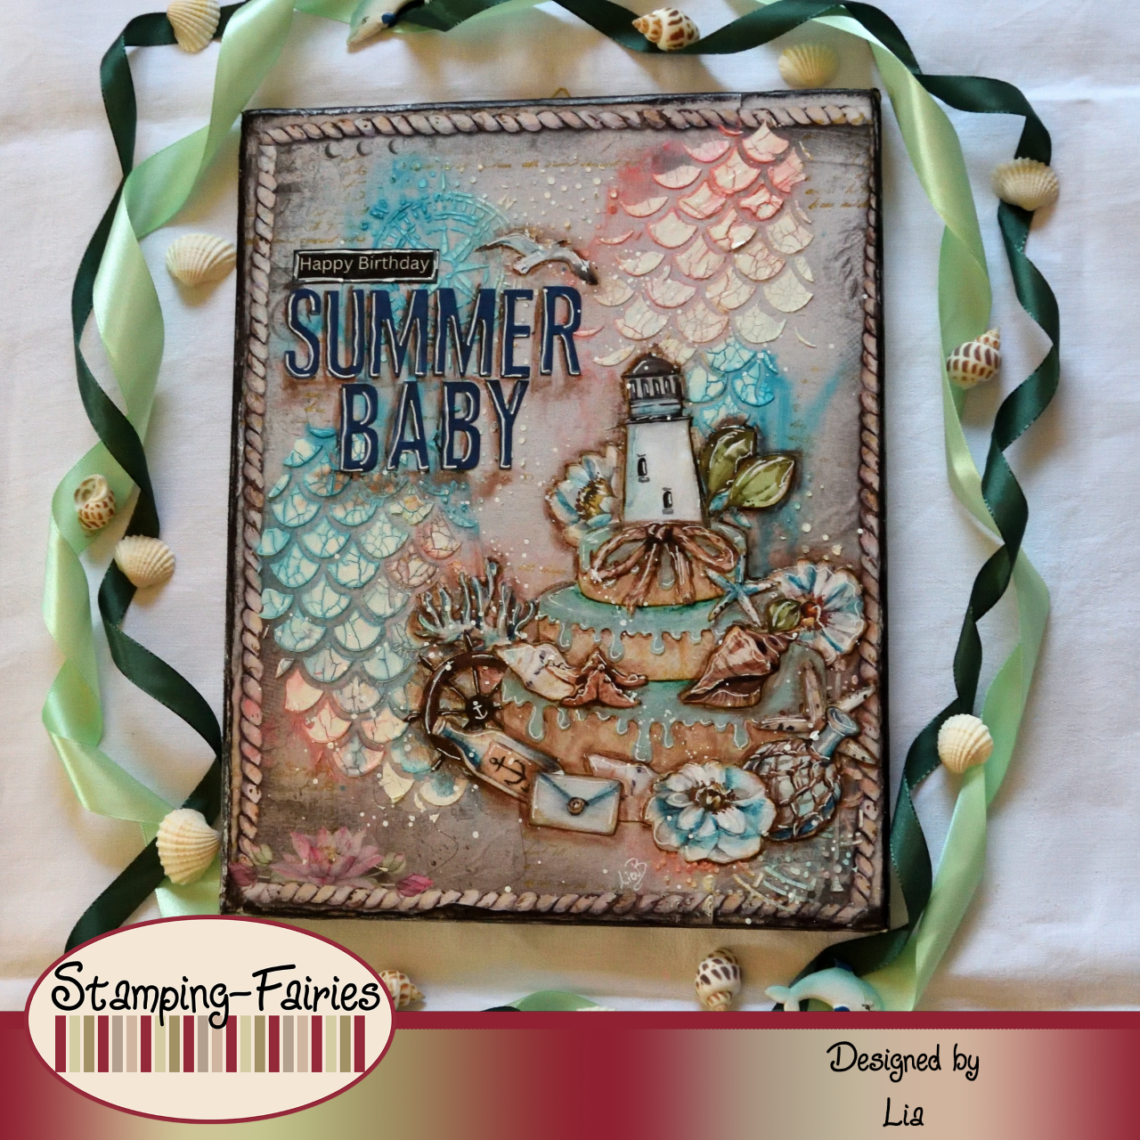
Hello everyone! Welcome back to another mixed media project. Today’s project is somewhat special. I wanted to make something nautical, but I also wanted to have a birthday theme because today happens to be my birthday! So, I made this project for me and all the summer babies out there! Let’s start with the materials I used:
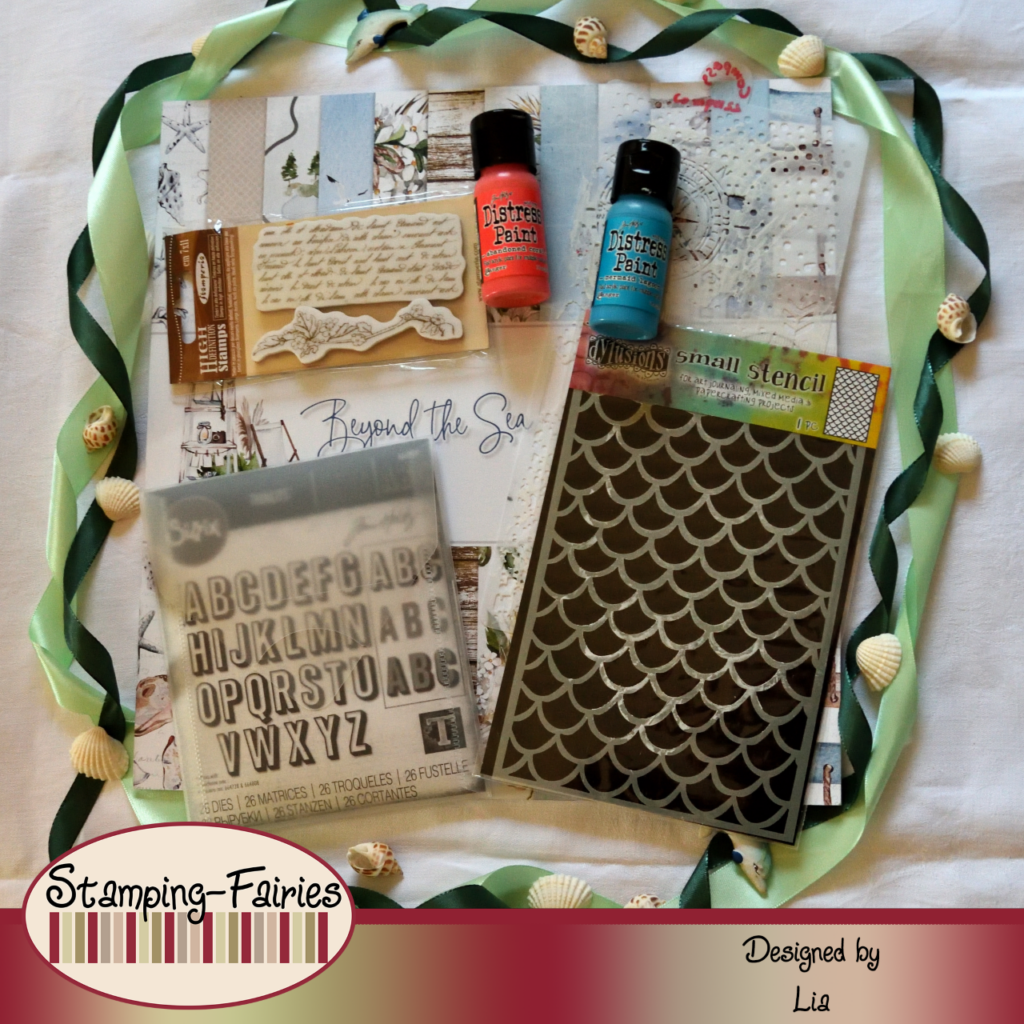
Materials
- Canvas
- 49 and Market Island Paradise – Beachy Sands 12″ x 12″
- Ranger Multi Medium – Matte
- Stamperia High Definition Stamps – Writings & Branch
- Dylusions small stencil – Fishtails, Small
- Stamperia Stencil – Compass
- Ranger Texture Paste Opaque Crackle
- Distress Paint
- P13 Paper Pad – Beyond the Sea
- Ranger – Tim Holtz Distress Oxide Pad
- Sizzix Tim Holtz Thinlits – Alphanumerics Shadow Upper
- Archival Ink
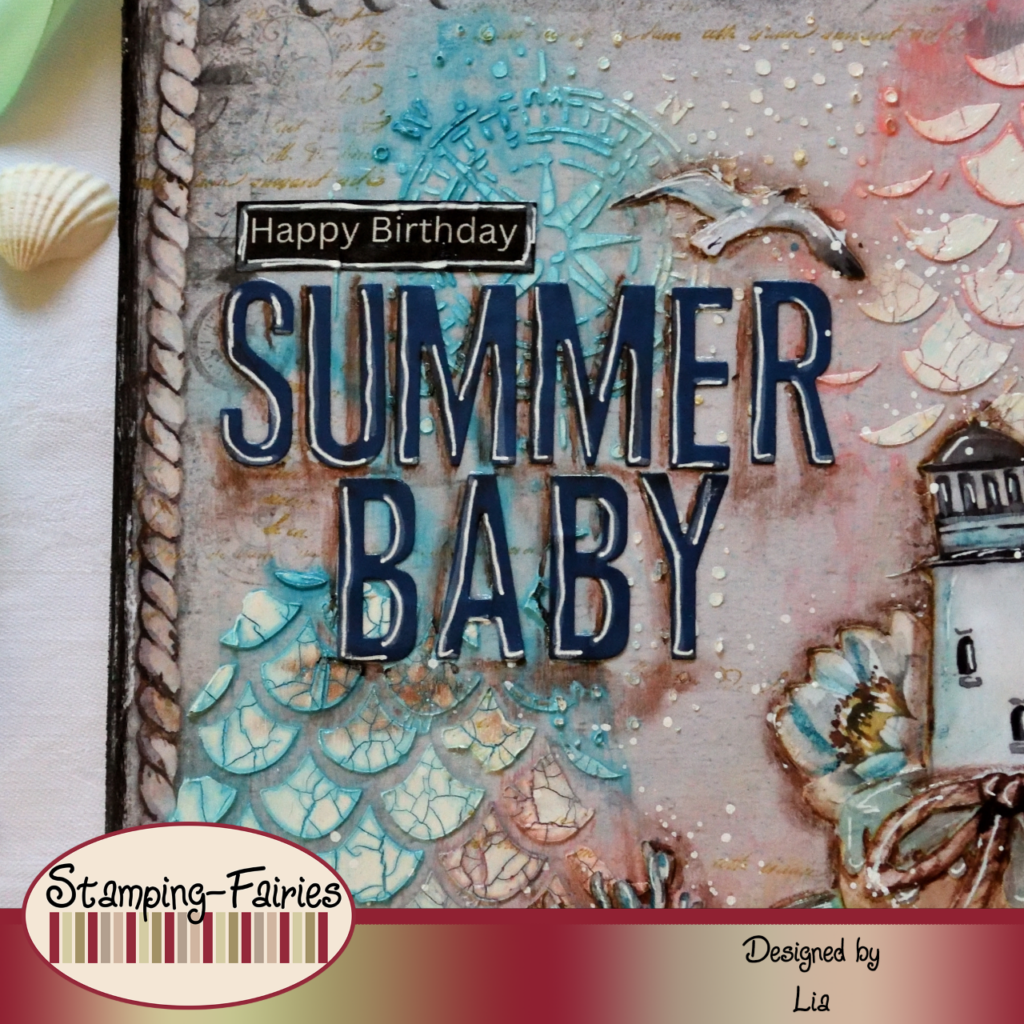
My project is made on a 24x30cm canvas. I wanted a beautiful yet neutral background. Looking through my papers, I found this beautiful 12×12″ (approximately 30x30cm) pattern paper from the Island Paradise collection by 49 and Market. Of course the paper is too big for my canvas but I cut the extra edge and used it to complete the design. I used Multi Medium Matte to glue it down. A trick one can use when gluing paper down is to make the paper slightly wet. The water makes the paper more pliable and easier to manipulate. My paper is not completely straight but that is not a problem for me. In order to remove the extra edges, I started sanding them with a nail buffer but that was too small and not strong enough. This paper is quite sturdy. So, I demanded for some sandpaper from my husband!!! With this it was actually easy to blend the edges and make them look like they were one with the canvas, which made me really happy! Moving on, I stamped a bit of text, using the Stamperia Writings & Branch stamp and brown Archival ink, and then I added a little bit of texture by using the Stamperia Campass stencil and the Dylusions Fishtails small stencil with Ranger Texture Crackle Paste. For my colours, I used Distress Paint. I applied the paint, sprayed it with water, left it run, dabbed the extra and then dried it. I started with Mermaid Lagoon and then I mixed Kitsch Flamingo and Abandoned Coral. I was going to use just the blue but the pattern paper has those pink flowers on it, so I tried to much that colour to bring everything together. I darkened the edges with black Archival ink and the background was done!
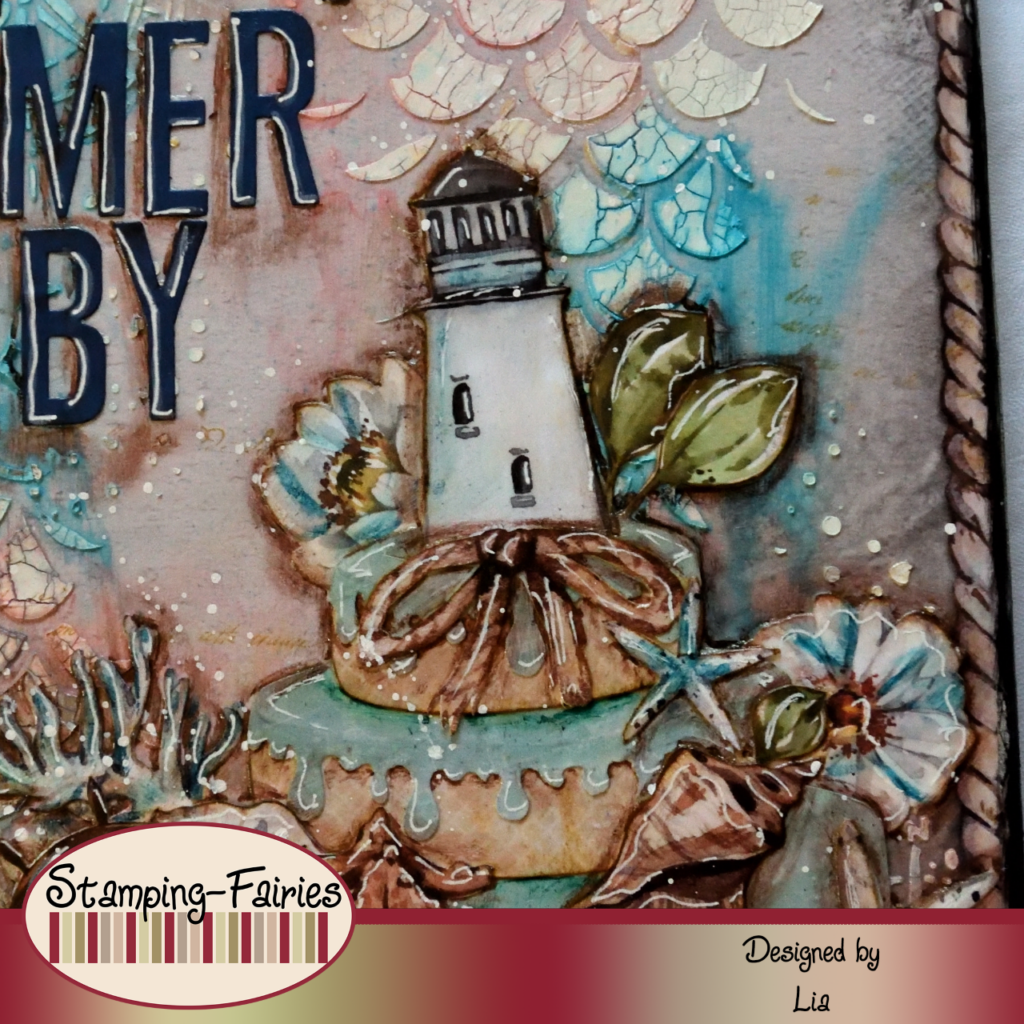
For my images, I used papers from the Beyond the Sea collection by P13. I wanted to have a cake on this project, so I started by sketching the cake levels on printer paper. I cut them out and used them as guides in order to trace the shapes and then cut them out of the pattern paper. The cake glaze is made in the same way. I added shadows on my cut pieces, using Distress Oxide inks and a stiff brush. I also cut a lot of small images from the collection papers, to decorate my cake. It took me some time to arrange them and then glue them on my canvas. After the glue was dry, I used the Faber-Castell Pit Artist Pens to add some extra colour and shadows. There are many different ways to add shadows, I just like these Pens. One could easily use Distress Crayons or Distress pencils or even just Ink pads with a stiff brush. The options are endless!

My sentiment consists of two parts. The first part I simply printed on the printer. The second part I cut out of dark blue cardstock, using the Sizzix Alphanumeric Shadow Upper Thinlits dies. I used only the letter parts because I didn’t want my letters to be too bulky. I didn’t want to hide too much of the background! My sentiment says „Happy Birthday Summer Baby“! I had some really sad Birthdays as a child. I am glad this is not the case anymore! After I had the sentiment on the project, I used Picket Fence Distress Paint to splatter the whole canvas!
And that was the project for today! I hope all the Summer Babies out there have a really nice Birthday this summer! Just a reminder: the Stamping Fairies challenge will be running until the end of July! You can find more information about it at the Stamping Fairies Facebook and Instagram profiles. Come play with us! Also, a lot of the products I used today are on sale in the Stamping Fairies shop. If you want to replenish your craft supplies, now is your chance! I really hope you like today’s project! I hope you got inspired! We will see each other again next Monday! Until then, stay creative and have fun!
*Deutsche Version*
Hallo zusammen! Willkommen zurück zu einem weiteren Mixed-Media-Projekt. Das heutige Projekt ist etwas Besonderes. Ich wollte etwas Maritimes machen, aber ich wollte auch ein Geburtstagsthema haben, weil heute zufällig mein Geburtstag ist! Also habe ich dieses Projekt für mich und alle Sommerbabys da draußen gemacht! Beginnen wir mit den Materialien, die ich verwendet habe:
Materialien
- Leinwand
- 49 and Market Island Paradise – Beachy Sands 12″ x 12″
- Ranger Multi Medium – Matte
- Stamperia High Definition Stamps – Writings & Branch
- Dylusions small stencil – Fishtails, Small
- Stamperia Stencil – Compass
- Ranger Texture Paste Opaque Crackle
- Distress Paint
- P13 Paper Pad – Beyond the Sea
- Ranger – Tim Holtz Distress Oxide Pad
- Sizzix Tim Holtz Thinlits – Alphanumerics Shadow Upper
- Archival Ink
Mein Projekt ist auf einer 24x30cm großen Leinwand gefertigt. Ich wollte einen schönen, aber neutralen Hintergrund. Als ich meine Papiere durchgesehen habe, habe ich dieses schöne Musterpapier im Format 12 x 12 Zoll (ca. 30 x 30 cm) aus der Island Paradise Kollektion von 49 und Market gefunden. Natürlich ist das Papier zu groß für die Leinwand, aber ich habe den überstehenden Rand abgeschnitten und ihn zur Vervollständigung des Designs verwendet. Zum Festkleben habe ich Multi Medium Matte verwendet. Ein Trick, den man beim Festkleben des Papiers anwenden kann, besteht darin, das Papier leicht nass zu machen. Das Wasser macht das Papier geschmeidiger und leichter zu manipulieren. Mein Papier ist nicht ganz gerade, aber das ist kein Problem. Um die zusätzlichen Kanten zu entfernen, habe ich angefangen, sie mit einem Nagelpolierer zu schleifen. Der war aber zu klein und nicht stark genug, dieses Papier ist ziemlich robust. Also habe von meinem Mann etwas Schleifpapier verlangt. Damit war es tatsächlich leicht, die Kanten zu verschmelzen und sie so zu machen, als ob sie mit der Leinwand eins wären, was mich wirklich glücklich gemacht hat! Anschließend habe ich mit dem Stamperia Writings & Branch Stempel und brauner Archivtinte ein wenig Text gestempelt und dann habe ich ein wenig Textur hinzugefügt, indem ich die Stamperia Campass-Schablone und die kleine Dylusions Fishtails Schablone mit Ranger Texture Crackle Paste verwendet habe. Für meine Farben habe ich Distress Paint verwendet. Ich habe die Farbe aufgetragen, mit Wasser besprüht, einwirken lassen, den Überschuss aufgetupft und dann getrocknet. Ich habe mit Mermaid Lagoon begonnen und dann habe ich Kitsch Flamingo und Abandoned Coral gemischt. Eigentlich wollte ich nur das Blau verwenden, aber auf dem Musterpapier sind diese rosa Blumen, also habe ich versucht, die gleiche Farbe zu verwenden, um alles zusammenzubringen. Ich habe die Ränder mit schwarzer Archivtinte abgedunkelt und der Hintergrund war fertig!
Für meine Bilder habe ich Papiere aus der Beyond the Sea Kollektion von P13 verwendet. Ich wollte bei diesem Projekt einen Kuchen haben, also habe ich damit begonnen, die Kuchenebenen auf Druckerpapier zu skizzieren. Ich habe sie ausgeschnitten und als Führung verwendet, um die Formen nachzuzeichnen und sie dann aus dem Musterpapier auszuschneiden. Der Tortenguss ist auf die gleiche Weise hergestellt. Ich habe mit Distress Oxide-Tinten und einem steifen Pinsel Schatten auf meine ausgeschnittenen Stücke aufgetragen. Ich habe auch viele kleine Bilder aus den Musterpapier ausgeschnitten, um meinen Kuchen zu verzieren. Es hat einige Zeit gedauert, sie anzuordnen und sie dann auf meine Leinwand zu kleben. Nachdem der Kleber getrocknet war, habe ich die Faber-Castell Pit Artist Pens verwendet, um zusätzliche Farbe und Schatten hinzuzufügen. Es gibt viele verschiedene Möglichkeiten, Schatten hinzuzufügen, ich mag einfach diese Stifte. Man könnte problemlos Distress Crayons oder Distress Bleistifte oder auch nur Stempelkissen mit einem steifen Pinsel verwenden. Die Möglichkeiten sind endlos!
Mein Spruch besteht aus zwei Teilen. Den ersten Teil habe ich einfach auf dem Drucker ausgedruckt. Den zweiten Teil habe ich mit den Sizzix Alphanumeric Shadow Upper Thinlits Stanzformen aus dunkelblauem Karton ausgeschnitten. Ich habe nur die Buchstabenteile verwendet, weil ich nicht wollte, dass meine Buchstaben zu sperrig werden. Ich wollte nicht zu viel vom Hintergrund verbergen! Mein Spruch lautet „Alles Gute zum Geburtstag, Sommerbaby“! Als Kind hatte ich einige wirklich traurige Geburtstage. Ich bin froh, dass diese Tage vorbei sind! Nachdem ich eine Vorstellung von dem Projekt hatte, habe ich Picket Fence Distress Paint verwendet, um die gesamte Leinwand zu bespritzen!

Und das war mein Projekt für heute! Ich hoffe, dass alle Sommerbabies diesen Sommer einen wirklich schönen Geburtstag haben! Nur zur Erinnerung: die Stamping Fairies-Challenge läuft bis Ende Juli. Weitere Informationen dazu findet ihr auf den Facebook und Instagram Profilen von Stamping Fairies. Komm, spiel mit uns! Außerdem sind viele der Produkte, die ich heute verwendet habe, im Stamping Fairies Shop im Angebot erhältlich. Wenn ihr euren Bastelbedarf auffüllen möchtet, ist jetzt eure Chance! Ich hoffe sehr, dass euch das Projekt gefällt! Ich hoffe, ihr habt euch inspirieren lassen! Wir sehen uns nächsten Montag wieder! Bis dahin bleibt kreativ und habt Spaß!

Soapbubbles for you

Make a wish
Das könnte dich auch interessieren
Sorry I Missed Your Birthday
24. Mai 2023
„My sweet ♡“ – Card
12. Juni 2020